


Van life battery wiring: complete guide for UK campervans
Step-by-step guide to van life battery wiring for UK campervans. Learn how to wire leisure batteries safely, meet UK standards, and choose the right charging setup.
TL;DR:
- Proper battery wiring ensures safety, longevity, and reliable van electrical systems.
- Using adequate cables, correct fusing, and proper grounding prevents faults and energy loss.
- Multi-source charging (solar, alternator, shore power) requires careful system integration.
Poor battery wiring is one of the most common reasons van lifers find themselves stranded at the roadside, or worse, dealing with an electrical fault mid-trip. Getting the wiring right from the start is not just about convenience; it directly affects safety, system longevity, and your ability to live comfortably on the road. This guide walks through the full process, from understanding battery types to testing your completed system, all referenced against UK standards. Whether you are starting a fresh conversion or upgrading an existing setup, the steps here are practical and directly applicable to UK van builds.
Table of Contents
- Understanding campervan battery systems
- Tools, materials, and safety for battery wiring
- Step-by-step battery wiring process
- charging methods and integration in your electrical system
- Testing your system and avoiding common pitfalls
- Our take: What most guides miss about van battery wiring
- Next steps: power up with trusted systems
- frequently asked questions
Key Takeaways
| Point | Details |
|---|---|
| Always isolate battery banks | Separating starter and leisure batteries prevents accidental breakdowns on the road. |
| Size cables correctly | Choosing the right cable thickness and fuse rating is crucial for both safety and performance. |
| Follow UK standards | Adhering to BS 7671 and EN 1648 ensures your installation is safe and legal. |
| Quality charging integration | Combine solar, alternator, and mains charging for flexible, reliable off-grid power. |
| Test thoroughly before use | Verifying with a multimeter and load testing helps avoid future failures and hazards. |
Understanding campervan battery systems
To ensure you start with the right foundation, let us break down the core components of a campervan’s electrical system.
A campervan has two distinct battery banks: the starter battery and the leisure battery. The starter battery’s sole job is to crank the engine. The leisure battery powers everything else, from lighting and fridges to inverters and USB sockets. Running house loads from the starter battery risks draining it completely, leaving you unable to start the engine. These two banks must always remain isolated during normal operation.
Choosing the right leisure battery chemistry is the next decision. Here is a quick comparison:
| Feature | AGM | LiFePO4 (lithium) |
|---|---|---|
| Weight | Heavy | Light |
| Cost | Lower upfront | Higher upfront |
| Life cycles | 300 to 500 | 2,000 to 5,000 |
| usable capacity | ~50% | 80 to 90% |
| BMS required | No | Yes |
| Low-temp protection | No | Yes (recommended) |
AGM batteries are affordable and straightforward to install. LiFePO4 batteries cost more upfront but deliver substantially more usable energy and last far longer. Our leisure battery guide covers these differences in practical detail, and if you are considering upgrading, our overview of lithium leisure batteries explains the real-world benefits.
Key system components you will need to plan for:
- Main leisure battery bank (one or more batteries)
- DC distribution board or busbar for splitting circuits
- Main fuse or ANL fuse on the positive cable close to the battery
- Battery management system (BMS) if using LiFePO4
- DC-DC charger or split charge relay for alternator charging
- Shore power inlet if you plan to use mains hookup
For further guidance on choosing the right battery for your specific use case, it is worth reviewing the specifications carefully before purchasing.
A properly isolated leisure battery bank is the single most important protection against being stranded by a dead starter battery.
Tools, materials, and safety for battery wiring
With an understanding of battery systems, gather the right tools and materials for a compliant and safe install.
Working with 12V DC systems may seem lower-risk than mains electricity, but high-current DC circuits are capable of causing serious burns, fires, and arc faults. UK standards require that AC hookup installations follow BS 7671 (Section 721), while DC systems should comply with EN 1648. RCD and MCB protection is mandatory for any shore power connection, and PME earth bonding must not be used in vehicles.
Essential tools:
- Cable crimping tool (ratchet type preferred for reliability)
- Wire strippers (suitable for 1.5mm² to 35mm²)
- Digital multimeter
- Battery post spanners and torque wrench
- Heat gun for heat-shrink terminals
- Cable tester or continuity checker
Materials checklist:
- Battery cables in appropriate sizes (see cable sizing section below)
- ANL or blade fuse holder with correct rating
- Battery terminals and lugs (crimped, not clamped)
- Distribution busbar (positive and negative)
- Heat-shrink tubing
- Cable conduit and clips for routing
- RCD/MCB consumer unit (if installing shore power)
For a thorough walkthrough of safe installation practices, our guide to safe lithium battery installation covers the steps specific to LiFePO4 systems.
Pro tip: Always disconnect the vehicle’s negative terminal before starting any wiring work. This eliminates risk of accidental short circuits while cables are being routed.
For additional context on how faulty wiring affects vehicle electronics safety, it is worth understanding why correct crimping and cable routing matter beyond just the battery system.
Step-by-step battery wiring process
Everything is ready to go. Now follow these steps to wire your battery system effectively and safely.
-
Position and secure your batteries. Mount leisure batteries in a ventilated, accessible location. Use proper battery boxes or brackets to prevent movement. Keep them away from heat sources.
-
Install the main fuse first. Before connecting any cables, fit an ANL fuse holder on the positive cable within 300mm of the battery terminal. This is the most critical protection in the system.
-
Run your main positive and negative cables. Route 25mm² to 35mm² cable from battery to your main distribution busbar. Keep positive and negative cables close together to reduce electromagnetic interference.
-
Connect the DC distribution board. Branch circuits run from the busbar. Cable sizing follows these guidelines: 1.5mm² for lights and USB loads up to 5A, 4mm² for a fridge up to 20A, 16mm² for DC-DC chargers up to 30A, and 25 to 35mm² for main battery and inverter connections. Keep voltage drop at or below 3%.
-
Wire the DC-DC charger to the alternator circuit. This requires a dedicated fused feed from the vehicle’s starter battery side, triggered by the ignition or a voltage-sensing relay.
-
Install the shore power inlet and consumer unit. If using EHU (electric hookup), wire the IEC inlet to an RCD/MCB unit before distributing to any AC sockets or chargers. Follow wiring standards in the UK to ensure compliance.
-
Earth and bond all metalwork. Connect the battery negative to the vehicle chassis at a clean, unpainted point. Bond any exposed metal components to the chassis earth.
For a more detailed breakdown of each stage, the step-by-step installation guide and our solar connection steps are useful references.
Never attempt to connect or adjust battery terminals without first confirming the main isolator switch is open.
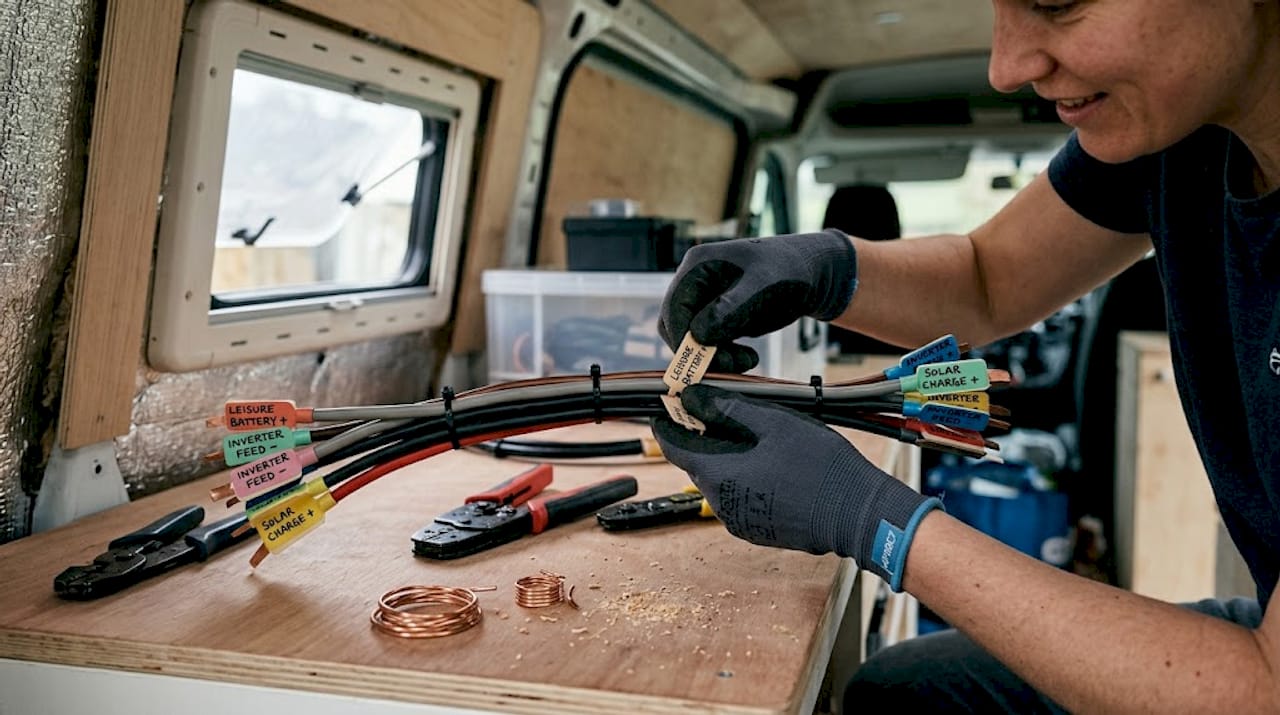
Pro tip: Label every cable at both ends before installation. A simple labelling system saves hours of troubleshooting later.
charging methods and integration in your electrical system
Once the battery system is in place, it is time to ensure reliable charging for all scenarios.
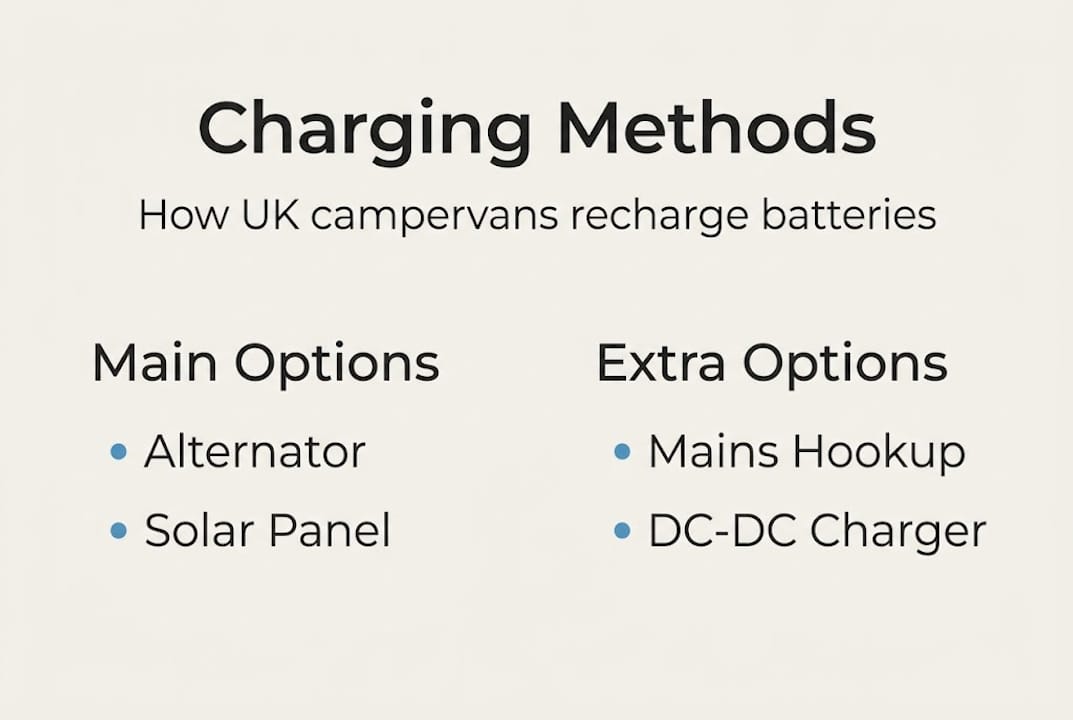
No single charging source is ideal for every situation. Most UK van lifers benefit from combining two or three sources. The most practical options are DC-DC charging, solar, and mains hookup, via a 16A IEC 60309 shore power connection.
| Method | Best use | Key device needed |
|---|---|---|
| DC-DC charger | Daily driving | Battery-to-battery charger |
| Solar panels | Off-grid stays | best for solar + battery comparisons |
| Shore power (EHU) | Site hookup | AC mains charger + RCD/MCB |
Key considerations by method:
- DC-DC charger (alternator): Essential for LiFePO4 batteries. A standard split-charge relay cannot deliver the correct charge profile for lithium chemistry. A dedicated DC-DC charger manages current and voltage correctly.
- Solar with an best for solar + battery types: An battery type comparisons reference helps match panel output to battery capacity.
- Shore power: The mains charger should be compatible with your battery chemistry. Multi-stage chargers with lithium profiles are now widely available and should be the standard choice for LiFePO4 systems.
For full guidance on configuring all three sources together, our lithium battery setup guide provides wiring diagrams and device recommendations tailored to UK van builds.
A practical note: A 200W solar panel in the UK generates an average of around 600 to 800 watt-hours per day in summer conditions. That is enough to run a 12V compressor fridge for a full day with energy to spare, making solar a genuinely effective primary source from April through September.
Testing your system and avoiding common pitfalls
With everything wired, double-check your setup to ensure dependability and safety on the road.
Step-by-step testing process:
- Before switching on, visually inspect every connection for loose terminals, exposed copper, or reversed polarity.
- Use a multimeter to check battery terminal voltage. A fully charged 12V LiFePO4 should read 13.3V to 13.6V at rest.
- Check continuity on every earth connection from component to chassis.
- Switch on the DC distribution board one circuit at a time, measuring current draw at each breaker.
- Test charging: connect a solar panel in daylight or start the engine and confirm the DC-DC charger is outputting current.
- Test shore power separately: connect EHU and confirm the RCD trips correctly on a test fault.
Common mistakes to avoid:
- Poor crimps: A badly crimped terminal is one of the most common causes of voltage drop and overheating. Always use a ratchet crimper and heat-shrink terminals.
- Wrong fuse sizing: A fuse protects the cable, not the device. Size the fuse to the cable’s current rating, not the load.
- voltage drop issues in undersized cables: This is a leading cause of subtle system failures, from flickering lights to inverter shutdowns.
- Missing earth bonds: Any unbonded metalwork can become live in a fault condition.
Our installation workflow tips and guide to battery upgrade steps both offer practical checklists to run through before your first trip.
Pro tip: Take photos of your wiring at every stage. If a fault develops months later, those photos are invaluable for diagnosis.
For battery handling tips that extend service life, routine checks at the start of each season are far more effective than waiting for a problem to surface.
Our take: What most guides miss about van battery wiring
Stepping back from the technical detail, there are broader lessons worth considering after working across numerous van electrical systems.
Voltage drop is the most routinely underestimated issue in van wiring. Many builders focus on fuse ratings and battery capacity while ignoring cable sizing. An undersized cable does not blow a fuse; it just quietly wastes energy, causes devices to behave erratically, and shortens component life. A 0.5V drop across a 12V system represents over 4% energy loss before anything useful happens.
Future-proofing is also consistently overlooked. Installing a larger busbar and running spare conduit now costs very little. Adding a second battery or a new appliance later without adequate infrastructure means rewiring entire sections of the build. Plan for the system you want in two years, not just the one you need today.
Finally, routine self-checks beat reactive troubleshooting every time. A monthly voltage check and a visual inspection of terminals takes ten minutes. Following the comprehensive installation steps correctly from the start reduces those checks to simple confirmation rather than detective work.
Next steps: power up with trusted systems
If you are ready to upgrade your setup or want peace of mind with a robust energy solution, here is where to start.

At www.skyenergi.com, we supply complete, pre-configured energy systems designed for UK van builds. The complete solar and electrics system includes a 3kVA inverter charger, battery-to-battery charger, and monitoring in a single, tested package. For solar charging, our high-output solar kit pairs a 610W panel with a smart smart system controller for maximum yield. All systems are sourced directly from manufacturers and compatible with UK electrical standards. Browse the range or get in touch for tailored advice.
frequently asked questions
Why must the starter and leisure batteries be kept separate?
Using your starter battery for living space power risks draining it, potentially leaving you unable to start the engine. Always isolate the two systems using a DC-DC charger or isolator relay.
What size cables are recommended for van life battery wiring?
Cable size depends on the load: 1.5mm² for lights through to 35mm² for main battery and inverter links. Keep voltage drop at or below 3% across any run.
Do I need fuses and RCD/MCB protection for my van?
Yes. Every positive DC circuit requires a fuse sized to protect the cable. RCD/MCB protection is required on any shore power (EHU) connection to comply with BS 7671 and EN 1648.
How do I safely charge my leisure batteries while travelling?
A DC-DC charger from the alternator is the correct method for LiFePO4 batteries. Solar with an alternator for LiFePO4 and a mains charger via EHU provide additional sources for flexible charging in all conditions.
How much usable capacity do AGM and LiFePO4 batteries have?
AGM batteries offer approximately 50% usable capacity. LiFePO4 batteries deliver 80 to 90% usable capacity with a significantly longer service life, making them the practical choice for full-time van life.
Recommended
- Install lithium campervan batteries: UK step-by-step guide – Skyenergi
- Solar Battery Connection Steps for Campervans UK Guide – Skyenergi
- Campervan off-grid power: UK lithium battery guide 2026 – Skyenergi
- Lithium Battery Setup Guide for Campervans UK 2026 – Skyenergi
- How to replace vehicle modules safely and efficiently
Prev post

Top 5 skyenergi.dearportal.com alternatives 2026
Updated on 27 April 2026
Next post

Deep cycle batteries: reliable energy for leisure vehicles
Updated on 25 April 2026


