


Solar Battery Connection Steps for Campervans UK Guide
Master solar battery connection steps with our clear UK guide. Follow each step to safely connect, test, and monitor your solar batteries for your campervan.
Finding reliable power off-grid can turn simple UK road trips into stressful guessing games if your campervan electrics are not set up right. For anyone craving true energy independence, understanding how to safely connect solar batteries is a crucial first step toward hassle-free adventures. This guide offers clear, step-by-step instructions that break down everything from sizing your system to secure installation and real-time energy monitoring, helping you avoid costly mistakes and keep your journeys powered for the long haul.
Table of Contents
- Step 1: Assess System Requirements And Gather Components
- Step 2: Position Solar Batteries And Prepare Mounting
- Step 3: Connect Cables And Secure Terminals
- Step 4: Integrate Charge Controller And Monitoring
- Step 5: Test Connections And Verify System Operation
Quick Summary
| Essential Insight | Detailed Explanation |
|---|---|
| 1. Assess Your Power Needs | Understand your power consumption before purchasing components to avoid costly mistakes and ensure the right setup for your travel style. |
| 2. Choose Appropriate Battery Size | Match battery capacity to your travel habits; larger capacities are necessary for full-time living, while smaller is adequate for short trips. |
| 3. Correctly Mount and Secure Batteries | Proper battery placement and secure mounting are vital to prevent overheating and damage during travel, ensuring long-term performance. |
| 4. Use Quality Connectors | Opt for suitable connectors for all components to ensure safe power transfer and avoid potential electrical hazards in your system. |
| 5. Conduct Thorough Testing | Verify each connection and system operation before reliance during a trip to catch issues early, ensuring safety and reliability. |
Step 1: Assess system requirements and gather components
Before you buy anything or pick up a screwdriver, you need to understand what your campervan actually needs. This step determines everything that comes next, from battery capacity to solar panel size. Getting it right now saves you money, frustration, and the headache of swapping out undersized components later.
Start by mapping out your power consumption honestly. What lights do you run? How often do you use your fridge, water pump, or laptop? Are you planning weekend escapes or full-time off-grid living? The answer matters because a weekend camper and a permanent nomad need completely different setups. A professional campervan electrical system design starts with assessing expected power usage, including lighting, fans, appliances, and charging needs. Write down everything you want to power, then estimate how many hours per day you use it. This becomes your baseline consumption figure.
Once you know your power needs, you can size your battery properly. Match battery capacity to your travel style and daily consumption. If you’re away for weekends without mains hook-ups, you need enough stored energy to last those days. Full-time off-grid living demands significantly larger capacity. Your leisure battery holds the power your system generates, and choosing the right size prevents running empty on rainy days.
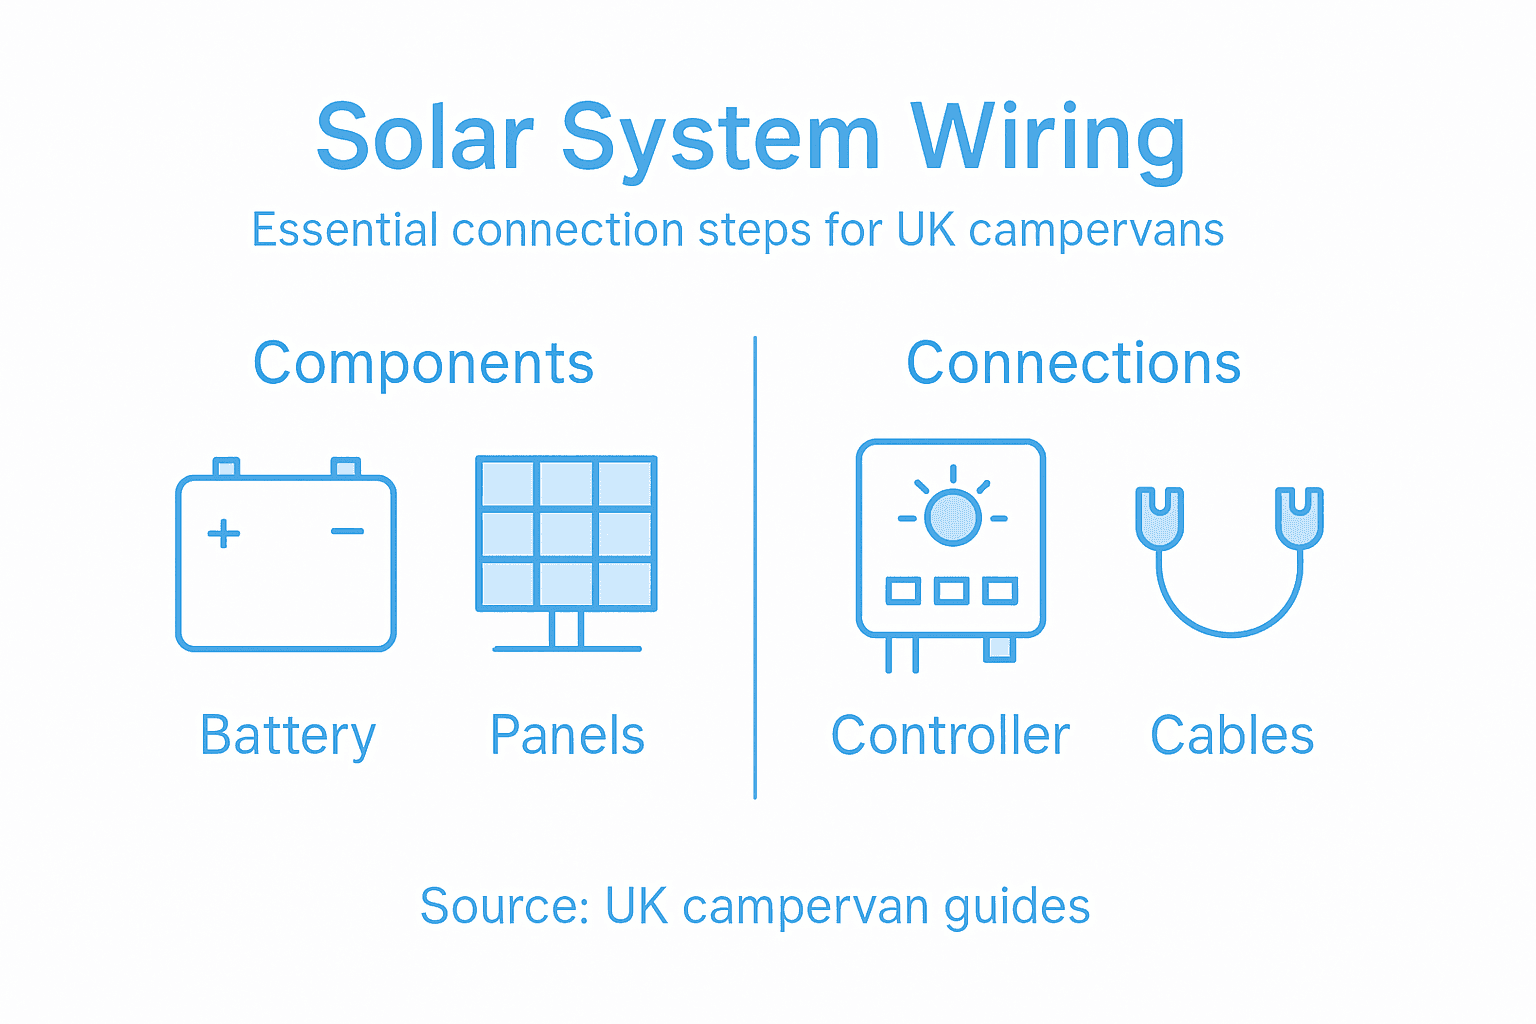
Next, identify which charging sources you’ll use. Solar panels, vehicle alternators, and mains chargers all feed your batteries in different ways. Understanding how each component’s role works helps you balance your system, as solar panels convert sunlight to electricity, charge controllers regulate voltage to protect batteries, and wiring connects everything safely. You might rely heavily on solar in summer but need alternator charging as backup in winter.
Gather your components based on this assessment. You’ll typically need leisure batteries, solar panels, a charge controller, wiring, fuses, and a battery management system. Skyenergi supplies high-performance lithium battery systems, SRNE turnkey solutions, and all the accessories you need. List everything required before purchasing so you don’t miss critical items or buy incompatible parts.
Compare common battery types for campervans:
| Battery Type | Typical Lifespan | Weight | Cost |
|---|---|---|---|
| Lithium (LiFePO4) | 7-10 years | Lightest | Highest |
| AGM (Absorbed Glass Mat) | 4-6 years | Heavy | Moderate |
| Flooded Lead Acid | 2-4 years | Heaviest | Lowest |
Here is a summary of key factors when choosing your battery setup:
| Travel Style | Battery Capacity Needed | Charging Source Priority |
|---|---|---|
| Weekend trips | Small (1-2 days use) | Alternator, small solar panel |
| Full-time off-grid | Large (5+ days use) | Multiple large solar panels, alternator, mains charger |
| Mixed use | Medium (2-4 days use) | Solar panel plus alternator backup |
Helpful tip Calculate your daily consumption by adding up watt-hours for each device, then multiply by days between charges to find required battery capacity, ensuring you account for 20-30% reserve to avoid deep discharge cycles.
Step 2: Position solar batteries and prepare mounting
Where you place your leisure battery matters more than you might think. A poor location can damage your battery, reduce performance, and create safety hazards. This step ensures your battery sits securely, stays cool, and remains accessible for the journey ahead.
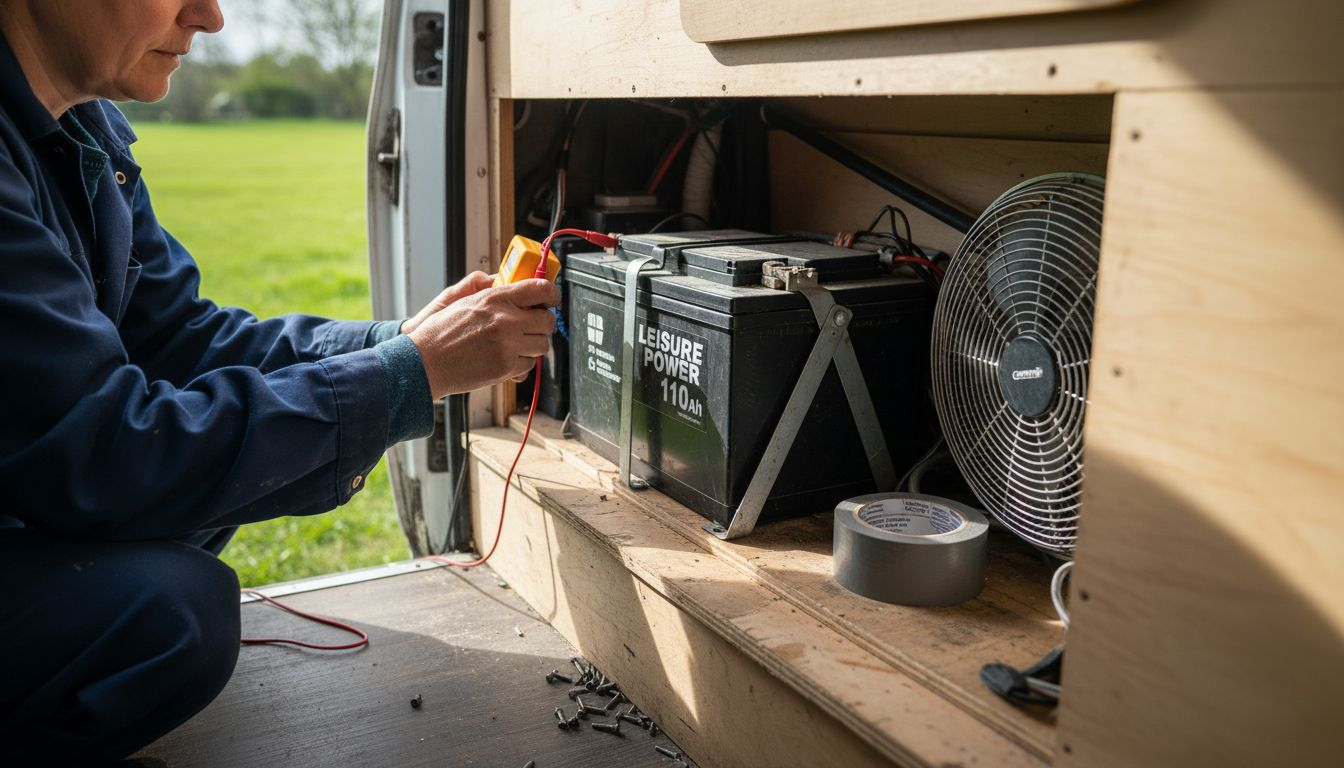
Start by finding a location that offers good airflow and stays away from heat sources. Your battery generates warmth during charging and discharging, so ventilation prevents overheating and extends its lifespan significantly. Many campervan owners mount batteries in under-seat storage or dedicated cupboards where air can circulate freely. Avoid positioning batteries near your heating system, engine bay, or direct sunlight. A stable location also means choosing a spot where the battery won’t experience excessive vibration from road movement.
Prepare a solid mounting surface before installation. Most setups use a plywood board as a stable base for secure battery mounting, which prevents movement and damage during travel. The surface must be completely flat and level. Check that your chosen location can support the weight of a fully charged battery. Lithium batteries are heavy, and an inadequate surface can cause structural problems down the line.
Secure the battery firmly using appropriate brackets or straps designed to absorb vibration. Movement during cornering, braking, or rough terrain causes damage to battery terminals and internal components. Every bump you hit could loosen connections or crack solder joints inside the battery. Make the mounting so solid that the battery doesn’t shift even slightly when you drive.
Access and monitoring matter equally. Position your battery where you can easily check terminals, connections, and the management display screen. You’ll need to inspect battery health regularly and troubleshoot issues quickly. A cramped corner might seem convenient until you need to work on it at night in a rainstorm. Choose a spot that balances protection with practical access.
Professional tip Install vibration dampening rubber pads beneath the mounting surface to isolate battery movement from van vibrations, extending battery life by reducing stress on internal cells and connections.
Step 3: Connect cables and secure terminals
This is where your system comes to life. Proper cable connections and terminal security determine whether your batteries perform reliably or fail dangerously. A loose connection might seem minor, but it can cause sparks, damage equipment, or leave you stranded without power.
Begin by selecting the right connectors for each part of your system. Solar panels typically use MC4 connectors, which snap together securely and resist corrosion. Battery terminals require ring terminals that crimp onto cable ends, creating a solid metal to metal contact. Using the correct connector type prevents incompatibility issues and ensures safe power transfer. Never attempt to improvise or use mismatched connectors, as this compromises safety and performance.
Before connecting anything, clean both the battery terminals and cable connectors thoroughly. Oxidation and dirt accumulate on metal surfaces and create resistance, reducing power flow and generating heat. A wire brush removes surface corrosion quickly. Once clean, apply a thin layer of petroleum jelly or terminal grease to prevent future oxidation. This step takes minutes but prevents countless electrical problems later.
Tighten all connections to manufacturer specifications using the appropriate sized spanner or wrench. All cable connections should use proper connectors and ring terminals that are securely fastened to prevent loose connections. A loose terminal creates electrical resistance and heat, which damages both the battery and connected equipment. Check each connection by gently tugging the cable; it should not move at all. Always connect the positive terminal first, then the negative, which reduces arc risk if you accidentally touch metal.
Protect your wiring from damage and wear. Use heat shrink tubing or conduit to cover exposed cables, especially where they pass through tight spaces or near sharp edges. Secure wires with cable clips or tie wraps every 30 centimetres, preventing chafing and movement. Route cables away from hot surfaces and sharp objects that could puncture insulation over time.
Helpful tip Double check every connection after 24 hours of system operation, as thermal cycling and settling can loosen even properly tightened terminals during your first journey.
Step 4: Integrate charge controller and monitoring
Your charge controller is the brain of your solar system. It regulates power flowing from panels to batteries, protecting both from damage. Adding proper monitoring lets you see exactly what your system is doing in real time, turning guesswork into certainty.
Start by choosing an appropriate location for your charge controller. It must sit in a dry, well-ventilated space away from moisture and direct sunlight. Many campervan owners mount controllers on a wall or panel near the battery, keeping cable runs short and organised. Poor ventilation causes overheating and reduces charging efficiency, so avoid cramped cupboards. The controller generates some heat during operation, particularly on sunny days, so airflow matters.
Connect your solar panels to the charge controller input, then connect the battery to the output. The order matters for safety, so follow the manufacturer’s wiring diagram exactly. Ensure fusing is installed on both the input side from solar panels and the output side to the battery. These fuses protect against short circuits and equipment damage. Never skip this step, as a fault in the system could cause dangerous electrical fires. Check all connections are tight before applying power to the system.
Install monitoring equipment to track your system’s performance accurately. A Victron SmartShunt monitoring device enables detailed tracking of battery performance and energy flows, which proves invaluable for maintaining system health and planning upgrades. These monitors display voltage, current, and energy consumption on a digital screen or smartphone app. Real-time data helps you understand your actual power usage versus what you predicted, allowing you to make informed decisions about expanding capacity or adjusting consumption habits.
Test your entire system before relying on it for actual trips. Switch everything on during daylight and observe the charge controller display. Check that voltage readings are sensible and current flows from panels to battery. Watch the system for at least an hour to confirm stable operation. This verification catches wiring mistakes or component failures before they strand you in the middle of nowhere.
Professional tip Mount your charge controller and monitoring display at eye level where you can see them easily, as quick visual checks throughout the day help you spot unusual readings that might indicate developing problems.
Step 5: Test connections and verify system operation
Now comes the moment of truth. Testing reveals whether your installation works correctly or needs adjustment before you rely on it during a trip. Thorough testing catches problems whilst you’re still at home with tools and support available.
Begin by visually inspecting every connection one final time. Look for loose terminals, exposed wiring, or anything that looks incomplete. Check that all fuses are installed and rated correctly. Verify that no cables are pinched, twisted, or damaged. A quick visual sweep takes minutes but prevents many problems. Pay special attention to battery terminals, as loose connections generate dangerous heat.
With everything connected, measure voltage at the battery terminals using a digital multimeter. A fully charged lithium battery typically reads around 54 volts. Reading significantly lower suggests a problem with charging or a faulty battery. Checking voltage levels at the battery ensures the charge controller correctly regulates power and confirms solar panels generate expected current under sunlight. Take measurements during daylight when solar panels are active. Compare readings to your charge controller display, which should show similar values.
Test the system under light load next. Turn on one device at a time, monitoring voltage and current flow. Watch the charge controller respond to the load, adjusting its output. A functioning system shows steady voltage and appropriate current increases. Now test under heavier load by running multiple devices simultaneously. Observe battery voltage behaviour, watching that it stays stable and doesn’t drop excessively. This real-world testing under typical usage conditions confirms reliable operation and safety.
Check all fuses and breakers are functioning. A fuse should be difficult to remove, indicating proper contact and security. Look for any signs of heating, discolouration, or burning smells near electrical components. These suggest dangerous faults requiring immediate investigation. Finally, verify proper charging and discharging behaviour by measuring battery voltage at rest and under load, ensuring your entire system responds correctly to power demands.
Helpful tip Record your baseline voltage and current readings on a sunny day with all components running normally, then use these figures as reference points for future troubleshooting if performance seems unusual.
Power Your Campervan Journey with Skyenergi’s Expert Lithium Battery Solutions
Connecting your solar battery system correctly is crucial for safe, efficient power on the road. This guide highlights common challenges like choosing the right battery size, ensuring secure cable connections and integrating smart monitoring to avoid unexpected power loss or damage. If you want peace of mind and reliable energy wherever your adventures take you, start with a high-quality, well-engineered system designed for campervan life.

Explore Skyenergi’s range of advanced lithium leisure batteries and complete turnkey energy solutions from SRNE, all tailored to meet the exact power demands of your campervan setup. With intelligent battery management technology and Bluetooth monitoring, you can track your system’s health in real time and protect your investment. Don’t settle for guesswork when you can have certainty and safety every time you hit the road. Visit Skyenergi now to discover how to build a dependable off-grid power solution that matches your lifestyle, and learn more about our lithium battery systems and Victron-compatible components. Take control of your campervan’s energy future today.
Frequently Asked Questions
How do I assess power consumption for my campervan’s solar battery system?
To assess power consumption, list all the devices you plan to use in your campervan and estimate how many hours per day each will run. Calculate the total watt-hours needed per day to properly size your battery.
What factors should I consider when choosing a battery type for my campervan?
When choosing a battery type, consider the typical lifespan, weight, and cost of the battery. Lithium batteries are lighter and last longer but are more expensive; flooded lead acid batteries are the opposite. Aim for a balance between cost and performance that suits your travel needs.
How can I ensure proper ventilation for my campervan’s leisure battery?
Ensure your leisure battery is placed in a location that allows for good airflow and is away from heat sources. Ideally, mount it in an area like under-seat storage where air can circulate freely, which helps prevent overheating and extends battery life.
What should I do to protect my wiring during the installation?
To protect wiring, use heat shrink tubing or conduit over exposed cables and secure them with clips every 30 centimetres. This prevents damage from chafing and safeguards the cables from sharp edges or hot surfaces throughout your campervan.
How do I test the connections after completing the installation?
After installation, visually inspect all connections and measure voltage at the battery terminals using a multimeter. Confirm that the readings are within expected ranges, indicating that your system is functioning correctly, and recheck connections for any looseness after the initial operation.
What should I do if my solar battery system is not charging properly?
If your solar battery system is not charging, start by checking all connections for security and ensure that fuses are correctly installed. Measure voltage levels at the battery and solar panels to diagnose whether the issue lies within the wiring or the components themselves.
Recommended
Prev post

Top 8 Solar Battery Systems for Small Installers 2026
Updated on 28 January 2026
Next post

7 Examples of Solar Charging Setups for UK Campervans
Updated on 26 January 2026


