


Top battery setup tips for reliable motorhome power
Discover essential battery setup tips for motorhomes to ensure reliable power on every adventure. Avoid downtime and enjoy stress-free travels!
TL;DR:
- A reliable battery setup is essential for stress-free motorhome travel, preventing power losses and appliance failures. Choosing the correct battery chemistry, ensuring proper installation, and routine maintenance maximize lifespan and performance, especially when off-grid camping. Investing in quality components and correct wiring practices reduces long-term costs and guarantees consistent, dependable power supply on every journey.
Running out of power miles from the nearest campsite hook-up is one of the most common frustrations in motorhome travel. Your fridge stops, the lights dim, and your inverter shuts down. A dependable battery setup prevents all of that. Whether you’re wild camping in the Scottish Highlands or parked up on a French aire, the quality of your battery system determines how comfortable and stress-free your trip will be. This guide covers the key decisions, installation practices, and maintenance routines that give you consistent, reliable power on every journey.
Table of Contents
- Key factors for reliable battery setups
- AGM vs lithium: Which is best for your motorhome?
- Essential installation and wiring practices
- Maintenance routines for lasting battery health
- Why setup shortcuts cost more in the long run
- Maximise your motorhome journeys with professional battery solutions
- Frequently asked questions
Key Takeaways
| Point | Details |
|---|---|
| Battery type matters | Lithium batteries last longer and deliver more consistent power than AGM, but cost more upfront. |
| Correct installation is crucial | Disconnect the negative first and use equal-length cables to keep your system safe and reliable. |
| Routine checks extend life | Regularly monitor voltage and state of charge for maximum battery longevity. |
| Maintenance pays off | Storing lithium at partial charge and occasionally topping up can add years to its lifespan. |
Key factors for reliable battery setups
Building a dependable motorhome battery system starts with understanding what you actually need before buying anything. Capacity, chemistry, and configuration all matter. Getting these decisions right from the start saves you time, money, and frustration down the road.
Battery type is the first and most consequential choice. AGM (Absorbent Glass Mat) batteries have been the default leisure battery for decades. They’re sealed, maintenance-free, and widely available. LiFePO4 (lithium iron phosphate) batteries are increasingly popular for good reason: they offer higher usable capacity, faster charge acceptance, and a significantly longer service life. Your lithium battery setup guide outlines which configuration suits different motorhome energy demands.
Key selection criteria to consider before purchasing:
- Capacity (Ah): Calculate your daily energy consumption and choose a bank that covers 1.5 to 2 times that figure
- Discharge depth: AGM batteries should only discharge to 50% usable capacity; LiFePO4 can go to 80-90%
- Weight: LiFePO4 batteries weigh roughly half as much as equivalent AGM units, important for van payload
- Charge compatibility: Confirm your charger, solar MPPT controller, and DC/DC converter are programmed for your chosen chemistry
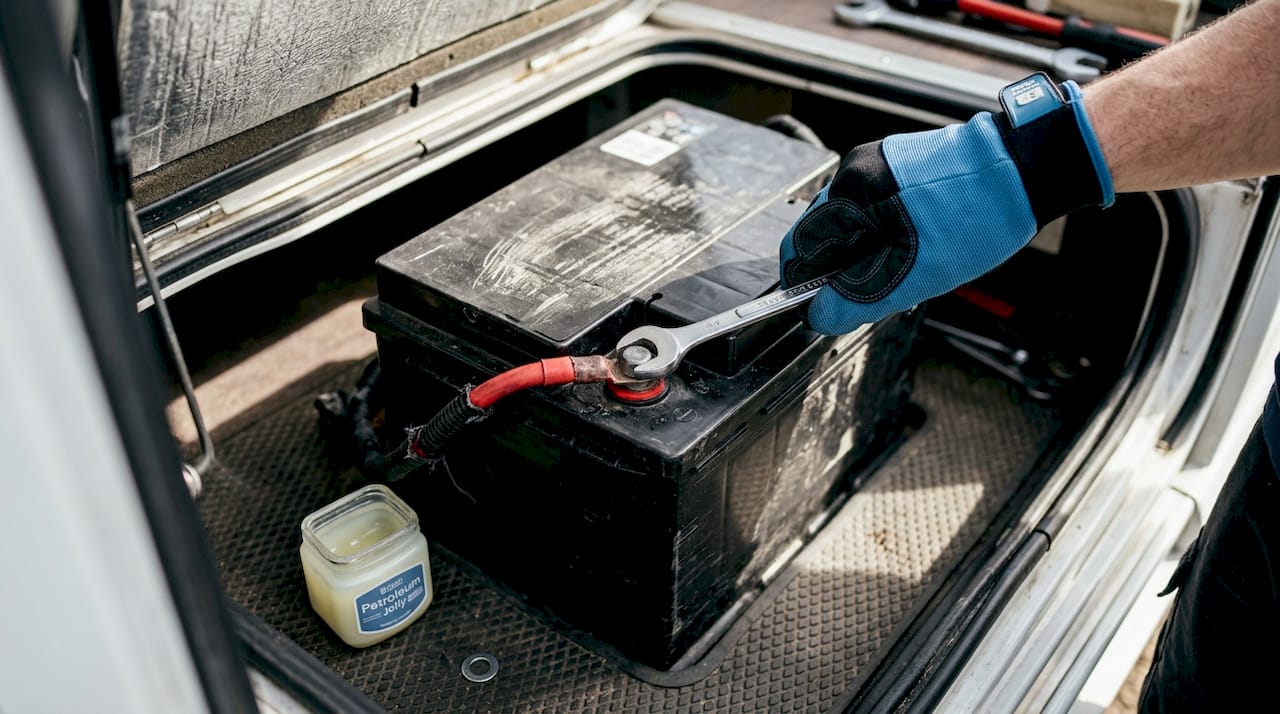
Safety during installation is non-negotiable. Always disconnect the negative terminal first when removing an old battery and reconnect it last when fitting the new one. This sequence prevents accidental short-circuits caused by tools touching the vehicle chassis.
After installation, always test battery voltage to confirm the system is connected and functioning correctly. LiFePO4 shows approximately 13.4V when fully charged under no load. A reading significantly below this suggests incomplete charging or a wiring fault.
Pro Tip: If you’re running two batteries in a parallel bank, use cables of equal length between them. Unequal lengths create resistance imbalances, causing one battery to work harder than the other and reducing overall bank life.
Cable quality directly affects system efficiency. Undersized cables heat up under load, creating resistance that wastes energy and poses a fire risk. Always use the minimum cable gauge recommended for your system’s maximum current draw, and err on the side of larger diameter when in doubt.
AGM vs lithium: Which is best for your motorhome?
With the main selection factors addressed, getting the right battery chemistry is the next big call. Here’s how your options compare in practical terms for UK motorhome use.
| Feature | AGM | LiFePO4 |
|---|---|---|
| Typical lifespan | 3-5 years | 10+ years |
| Usable capacity | ~50% | ~80-90% |
| Weight (per kWh) | High | Low |
| Charge speed | Moderate | Fast |
| Self-discharge rate | Low | Very low |
| Cost (upfront) | Lower | Higher |
| BMS protection | No | Yes (built-in) |
LiFePO4 batteries last over 10 years compared to a typical AGM lifespan of 3-5 years, making lithium the better long-term investment for frequent travellers.
AGM battery advantages:
- Lower upfront cost per unit
- Wide availability at motorhome and caravan retailers
- Compatible with most existing chargers without reprogramming
- Tolerates overcharging better than some older lithium chemistries
AGM battery limitations:
- Only 50% usable capacity means a 100Ah battery delivers just 50Ah reliably
- Heavy, adding significant weight to your build
- Lifespan shortens dramatically if regularly deep discharged
- Requires specific storage charging to prevent sulphation over winter
LiFePO4 battery advantages:
- 80-90% usable capacity from the same rated Ah
- Consistent voltage output throughout the discharge cycle, so appliances run better
- Accepts charge much faster, ideal when solar or shore power is limited
- Built-in Battery Management System (BMS) protects against overcharge, over-discharge, and thermal issues
- Bluetooth monitoring available on many units for real-time state of charge visibility
LiFePO4 battery limitations:
- Higher initial purchase cost
- Requires chargers, MPPT controllers, and DC/DC converters set to lithium charging profiles
- Performs less efficiently in very cold temperatures below 0°C, though most modern units include low-temperature charge protection
For motorhomers who head out regularly, especially those favouring off-grid or wild camping, lithium is the practical choice. You can see how the two technologies compare in more detail in our AGM vs lithium breakdown, and for a broader overview of real-world campervan battery reliability across different usage profiles.
If budget is the primary constraint, quality AGM battery examples are available for smaller, lighter-use setups where deep cycling is infrequent.
Pro Tip: If you’re upgrading from AGM to LiFePO4, don’t assume your existing charger is compatible. Check the charging profile settings on your mains charger, solar controller, and any DC/DC charger. Running a lithium battery on an AGM charge profile can reduce performance and shorten its life.
Essential installation and wiring practices
Once you’ve decided on your battery, professional installation makes all the difference for ongoing reliability. Poor wiring is one of the leading causes of battery underperformance, and it’s entirely avoidable with careful attention to a few core principles.
Step-by-step installation order:
- Disconnect the existing battery by removing the negative terminal first, then the positive
- Remove the old battery safely and inspect the battery tray for corrosion or damage
- Clean the tray and terminals before fitting the new unit
- Position the new battery securely, ensuring it cannot move during transit
- Connect the positive terminal first, followed by the negative
- Check all connections are tight and apply terminal protection spray or grease
- Test system voltage and run a brief load test to confirm function
Cable gauge and length are two areas where cutting corners causes real problems. Interconnect cables in parallel banks should be equal length and at least 16mm² in cross-sectional area to ensure balanced charge and discharge across both batteries. Using mismatched cables in a parallel bank is one of the most common mistakes in DIY motorhome electrical builds.
“Equal cable lengths in a parallel battery bank ensure balanced current sharing. Unequal lengths create different resistances, causing uneven cycling that shortens the life of both batteries.”
Use the installation workflow guide for a structured overview of how components connect, and the step-by-step installation resource if you’re setting up a new system from scratch.
Risks to avoid:
- Sparks near the battery: Always remove rings and metal jewellery before working near batteries; a short-circuit can cause severe burns
- Mismatched cable gauges: Never mix 10mm² and 16mm² cables in the same circuit without appropriate fusing
- Unprotected cable runs: All positive cables should be fused as close to the battery terminal as practical
- Mixing battery chemistries: Never connect AGM and LiFePO4 batteries in parallel; their different voltage profiles will cause one to charge the other incorrectly
Pro Tip: Fit a battery isolation switch in an accessible location. This lets you disconnect the leisure bank when the van is parked up for extended periods, preventing parasitic drain from small loads like clocks, alarms, or inverter standby consumption.
Maintenance routines for lasting battery health
Installation is just the start; regular upkeep keeps your energy flowing for years to come. Both AGM and LiFePO4 batteries benefit from attentive maintenance, though the specific requirements differ by chemistry.
Monthly maintenance checklist:
- Check state of charge (SOC) using a battery monitor or Bluetooth app
- Inspect terminals and cable connections for corrosion or looseness
- Ensure the battery compartment is ventilated and free from moisture
- Verify charger profiles are still set correctly after any firmware updates to controllers
- Log any unusual behaviour such as faster than normal discharge or slower charging
| Maintenance task | AGM | LiFePO4 |
|---|---|---|
| Check terminal tightness | Monthly | Monthly |
| Top-up charge during storage | Monthly | Every 2-3 months |
| Ideal storage SOC | 100% | 40-60% |
| Equalisation charge | Occasionally | Not required |
| BMS status check | Not applicable | Monthly via app |
Store lithium batteries at 40-60% state of charge and top up every 2-3 months during storage for maximum cycle life. Storing at 100% or near-zero charge accelerates degradation in lithium chemistry.
AGM batteries, by contrast, should be kept at full charge during storage. Leaving them partially discharged accelerates sulphation, where lead sulphate crystals form on the plates and permanently reduce capacity.
Signs of battery decline to watch for:
- Runtime noticeably shorter than when the battery was new
- Voltage drops under moderate load to below 12V (AGM) or 12.8V (LiFePO4)
- Battery takes significantly longer to reach full charge via solar or mains
- BMS trips or disconnects frequently under normal loads
- Physical swelling or heat generation during routine charging
Our maintenance tips guide covers seasonal care in more detail, and if you’re uncertain which lithium options best suit your motorhome’s energy demands, that resource walks through the key product formats. For a structured approach to recognising battery end-of-life signs, catching deterioration early avoids the unpleasant surprise of a failed battery mid-trip.
Keeping connections clean is straightforward but often overlooked. A thin layer of petroleum jelly or a dedicated terminal grease on each connection point prevents the oxidation that increases resistance over time. Even a slight increase in terminal resistance reduces charging efficiency and can cause your charger to incorrectly read the battery as full before it actually is.
Why setup shortcuts cost more in the long run
With the practical routines covered, it’s worth pausing on a lesson many owners only learn the hard way.
The motorhome community is full of accounts of people who saved money on cable quality, skipped voltage testing after installation, or mixed old and new batteries in a parallel bank to avoid replacing the whole bank at once. In almost every case, the short-term saving resulted in a larger problem within twelve months.
Undersized cables are a good example. The symptom isn’t always a blown fuse or a fire. Often it’s simply poor charging performance: the solar array or DC/DC charger never quite pushes the battery to full charge because resistance in the cable eats into the available voltage. The owner assumes the solar panel is undersized and buys another panel. The actual problem was a £15 cable upgrade they chose not to make.
The same logic applies to testing. A five-minute voltage check after installation tells you immediately whether the system is connected correctly and the battery is healthy. Without it, you might drive 200 miles before discovering a terminal wasn’t fully tightened and the battery hasn’t charged at all from the alternator. These are not edge cases. They’re the kind of calls motorhome electricians and forum helpers receive every week.
Investing in quality components and taking time to optimise your energy storage workflow from the start pays back many times over in reliability and reduced maintenance costs. Seasoned UK motorhome owners who spend full seasons on the road often cite their battery setup as the single most important factor in trouble-free travel. Not the solar panel wattage, not the inverter brand. The batteries and the wiring behind them.
The upfront difference between a 10mm² cable and a 16mm² cable is negligible. The difference in performance and safety over five years of motorhome use is not.
Maximise your motorhome journeys with professional battery solutions
If you want consistent, reliable power on every journey, starting with the right products and the right advice makes everything easier. At Skyenergi, we supply high-performance lithium leisure batteries, SRNE turnkey energy systems, Victron-compatible components, and solar charging accessories specifically for motorhomes and campervans.

Our product range is sourced directly from manufacturers, keeping prices competitive without compromising on build quality. Many of our lithium batteries include Bluetooth BMS monitoring, so you can check state of charge and system health from your phone in real time. Whether you’re building a new system or upgrading an existing AGM setup, our team can advise on the right configuration for your van and usage pattern. Visit Skyenergi to browse our full range of leisure battery systems, solar controllers, and installation accessories, and get the support you need to travel with confidence.
Frequently asked questions
How do I test if my motorhome battery setup is working correctly?
After installation, measure the battery voltage with a multimeter. A fully charged LiFePO4 reads approximately 13.4V, confirming the battery is properly connected and charged.
Which is better for a UK motorhome: AGM or lithium batteries?
Lithium batteries are generally the better choice for regular off-grid use. LiFePO4 lasts over 10 years compared to 3-5 years for AGM, and delivers far more usable capacity per charge cycle.
What’s the best way to maximise battery life when storing my van?
Store lithium at 40-60% SOC and top up every 2-3 months during the off-season. AGM batteries should be kept fully charged to prevent sulphation.
How can I tell if my battery is nearing the end of its life?
Key battery end-of-life signs include noticeably reduced runtime, voltage dropping below expected levels under load, and the battery failing to reach full charge after an extended charge session.
Recommended
- The essential motorhome energy checklist for off-grid UK travel – Skyenergi
- Optimise your motorhome energy storage workflow in 2026 – Skyenergi
- Why Use Battery Banks in Motorhomes: Powering Off-Grid Independence – Skyenergi
- 7 Essential Tips for Off-Grid Power Systems in Campervans – Skyenergi
- Vehicle protection checklist: save on repairs & worry less
Prev post

Achieve true energy independence for van life in the UK
Updated on 06 May 2026
Next post

Understand expandable power systems for off-grid adventures
Updated on 04 May 2026


