


Optimise your motorhome energy storage workflow in 2026
Master your motorhome's energy storage workflow with lithium batteries. Complete 2026 guide covering assessment, installation, verification, and troubleshooting for reliable off-grid power.
Managing energy storage in your motorhome shouldn’t feel like guesswork. Many UK motorhome owners struggle with unreliable power supplies, inefficient battery systems, and confusing installation processes that leave them anxious about running out of energy off-grid. Modern lithium battery technology paired with a properly designed workflow eliminates these frustrations, delivering consistent power for extended adventures. This comprehensive guide walks you through assessing your energy needs, preparing materials, executing installation step by step, and verifying system performance to achieve true energy independence in 2026.
Table of Contents
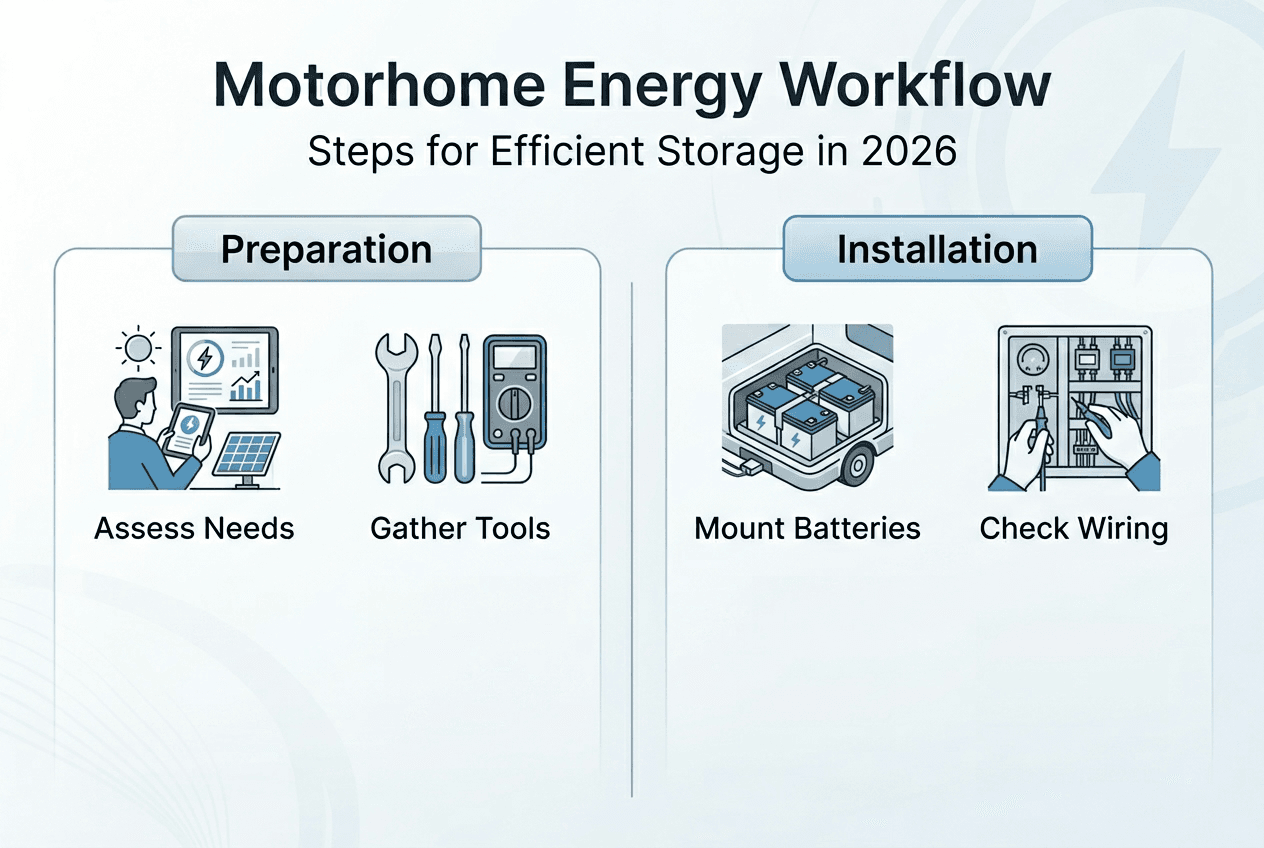
- Understanding Your Motorhome Energy Needs And Workflow Requirements
- Preparing And Gathering Tools And Materials For Lithium Battery Installation
- Executing The Motorhome Lithium Battery Energy Storage Workflow Step By Step
- Verifying And Troubleshooting Your Motorhome Energy Storage System
- Optimise Your Motorhome Energy Storage With Skyenergi Solutions
- Frequently Asked Questions About Motorhome Energy Storage Workflows
Key takeaways
| Point | Details |
|---|---|
| Energy assessment | Calculate daily consumption to determine required battery capacity and system components for your specific motorhome usage patterns |
| Preparation matters | Gather essential tools, lithium batteries, BMS units, and safety equipment before starting installation to ensure smooth workflow execution |
| Step by step installation | Follow structured process from disconnecting power through mounting batteries, connecting BMS, integrating solar controllers, and testing voltage |
| Verification essential | Conduct thorough voltage tests, check connections, and establish maintenance routines to ensure long-term reliability and performance |
| Professional solutions | Skyenergi offers integrated lithium battery systems with MPPT controllers and inverter chargers designed specifically for motorhome applications |
Understanding your motorhome energy needs and workflow requirements
Properly assessing energy consumption forms the foundation of any successful motorhome energy storage workflow. Start by listing every appliance and device you use regularly: refrigerator, lighting, water pump, heating, laptops, phones, and entertainment systems. Multiply each item’s wattage by daily usage hours to calculate watt-hours consumed. A typical motorhome might use 2000-4000 watt-hours daily, though your actual consumption depends entirely on lifestyle and equipment.
Lithium batteries deliver significant advantages over traditional lead-acid alternatives for motorhome applications. They provide usable capacity of 80-90% compared to just 50% for lead-acid, meaning a 200Ah lithium battery offers equivalent usable energy to a 400Ah lead-acid bank. Lithium cells charge faster, tolerate deeper discharge cycles without damage, weigh considerably less, and last 3000-5000 cycles versus 300-500 for lead-acid. For off-grid motorhome living, these benefits translate directly into longer adventures and fewer charging stops.
Your energy storage installation workflow requires several key components working together:
- Lithium leisure batteries sized to your daily consumption plus 20-30% safety margin
- Battery management system to protect cells from overcharge, over-discharge, and temperature extremes
- Solar charge controller (MPPT preferred) to harvest energy from roof-mounted panels
- Inverter charger to convert DC battery power to AC for appliances and recharge from mains hookup
- Distribution panel with fuses and switches for circuit protection
- Monitoring system to track battery state of charge and system performance
Off-grid conditions heavily influence workflow design. If you wild camp frequently without hookups, prioritise larger battery capacity and robust solar arrays. Weekend users with regular campsite access can manage with smaller systems. Consider seasonal variations too: winter demands more heating energy whilst reducing solar harvest, requiring careful capacity planning for year-round reliability.
Pro Tip: Build your system with expansion capability. Installing 200Ah initially with space and wiring for adding another 200Ah later costs little extra upfront but provides valuable flexibility as your energy needs evolve.
A comprehensive lithium battery setup guide helps you map the entire workflow before purchasing components. Sketch your motorhome’s electrical layout, noting where batteries will mount, how cables will route, and where monitoring displays will install. This planning prevents costly mistakes and ensures all components integrate seamlessly.
Preparing and gathering tools and materials for lithium battery installation
Having the right tools ready ensures your installation proceeds smoothly without frustrating delays or safety compromises. Professional-quality equipment makes the difference between a reliable system and one plagued by intermittent faults.
Essential tools include:
- Digital multimeter for voltage and continuity testing
- Cable cutters and crimping tool for proper termination
- Socket set with metric and imperial sizes
- Torque wrench for battery terminal connections
- Wire strippers for various gauge cables
- Drill with appropriate bits for mounting brackets
- Cable ties and mounting clips for neat installation
- Heat shrink tubing and heat gun for weatherproof connections
| Material | Purpose | Specification |
|---|---|---|
| Lithium batteries | Primary energy storage | Match calculated capacity requirement |
| Battery management system | Cell protection and balancing | Integrated or external depending on battery type |
| Cables | Power distribution | Sized for maximum current, typically 25mm² or larger |
| Fuses and holders | Circuit protection | Rated 20% above maximum expected current |
| Solar charge controller | Harvest solar energy | MPPT type, voltage and current matched to panels |
| Inverter charger | AC conversion and mains charging | Pure sine wave, adequate wattage for appliances |
| Battery monitor | Track state of charge | Shunt-based for accurate measurement |
| Mounting brackets | Secure battery installation | Non-conductive, vibration resistant |
Safety equipment cannot be optional. Lithium batteries store enormous energy that can cause severe injury if mishandled. Always wear insulated gloves when working with electrical connections. Safety glasses protect against accidental short circuits that can spray molten metal. Keep a suitable fire extinguisher (Class D for lithium fires) within reach throughout installation. Never work alone on electrical systems; having someone nearby provides critical safety backup.
Each material serves specific purposes in your energy workflow. Properly sized cables prevent voltage drop and overheating. Fuses protect against short circuits that could start fires. The BMS monitors individual cell voltages, preventing damage from imbalanced charging. Solar controllers optimise panel output whilst protecting batteries from overcharge. Understanding these functions helps you select appropriate components rather than simply buying the cheapest options.
Pro Tip: Purchase cable lugs and terminals from marine suppliers rather than automotive sources. Marine-grade components resist corrosion far better in the damp environment typical of motorhome installations, ensuring reliable connections for years.
Before starting physical installation, prepare your workspace. Clear the area where batteries will mount, ensuring adequate ventilation and accessibility for future maintenance. Lay out all components and verify you have everything needed. Read manufacturer instructions for each piece of equipment, noting any specific requirements or warnings. This preparation prevents discovering missing items halfway through installation when suppliers are closed.
Executing the motorhome lithium battery energy storage workflow step by step
Following a detailed installation workflow minimises errors and maximises system reliability in motorhome energy storage. Rushing through installation or skipping steps invariably causes problems that require time-consuming troubleshooting later.
Step 1: Disconnect all existing power sources completely. Turn off the main battery isolator, disconnect shore power, and verify zero voltage at all connection points using your multimeter. This critical safety step prevents accidental short circuits and electric shock during installation. Place warning signs on the battery compartment and shore power inlet so nobody reconnects power whilst you work.
Step 2: Mount lithium batteries securely in your chosen location. The mounting area must provide adequate ventilation, protection from extreme temperatures, and accessibility for maintenance. Batteries should sit on non-conductive mounting brackets bolted firmly to the motorhome structure to prevent movement during travel. Leave at least 25mm clearance around batteries for airflow. Ensure the mounting location keeps batteries level; tilting can affect BMS performance and cell balancing.
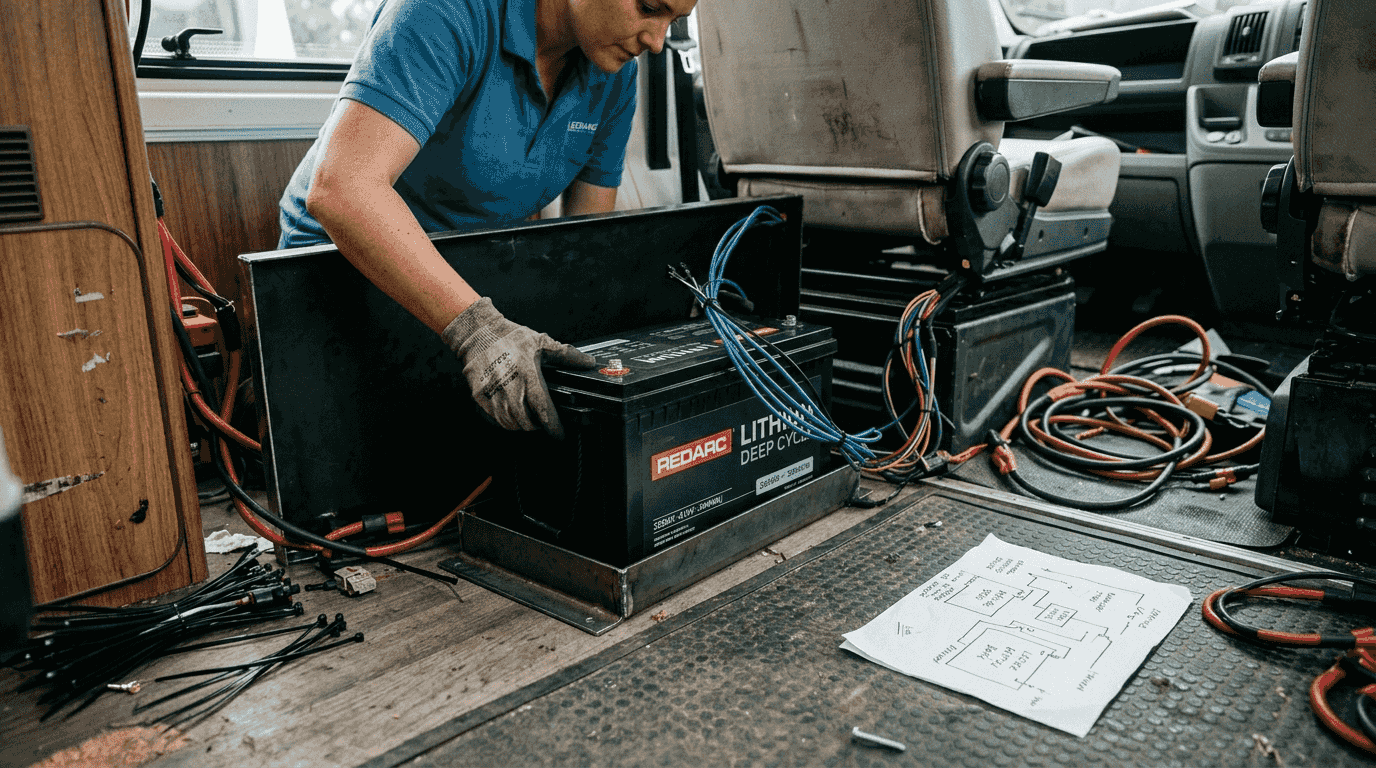
Step 3: Connect the battery management system and wiring harnesses according to manufacturer specifications. The BMS typically connects directly to battery terminals via short, heavy-gauge cables. Follow the exact wiring diagram provided; incorrect BMS connections can damage the unit or fail to protect your batteries. Secure all connections with appropriate torque settings, typically 8-10Nm for M8 terminals. Apply dielectric grease to terminals to prevent corrosion.
Step 4: Integrate solar charge controllers and inverter connections into your energy storage installation process. Connect the solar controller first to the battery, then to the solar panels, never the reverse order. This sequence prevents voltage spikes damaging the controller. Wire the inverter charger directly to battery terminals using cables sized for maximum current draw. Install appropriate fuses within 300mm of battery positive terminals.
Step 5: Test all connections for continuity and verify correct voltage levels before applying power. Use your multimeter to check each connection point, confirming solid contact and proper polarity. Measure open-circuit voltage at battery terminals; lithium cells should read 13.2-13.6V when fully charged. Check for any voltage drop across connections; readings above 0.1V indicate poor connections requiring attention.
| Wiring method | Configuration | Advantages | Disadvantages |
|---|---|---|---|
| Parallel | Positive to positive, negative to negative | Maintains 12V system voltage, increases capacity | Requires matched batteries, needs careful balancing |
| Series | Positive to negative terminals | Creates 24V or 48V systems, reduces cable size | More complex, fewer compatible appliances |
| Series-parallel | Combination of both methods | Optimises voltage and capacity | Most complex installation, requires expertise |
Most motorhome installations use parallel wiring to maintain standard 12V system voltage whilst achieving required capacity. Connect batteries using identical length cables to ensure equal current distribution. Never mix old and new batteries in parallel; the older cells will drag down performance of the entire bank.
Pro Tip: Before final assembly, photograph all connections with your phone. These reference images prove invaluable for future troubleshooting or when explaining your system to technicians.
Maintain strict safety protocols throughout installation. Never create connections with power applied. Double-check polarity before tightening terminals; reverse polarity destroys electronic components instantly. Keep metal tools away from battery terminals; accidental shorts generate extreme heat and sparks. Work methodically rather than rushing, taking breaks to maintain concentration.
Verifying and troubleshooting your motorhome energy storage system
Routine checks and troubleshooting steps are vital to ensure long-term performance of lithium battery energy systems in campervans. A thorough verification process after installation catches problems before they cause system failures during your adventures.
Conducting comprehensive voltage and load tests confirms your system functions correctly. With all connections complete but no loads connected, measure battery voltage at terminals. Lithium batteries should read 13.2-13.6V when fully charged, dropping to 12.8-13.0V under light load. Connect a moderate load like interior lighting and monitor voltage stability; it should remain steady without significant drops. Apply heavier loads progressively, watching for voltage sag that indicates inadequate cabling or poor connections.
Test charging functionality from all sources. Connect solar panels and verify the controller shows appropriate current flow on sunny days. Plug into shore power and confirm the inverter charger begins bulk charging at the expected amperage. Monitor battery temperature during charging; excessive heat indicates problems requiring immediate investigation. Check that the BMS communicates properly with monitoring displays, showing accurate state of charge and cell voltages.
Common installation issues include:
- Loose terminal connections causing voltage drop and overheating
- Incorrect wiring polarity damaging electronic components
- Inadequate ventilation leading to thermal shutdown
- Undersized cables creating resistance and power loss
- Improperly configured charge controller settings
- Missing or incorrect fuse ratings compromising safety
Maintaining your energy storage system requires regular attention but minimal effort. Inspect all connections monthly, checking for corrosion, looseness, or damage. Clean terminals annually using a wire brush and apply fresh dielectric grease. Monitor battery health through your BMS app, watching for cell voltage imbalances that indicate problems. Update BMS firmware when manufacturers release improvements. Keep battery compartments clean and dry, addressing any water ingress immediately.
Pro Tip: Create a simple maintenance log recording voltage readings, charge cycles, and any issues encountered. This historical data helps identify developing problems before they cause failures and provides valuable information if warranty claims become necessary.
Protecting lithium batteries from over-discharge extends their lifespan dramatically. Configure your BMS to disconnect loads at 20% state of charge rather than allowing complete depletion. This practice alone can double your battery’s cycle life.
Always use insulated tools when working around energised systems. Verify zero voltage with your multimeter before touching any connections, even if you believe power is disconnected. Residual charge in capacitors can deliver dangerous shocks. If you encounter problems beyond your expertise, consult qualified technicians rather than experimenting. Lithium battery systems contain substantial energy that demands respect and proper handling.
Establish a pre-trip inspection routine checking battery charge level, connection tightness, and system functionality. This five-minute check prevents discovering problems at remote locations without support. After extended storage periods, verify batteries maintained proper voltage and charge fully before departing. Regular use keeps batteries healthier than long periods of inactivity.
Optimise your motorhome energy storage with Skyenergi solutions
Building a reliable motorhome energy system requires quality components and expert integration. Skyenergi specialises in complete lithium battery and solar solutions engineered specifically for mobile applications, eliminating the guesswork from system design.

Our turnkey solar power systems combine 3kVA inverter chargers with MPPT solar controllers and comprehensive monitoring in pre-configured packages. These integrated solutions ensure all components work together seamlessly, reducing installation complexity whilst maximising efficiency. Professional system design typically improves energy harvest by 15-25% compared to mismatched components, extending your off-grid capability significantly.
For larger motorhomes requiring robust power systems, the Victron EasySolar-II 48V delivers 5000W continuous power with integrated MPPT charge control and system monitoring. This professional-grade solution handles substantial loads whilst maintaining battery health through intelligent charging algorithms. The 48V architecture reduces cable sizes and improves efficiency for high-power applications.
Expanding solar capacity becomes straightforward with our 610W solar panel kits including Victron Smart MPPT controllers and all necessary mounting hardware. These complete packages eliminate compatibility concerns whilst providing Bluetooth monitoring of solar harvest and battery status through your smartphone.
Pro Tip: Investing in quality components from established manufacturers like Victron provides long-term value through superior reliability, comprehensive warranty support, and compatibility with future system expansions as your energy needs grow.
Frequently asked questions about motorhome energy storage workflows
What size lithium battery do I need for my motorhome?
Calculate your daily energy consumption in watt-hours, then divide by 12V to determine amp-hour capacity required. Add 20-30% safety margin and ensure you can recharge fully from available sources. Most motorhomes need 200-400Ah lithium capacity for comfortable off-grid living.
How often should I maintain my motorhome’s energy storage system?
Inspect connections monthly for tightness and corrosion. Check battery health through your monitoring system weekly during active use. Perform thorough system tests quarterly, verifying all charging sources function correctly and loads operate as expected.
Can I upgrade my existing system to lithium batteries easily?
Most systems accommodate lithium upgrades with appropriate charge controller and BMS additions. Verify your existing charger supports lithium profiles or plan to replace it. Consult a lithium battery setup guide specific to your motorhome configuration before purchasing components.
What safety precautions are essential during installation?
Always disconnect all power sources before working on electrical systems. Use insulated tools and wear safety glasses and gloves. Install appropriately rated fuses within 300mm of battery terminals. Never work alone on high-voltage systems and keep fire extinguishers accessible.
How can solar panels improve my energy storage workflow?
Solar panels provide continuous charging during daylight hours, extending time between hookups significantly. A properly sized solar array can fully recharge batteries during summer days, enabling indefinite off-grid camping. Winter performance reduces but still contributes valuable energy, reducing generator runtime and fuel costs.
Recommended
- Energy storage installation workflow UK campervans 2026 – Skyenergi
- Energy Storage System Workflow for Campervans: Complete Guide – Skyenergi
- Energy Storage for Campervans: 80% More Usable Lithium Power – Skyenergi
- What Is Energy Storage for Campervans? – Skyenergi
- 2017 Thor Hurricane 34J Class A Gas Motor Home - Class A RV Repairs
Prev post

What is energy storage for campervans: a 2026 UK guide
Updated on 15 March 2026
Next post

Understanding solar charge efficiency for UK leisure vehicles
Updated on 13 March 2026


