


Campervan energy conversion steps: 2026 guide
Unlock reliable power for off-grid adventures! Follow these essential campervan energy conversion steps to build your optimal energy system.
TL;DR:
- Proper planning and correct wiring are essential for a reliable off-grid campervan power system that meets your energy needs.
- Installing panels with appropriate mounts and seals prevents leaks and ensures safety during travel.
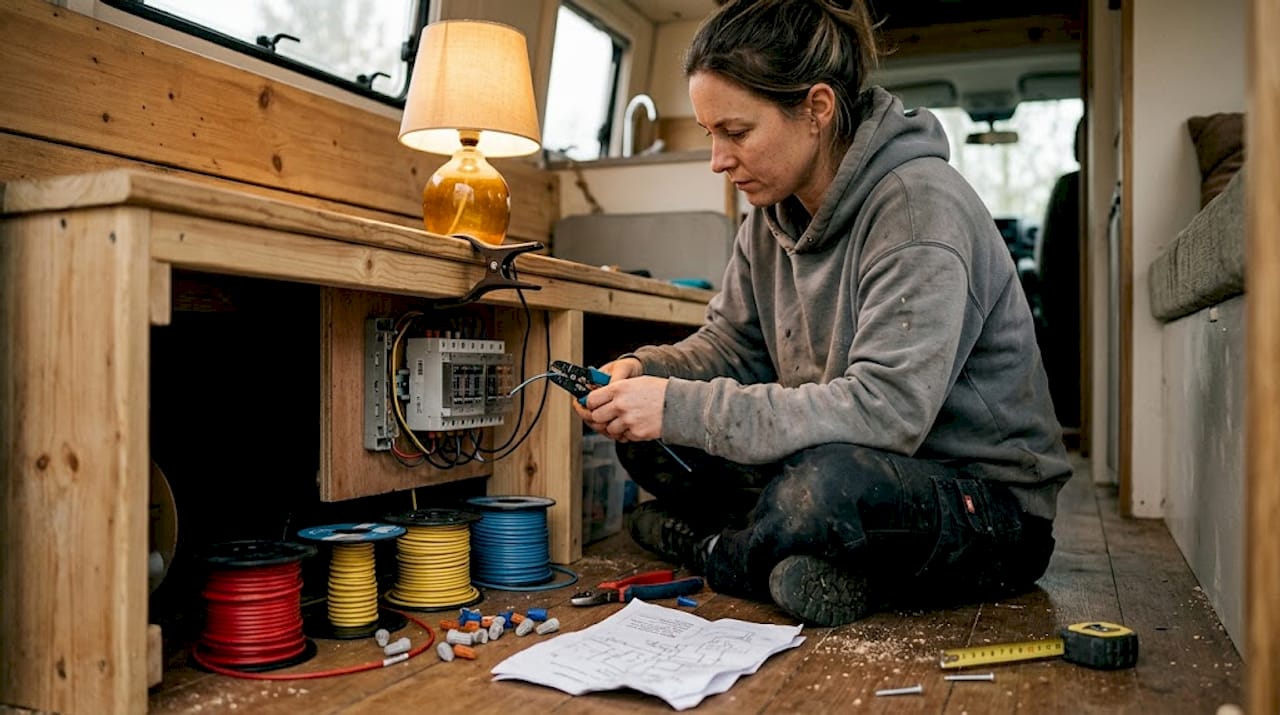
Unreliable power ruins off-grid trips fast. Whether your leisure battery dies by day two or your solar panels barely charge a phone, the root cause is almost always the same: the energy system was never properly planned or built. Following clear campervan energy conversion steps from the start changes that entirely. This guide covers every stage, from selecting the right components and mounting solar panels safely, to wiring your system correctly and sizing your battery bank for real-world use. By the end, you will have the knowledge to build a reliable, expandable off-grid power system in your own vehicle.
Table of Contents
- Key takeaways
- Campervan energy conversion steps: components and tools
- Installing solar panels on a campervan roof
- Wiring the electrical system safely
- Calculating energy needs and sizing your system
- Testing, troubleshooting, and maintenance
- What I have learned from years of campervan builds
- Power your build with Skyenergi
- FAQ
Key takeaways
| Point | Details |
|---|---|
| Plan before you buy | Calculate your daily watt-hour needs before purchasing any components to avoid costly oversizing or undersizing. |
| Connection order matters | Always connect the battery to the charge controller before attaching solar panels to protect the controller from damage. |
| MPPT controllers outperform PWM | MPPT charge controllers extract significantly more energy from your panels, especially in variable UK weather conditions. |
| Poor battery management causes most failures | Adding more panels rarely fixes power shortages; managing battery charge cycles and loads is more effective. |
| Fuse placement is a safety critical step | Place fuses within 30 cm of the battery positive terminal to protect the entire electrical system from fire risk. |
Campervan energy conversion steps: components and tools
Before you touch a single cable, you need the right equipment on hand. A standard campervan electrical system includes a battery bank, charge sources such as solar panels and an alternator, an MPPT charge controller, a pure sine wave inverter, correctly rated wiring, and fused circuits throughout.
Here is a practical checklist of core components:
- Battery bank: Lithium LiFePO4 batteries are the preferred choice for most modern conversions, offering longer cycle life and higher usable capacity than lead-acid alternatives
- Solar panels: Monocrystalline panels are the standard for campervans due to their efficiency in low-light conditions
- MPPT charge controller: Sized to match your panel array wattage and system voltage (12V or 24V)
- Pure sine wave inverter: Typically 1000W to 2000W for van life appliances
- Wiring and cable lugs: Correctly rated for current loads at each circuit
- Fuses and blade fuse box: Including a main fuse near the battery positive terminal
- MC4 connectors and extension cables: For solar panel connections on the roof
- Cable entry glands: For weatherproof roof penetrations
- Mounting hardware: Z-brackets or ABS plastic mounts depending on roof type
For tools, you will need a multimeter, wire stripper, crimping tool, drill with step and hole saw bits, and a sealant gun for lap sealant or self-levelling sealant.
The table below compares the two main charge controller types and battery chemistries worth considering:
| Component | Option A | Option B | Best for |
|---|---|---|---|
| Charge controller | MPPT | PWM | MPPT for all serious builds |
| Battery type | LiFePO4 Lithium | AGM Lead-acid | LiFePO4 for longevity and capacity |
| Typical efficiency | Up to 98% | 70-75% | MPPT and Lithium win on efficiency |
| Cost | Higher upfront | Lower upfront | LiFePO4 cheaper long-term |
Pro Tip: Size your MPPT controller for at least 25% more panel capacity than your current array. This gives you room to expand without replacing the controller later.
Installing solar panels on a campervan roof
Getting panels on the roof correctly is one of the most consequential parts of the entire process. Done poorly, it means leaks, panel movement at speed, or water ingress into the living space.
Roof type determines mounting approach: ribbed roofs suit Z-brackets combined with 3M VHB tape and lap sealant to reduce drilling stress and leaks, while curved or smooth roofs work better with aerodynamic ABS plastic mounts. ABS mounts are increasingly popular for their cleaner appearance and simpler fitting process.
Follow these steps in order:
- Assess your roof and note whether it is flat, ribbed, or curved. Measure the available mounting area and plan panel positions to avoid roof vents, skylights, and aerials.
- Mark bracket positions using a pencil or tape. Space them to match the panel frame’s pre-drilled holes.
- Drill pilot holes where required for Z-brackets. Apply a generous bead of lap sealant or self-levelling sealant into each hole before inserting fixings.
- Apply 3M VHB tape to the underside of each bracket or ABS mount before pressing firmly onto the roof surface for added adhesion.
- Fix the mounting hardware and allow sealant to cure fully before loading the brackets with panel weight.
- Position each solar panel onto the mounts and secure with M6 stainless steel bolts. Do not overtighten on ribbed roofs.
- Mark and drill the cable entry point, typically near the rear of the roof. Fit a cable gland rated for outdoor use.
- Route MC4 extension cables through the gland into the van interior. Apply additional sealant around the gland exterior and allow to cure.
- Leave panels unconnected at the MC4 level until the controller and battery wiring is complete inside the van.
Pro Tip: Position panels as close to the centre of the roof as possible and away from the cab area where shade from the windscreen frame causes disproportionate power loss. Even partial shading on one cell can reduce output across the whole panel significantly.
Wiring the electrical system safely
Wiring is where most DIY conversion mistakes happen, and most of those mistakes carry genuine fire or failure risk. Follow a strict sequence and do not skip steps.
The correct wiring order for a campervan solar system is:
- Connect the battery bank terminals to the main fuse box first
- Place the main fuse or circuit breaker within 30 cm of the battery positive terminal. Correct fuse placement at this point protects the entire downstream system from short circuit and fire
- Wire the MPPT charge controller to the battery next, following the manufacturer’s terminal labelling precisely
- Connect the solar panels to the charge controller inputs last. Connecting the battery to the controller first allows the controller to detect system voltage correctly before live panel current flows through it
- Wire the inverter directly to the battery with its own dedicated fuse
Common wiring mistakes to avoid:
- Using undersized cable for high-current runs between battery and inverter
- Placing a fuse at the load end rather than the battery end of a cable run
- Mixing cable gauges on the same circuit without accounting for the weakest point
- Skipping a fuse on the charge controller’s battery connection
- Connecting solar panels to the controller before the battery is wired in
Wire sizing and fuse placement are not optional details. Undersized cables or misplaced fuses cause fire risk and system failure. Use a cable sizing calculator and verify every run before powering the system.
Your system will carry two distinct circuit types. The 12V DC side handles battery, solar, controller, and low-voltage loads such as lighting and USB sockets. The 230V AC side runs from the inverter output and powers mains appliances. Keep these circuits physically separated and clearly labelled. For inverter selection and wiring best practices, the Skyenergi guide on inverter wiring for campervans covers the key decisions in detail.
Pro Tip: Download and print a wiring diagram before you start. Mark each connection as you complete it. This makes fault-finding straightforward and gives you a record of the system for any future work or resale.
Calculating energy needs and sizing your system
Undersizing leads to flat batteries. Oversizing wastes money. Accurate calculation is the only way to get this right, and it takes less time than most people expect.
Start by listing every device you plan to run and its typical daily usage:
| Device | Wattage (W) | Daily hours | Daily Wh |
|---|---|---|---|
| LED lighting | 20W | 4 hrs | 80Wh |
| Laptop | 60W | 3 hrs | 180Wh |
| 12V compressor fridge | 45W | 8 hrs | 360Wh |
| Phone charging x2 | 20W | 2 hrs | 40Wh |
| Fan or ventilation | 15W | 6 hrs | 90Wh |
| Total | 750Wh/day |
With 750Wh of daily use and a target of two days of autonomy without solar input, you need a usable battery capacity of 1500Wh. For a 12V LiFePO4 system, that equates to approximately 125Ah at 100% depth of discharge. Lithium batteries offer around 80% more usable capacity than equivalent AGM banks due to their deeper discharge capability.
For solar panel sizing, divide your daily Wh total by the peak sun hours for your typical travel region. The UK averages between 2.5 and 4 peak sun hours per day. Applying a 20% efficiency loss factor: 750Wh divided by 3 peak hours, then divided by 0.8, gives approximately 312W of solar panel capacity. For reference, a 100W panel suits weekend use only; extended three-season travel needs at least 200 to 400W. For a detailed sizing walkthrough, the Skyenergi article on battery capacity for campervans is worth reading alongside this guide.
MPPT controllers extract 20 to 30% more energy from the same panel array compared to PWM models, making them the only sensible choice for any serious off-grid build.
Pro Tip: Avoid the wattage trap. Poor battery management causes more power shortages than insufficient solar. Before adding panels, audit your loads, switch to LED lighting, and check your battery’s state of health.
Testing, troubleshooting, and maintenance
Once wiring is complete, do not assume the system works correctly. Verify it before relying on it.
Start with a multimeter. Measure voltage at the battery terminals, at the controller’s battery input, and at the load outputs. All readings should match expected system voltage within a safe tolerance. With panels connected in daylight, the controller display should show a positive charge current flowing into the battery.
Maintenance checklist for ongoing system health:
- Monthly: Check all cable connections for corrosion or looseness, particularly at battery terminals and busbars
- Monthly: Inspect roof sealant around cable glands and panel mounts for cracking or lifting
- Every 3 months: Review battery State of Health data via your BMS app if using Bluetooth-monitored lithium batteries
- Seasonally: Clean panel surfaces to remove road grime, bird deposits, and general dirt that reduce output
- Annually: Torque-check all mounting bolts, particularly after motorway driving
Monitoring tools make this easier. Many modern lithium battery management systems include Bluetooth connectivity, allowing you to track voltage, current, state of charge, and cycle count directly from a smartphone. For guidance on getting the most from your battery over its lifespan, the Skyenergi resource on battery cycle life for campervans provides practical maintenance advice.
Pro Tip: Set up a low-voltage disconnect at 20% state of charge in your BMS settings. This prevents deep discharge events that degrade lithium cells and extends total battery lifespan significantly.
What I have learned from years of campervan builds
In my experience, the biggest mistake DIY converters make is treating panel wattage as the primary measure of system quality. I have seen vans with 600W on the roof that still run flat batteries by midday, because the battery was undersized, the controller was mismatched, or loads were simply not being managed.
What actually determines a good outcome is the planning stage. Getting the energy audit right, understanding your real usage rather than your estimated usage, and selecting a battery that genuinely fits the load profile. I have seen the shift towards ABS mounts on smooth-roofed vans change the game for installers who were previously spending hours trying to seal drilled fixings cleanly. The result is faster builds and fewer leak call-backs.
The emergence of EV Vehicle-to-Load technology is also worth watching. Kia’s V2L integration in 2026 campervan conversions is already reducing the need for large auxiliary battery banks in EV-based builds. It is a genuine shift in how energy conversion in RVs is approaching practicality.
My advice is to plan thoroughly, build conservatively, and expect to refine the system after your first few trips. The road teaches you things the spreadsheet never will.
— John
Power your build with Skyenergi
Skyenergi specialises in lithium leisure batteries, MPPT controllers, solar accessories, and complete off-grid power solutions for campervans and motorhomes. Every product in the range is selected for reliability and performance in real-world vehicle conditions, sourced directly from manufacturers to keep pricing competitive.

Whether you are building a system from scratch or upgrading an existing setup, Skyenergi carries the components to match. The range includes SRNE turnkey leisure vehicle solutions, Skyenergi own-brand lithium batteries with Bluetooth BMS monitoring, and Victron-compatible accessories for system integration. Product pages include technical specifications and the team is available to advise on sizing and configuration. Visit Skyenergi’s solar charge control guide for further reading, or browse the full product range at skyenergi.com to find the right components for your conversion.
FAQ
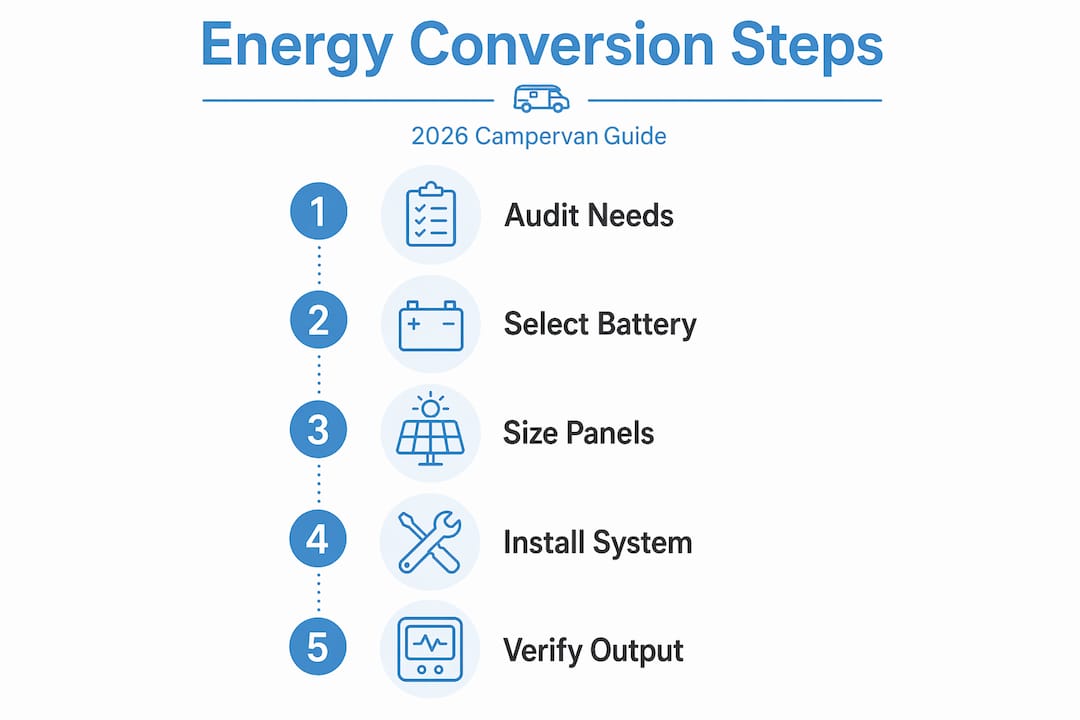
What are the basic campervan energy conversion steps?
The core steps are: calculate your daily energy needs, select battery bank and solar panel sizes, mount panels on the roof with appropriate brackets, wire the system in the correct sequence (battery to controller before panels), and verify operation with a multimeter before use.
How many solar panels do I need for a campervan?
A single 100W panel is adequate for weekend-only use. For extended off-grid travel across three seasons, a 200W to 400W array is recommended, sized against your actual daily watt-hour consumption and local peak sun hours.
Should I use an MPPT or PWM charge controller?
MPPT controllers are the correct choice for any serious campervan solar setup. They extract 20 to 30% more energy from the same panel array compared to PWM models, which is particularly valuable in the lower-light conditions typical of the UK.
What is the most common reason for power shortages in campervans?
Poor battery management is a more frequent cause of power shortages than insufficient solar panel capacity. Auditing loads, using efficient appliances, and maintaining battery health resolves most shortage issues without adding more panels.
In what order should I connect campervan solar wiring?
Connect the battery to the charge controller first, then connect the solar panels to the controller inputs. This order allows the controller to detect system voltage correctly and prevents damage to the controller from unregulated panel current.
Recommended
Prev post

How to install campervan solar: DIY guide 2026
Updated on 28 May 2026
Next post

The role of battery cells in renewable energy storage
Updated on 26 May 2026


