


Battery bank design: a practical guide for DIY builds
Discover what battery bank design is and learn practical steps to build a reliable DIY battery bank for your campervan or off-grid setup.
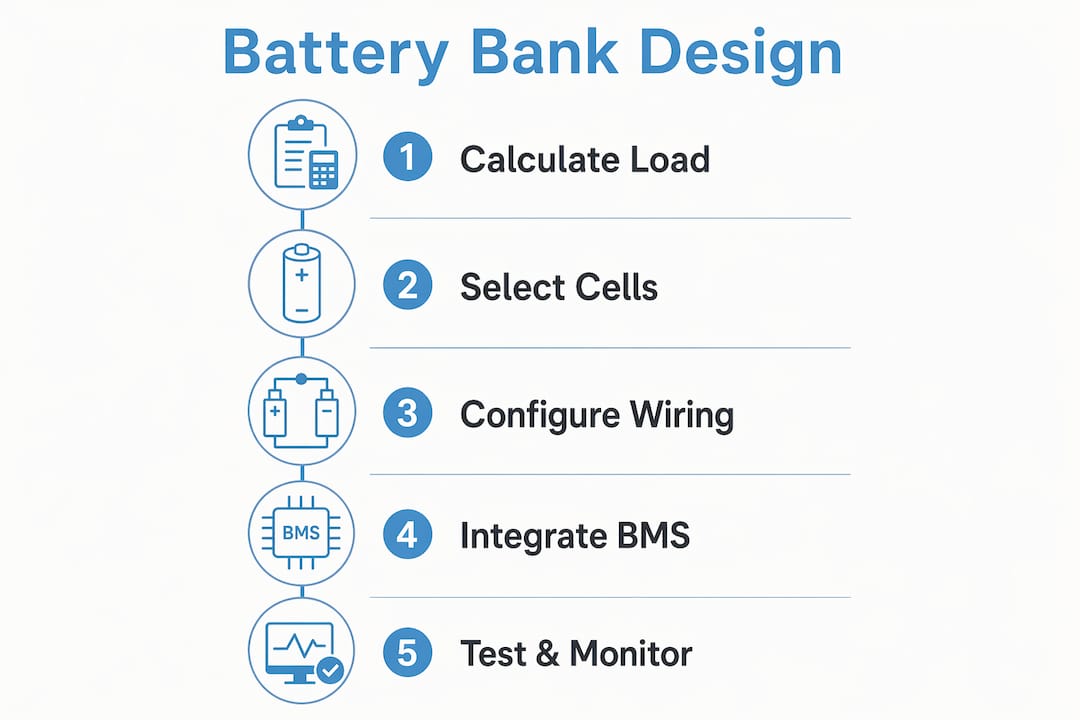
Battery bank design is the engineering process of arranging multiple battery cells and associated systems to deliver a targeted voltage, capacity, and current safely and reliably. Whether you are building a power system for a campervan, a narrowboat, or an off-grid solar setup at home, the same core principles apply. Get the design right and you have a system that performs consistently for years. Get it wrong and you face underperformance, premature cell failure, or worse. This guide covers the key principles, sizing methods, safety requirements, and practical steps you need to build a battery bank that actually works.
What is battery bank design and why does it matter?
Battery bank design is the systematic process of selecting, configuring, and integrating battery cells to meet specific power and energy requirements. The industry term for a finished assembly is a battery pack, though in off-grid and renewable energy contexts, the terms battery bank and battery system are used interchangeably. Battery packs commonly use series and parallel wiring configurations and include sensors for voltage and temperature to support charging management. This means design is never just about counting cells. It involves electrical architecture, protection electronics, thermal management, and mechanical layout.
The practical stakes are high for DIY builders. A campervan running a 12V system with a 200Ah lithium battery has very different design requirements from a residential solar storage system delivering 48V and 10kWh. Both are battery bank designs, but the voltage targets, safety standards, and component choices differ significantly. Understanding the principles behind each decision is what separates a reliable system from one that fails at the worst possible moment.

How are battery cells arranged in series and parallel?
The two fundamental wiring configurations in any battery bank are series and parallel. Each serves a distinct purpose, and most real-world systems use a combination of both.
Series wiring connects the positive terminal of one cell to the negative terminal of the next. This increases the total voltage while keeping capacity constant. Four 3.2V LiFePO4 cells wired in series produce a 12.8V nominal pack. Eight cells in series produce 25.6V, which is the basis of a 24V system.
Parallel wiring connects all positive terminals together and all negative terminals together. This keeps voltage constant while multiplying capacity. Two 100Ah cells wired in parallel produce a 200Ah bank at the same voltage.
Series-parallel combinations are used when you need both a higher voltage and greater capacity. A 4S2P configuration, for example, uses four cells in series to set the voltage and two of those strings in parallel to double the capacity. Common DIY system voltages are 12V, 24V, and 48V, with 48V increasingly favoured for larger solar installations because lower current at higher voltage reduces cable losses.
- Series connection: increases voltage, capacity unchanged
- Parallel connection: increases capacity, voltage unchanged
- Series-parallel: achieves both target voltage and target capacity
- Higher system voltage reduces current draw and cable losses
- Mismatched cells in parallel cause unequal current flow and accelerate degradation
Pro Tip: Always use cells from the same batch, with matched internal resistance and capacity ratings, when wiring in parallel. Mixing old and new cells, or cells from different manufacturers, creates imbalance that shortens the life of the entire bank.
What are the critical factors for sizing a battery bank?
Sizing is where most DIY designs go wrong. The goal is to calculate the minimum rated capacity needed to deliver your required usable energy across your chosen autonomy period. Sizing a solar battery bank depends on daily energy use, autonomy days, depth of discharge, and system voltage.
The standard sizing formula is:
Bank capacity (Ah) = (Daily Wh × Autonomy days) / (Battery voltage × DoD)
Work through each variable before specifying any hardware:
- Daily energy audit. List every load, its wattage, and daily hours of use. A 12V compressor fridge drawing 45W for 8 hours uses 360Wh per day. Add lighting, inverter loads, phone charging, and any other consumers.
- Autonomy days. Decide how many days the bank must supply power without recharging. Off-grid solar systems typically target 2 to 3 days of autonomy to cover poor weather.
- Depth of discharge (DoD). This is the percentage of rated capacity you can safely use. Lead-acid requires about 60% more rated capacity than LiFePO4 at 80% DoD to deliver the same usable energy. Lead-acid is typically limited to 50% DoD to protect cycle life, while lithium iron phosphate (LiFePO4) can operate at 80 to 100% DoD.
- System efficiency. Usable energy calculations must account for DoD, system efficiency, and inverter losses. A 90% efficient inverter and 95% efficient wiring means your bank needs to supply roughly 17% more energy than your load audit suggests.
| Variable | Lead-acid | LiFePO4 |
|---|---|---|
| Typical DoD | 50% | 80 to 100% |
| Cycle life at rated DoD | 300 to 500 cycles | 2,000 to 5,000 cycles |
| Relative bank size needed | Larger | Smaller |
| Weight per usable kWh | Higher | Lower |
Pro Tip: Run your sizing calculation twice: once for average daily use and once for your worst-case high-consumption day. Design to the higher figure. Undersized banks are the single most common cause of premature battery failure in DIY off-grid systems.
How does a BMS influence battery bank design?
A battery management system (BMS) is the central safety and performance component in any lithium battery bank. The BMS performs monitoring, balancing, and active protection across all cells in the pack. Without a BMS, lithium cells are vulnerable to overcharge, over-discharge, short circuit, and thermal runaway. Understanding why BMS matters for off-grid energy is not optional for anyone building a lithium bank.
Core BMS functions include:
- Cell voltage monitoring: detects overcharge or deep discharge at the individual cell level
- State of charge (SoC) estimation: tracks remaining capacity in real time
- Cell balancing: redistributes charge between cells to prevent divergence over time
- Temperature monitoring: cuts off charging or discharging if cell temperature exceeds safe limits
- Overcurrent and short-circuit protection: disconnects the pack if current exceeds rated limits
Beyond the BMS itself, lithium battery pack design includes thermal management, mechanical design, testing, and certification. Thermal management is particularly critical. Cells packed too tightly without ventilation accumulate heat during high-rate discharge, which degrades capacity and can trigger thermal runaway.
For residential energy storage systems, safety standards set a clear framework. UL 9540 defines safety requirements for residential energy storage systems with a maximum electrochemical capacity of 20kWh. UL 9540A evaluates thermal runaway fire propagation to determine required separation and fire safety measures. DIY builders working on home storage systems should be aware of these standards even if they are not required to certify their build formally.
Design must go beyond wiring to validate thermal safety and system integration. A well-wired bank with poor thermal management or no BMS is not a safe or complete design.
The role of BMS in energy storage extends to system lifespan. Active cell balancing, in particular, extends battery life by preventing individual cells from ageing faster than others due to charge imbalance.
What are the best practices for DIY battery bank design?
Successful battery bank design starts from application requirements and load profile, not from fitting whatever cells happen to be available. Follow this workflow to avoid the most common DIY mistakes.
- Start with the load audit. Calculate daily Wh consumption before selecting any hardware. Skipping this step leads to undersized or oversized banks.
- Choose chemistry first. LiFePO4 is the standard choice for campervans, motorhomes, and marine applications due to its safety profile, cycle life, and high DoD. Lead-acid remains viable for low-budget, low-cycle applications.
- Match cells carefully. Use cells with identical capacity, chemistry, and ideally the same production batch. Mismatched cells in parallel create imbalance between parallel groups, a common failure mode that degrades the weakest cell fastest.
- Specify the BMS before the cells. The BMS must be rated for your system voltage, maximum continuous current, and number of cell groups. A BMS rated for 4S LiFePO4 will not protect a 16S pack.
- Use correctly rated cable and connectors. Undersized cable causes resistive heating and voltage drop. Use a cable sizing calculator based on maximum continuous current and cable run length.
- Design for modularity. Build in the ability to add parallel strings later if your energy needs grow. Label all connections clearly and document your wiring diagram.
- Test before final installation. Charge the bank fully, check cell voltages individually, and verify BMS protection functions by simulating an overload condition.
Pro Tip: Bluetooth-enabled BMS units, such as those found in many Skyenergi lithium leisure batteries, allow you to monitor individual cell voltages and state of charge from a smartphone. This makes ongoing maintenance and fault diagnosis far simpler than relying on a multimeter alone.
Key takeaways
Effective battery bank design requires accurate load sizing, correct cell configuration, and a properly specified BMS working together as an integrated system.
| Point | Details |
|---|---|
| Series vs parallel wiring | Series increases voltage; parallel increases capacity. Most systems use both. |
| Sizing formula | Calculate bank capacity using daily Wh, autonomy days, DoD, and system voltage. |
| LiFePO4 advantage | LiFePO4 allows 80 to 100% DoD, requiring significantly less rated capacity than lead-acid. |
| BMS is non-negotiable | A BMS provides cell balancing, overcharge protection, and thermal monitoring for lithium banks. |
| Design beyond wiring | Thermal management and mechanical layout are as critical as electrical configuration. |
Why I think most DIY battery bank designs fail at the sizing stage
Most DIY builders I have seen get the wiring right but underestimate their actual energy consumption. They run a quick mental calculation, round down, and end up with a bank that cannot cover two cloudy days. The sizing formula is straightforward, but it only works if the load audit is honest. That means measuring actual appliance draw with a clamp meter, not trusting the label wattage, and accounting for standby loads that run 24 hours a day.
The second mistake is treating the BMS as an optional extra. On a lead-acid system you can get away without one. On a lithium bank, the BMS is the difference between a system that lasts a decade and one that fails in the first winter. Skyenergi builds BMS protection into its lithium leisure batteries precisely because field experience shows that unprotected lithium cells in DIY builds are a liability, not a saving.
The good news is that the principles here are not complicated. A well-sized bank with matched cells, a correctly rated BMS, and decent cable work will outperform an expensive but poorly designed system every time. Start with the load audit. Everything else follows from that.
— John
Build your system with the right components from Skyenergi
Skyenergi supplies a full range of components for off-grid and renewable energy builds, from lithium leisure batteries with integrated BMS to Victron Energy solar and management hardware.

The Victron Energy Solar Home System 200 MPPT is a complete off-grid solution combining a solar panel, MPPT charge controller, and battery storage in a single package. For larger builds, the Victron 610W solar panel bundle includes a Smart MPPT charge controller, cabling, mounting hardware, and a battery option, covering the core components of a well-engineered solar battery bank system in one order. Skyenergi sources directly from manufacturers to keep pricing competitive without compromising on specification.
FAQ
What is a battery bank in simple terms?
A battery bank is two or more batteries connected together to store and supply electrical energy as a single unit. The configuration determines the system voltage and total capacity available.
How do I calculate the right size for my battery bank?
Use the formula: Bank capacity (Ah) = (Daily Wh × Autonomy days) / (Battery voltage × DoD). A 12V LiFePO4 system at 80% DoD supplying 500Wh per day for 2 days requires approximately 104Ah of rated capacity.
What is the difference between series and parallel battery connections?
Series connections increase system voltage while keeping capacity constant. Parallel connections increase capacity while keeping voltage constant. Most battery banks use a combination of both to reach a target voltage and capacity.
Do I need a BMS for a DIY lithium battery bank?
A BMS is required for any lithium battery bank. It provides overcharge and over-discharge protection, cell balancing, and temperature monitoring. Operating LiFePO4 cells without a BMS risks permanent cell damage and potential thermal runaway.
What depth of discharge should I use for sizing?
Use 50% DoD for lead-acid batteries and 80% DoD for LiFePO4 to balance usable energy against cycle life. Running lead-acid below 50% DoD significantly reduces the number of charge cycles the battery will deliver.
Recommended
Prev post

Battery bank setups: a practical guide for 2026
Updated on 14 June 2026
Next post

The role of solar array capacity in off-grid systems
Updated on 12 June 2026


