


Campervan energy storage: your 2026 upgrade guide
Discover our comprehensive campervan energy storage guide 2025. Upgrade your system for reliable power on every adventure. Click to learn more!
TL;DR:
- A reliable campervan energy system prevents power failures by using appropriate batteries, protections, and monitoring. Proper installation, UK compliance, and correct component matching are essential to ensure safety and longevity. Avoid common mistakes like undersized wiring, incompatible chargers, and neglected monitoring for optimal performance.
Running out of power mid-trip is one of the most frustrating experiences a campervan owner can face. A flat battery means no fridge, no lighting, no phone charging, and a very uncomfortable night. The right energy storage system changes all of that, giving you reliable, predictable power wherever you park. This guide covers everything you need: the essential components, a step-by-step installation walkthrough, battery monitoring best practices, and the 2026 UK safety standards that now apply to battery storage in leisure vehicles. Follow it carefully and you’ll have a system that actually works when you need it most.
Table of Contents
- What you need for a reliable campervan energy storage system
- Step-by-step installation guide for campervan energy storage
- Battery management essentials: monitoring State of Charge and avoiding common errors
- Safety and compliance: key rules for installing and upgrading in 2026
- Why most campervan energy upgrades fail and what actually works
- Upgrade your system with reliable, compliant solutions
- Frequently asked questions
Key Takeaways
| Point | Details |
|---|---|
| Regulations are changing | BS 7671 introduces key safety requirements—always check UK compliance when upgrading campervan systems. |
| Lithium isn’t a drop-in | Switching battery types means checking compatibility of chargers and battery management systems for safe use. |
| Monitor and synchronise | Proper use of battery monitors and regular synchronisation prevents power surprises off-grid. |
| Plan before you upgrade | List equipment, check safety codes, and follow proven UK guides for reliable and legal campervan energy storage. |
What you need for a reliable campervan energy storage system
Now that you know what’s at stake, let’s get clear on what you must have before starting any energy upgrade.
The foundation of any campervan energy setup is choosing the right battery chemistry. AGM (Absorbent Glass Mat) batteries are sealed lead-acid units. They are robust, affordable, and widely supported by older chargers. Lithium batteries, specifically LiFePO4 (Lithium Iron Phosphate), offer significantly higher usable capacity, a much longer cycle life, and lower weight. A typical 100Ah AGM delivers around 50Ah of usable energy before damage occurs. A 100Ah LiFePO4 delivers closer to 95Ah usably. That difference is decisive for extended off-grid use.
Both battery types carry regulatory requirements under British Standards. The BS 7671 standard now adds battery guidance through a dedicated battery-storage chapter focusing on installation design, isolation, ventilation, and fire-risk mitigation. This affects any new installation or significant upgrade in a leisure vehicle. Understanding energy storage basics before you purchase components saves costly mistakes.
Key components table
| Component | AGM typical spec | Lithium (LiFePO4) typical spec | Notes |
|---|---|---|---|
| Battery bank | 100Ah to 200Ah | 100Ah to 300Ah | Lithium allows more usable capacity |
| BMS | Not required externally | Required (internal or external) | Protects against over-discharge/charge |
| Charger | Standard lead-acid profile | Lithium-specific profile | Check charger compatibility |
| Battery monitor | Optional but recommended | Strongly recommended | Essential for SoC accuracy |
| Fuse/MCB rating | Sized to cable | Sized to cable | Per BS 7671 requirements |
| Cable gauge | Minimum 16mm² for high loads | Minimum 16mm² for high loads | Larger gauge for longer runs |
| Ventilation | Required for AGM off-gassing | Less critical but still required | Prevents heat and gas build-up |
Essential features for UK compliance
When selecting components, confirm the following:
- Isolation switches: A dedicated battery isolation switch is mandatory. It must be accessible and clearly labelled.
- Overcurrent protection: Fuses or circuit breakers must be rated correctly for cable gauge and load. Place fuses as close to the battery positive terminal as practicable.
- Ventilation provision: AGM batteries can off-gas hydrogen. Lithium batteries generate heat. Both require adequate airflow in the battery compartment.
- Fire-risk mitigation: No combustible materials directly adjacent to battery terminals or wiring. Use heat-resistant sleeving on exposed terminals.
- Serviceable installation: All components must be accessible for inspection, testing, and replacement without dismantling the entire vehicle interior.
- Clear documentation: A wiring diagram kept in the vehicle is strongly recommended and increasingly expected during insurance or MOT assessments.
Across the UK, lithium battery installations in campervans have increased sharply since 2022. Installers report that fire incidents predominantly trace back to incorrect fusing or incompatible charger profiles, not battery chemistry itself. Proper component selection resolves both risks before they occur.
Step-by-step installation guide for campervan energy storage

From knowing your toolkit and supplies, it’s time to actually fit or upgrade your campervan’s energy system.
Whether you are fitting a new system from scratch or upgrading an existing AGM setup, the sequence matters. Rushing the wiring stage or skipping charger compatibility checks causes the majority of post-installation failures.
- Disconnect all power sources. Isolate the vehicle’s starter battery, remove any shore power connection, and disconnect any existing leisure battery. Work with no live circuits.
- Plan your layout before mounting anything. Measure cable runs from the battery location to the distribution point. Longer runs require larger cable gauges to manage voltage drop.
- Mount the battery securely. Batteries must be restrained against movement. Use a battery box or a purpose-built cradle. Secure it with straps or bolts rated for the battery weight.
- Install the main fuse first. The fuse or circuit breaker goes between the battery positive terminal and every other connection. Size it to protect the cable, not just the load.
- Connect the BMS (lithium only). If your lithium battery has an external BMS, install and configure it before connecting any charger. The BMS controls charge acceptance and protects the cells.
- Run and connect the charger. This step is where AGM and lithium installations diverge most significantly. As noted in guidance on Campervan LiFePO4 Batteries, you cannot treat lithium as a drop-in AGM replacement without checking charge profiles, BMS expectations, and charger compatibility. A charger set to AGM profile can trigger BMS protection or cause overcharge on a lithium bank.
- Install the battery monitor shunt. The shunt goes on the negative cable between the battery negative terminal and the negative busbar. Every load and charge source must connect to the busbar, not directly to the battery terminal, or the monitor will read inaccurately.
- Connect loads and secondary charge sources. Solar MPPT controllers, DC/DC converters, and inverters all connect at the distribution busbars. Label each connection at both ends.
- Carry out pre-energisation checks. Verify polarity on every connection. Check all fuse ratings. Confirm ventilation gaps are clear. Only then reconnect the main isolation switch.
- Test under load. Run a known load (a 12V compressor fridge is reliable for this) and observe the battery monitor. Confirm the State of Charge reading responds correctly and the charger enters the correct charge stage.
For a detailed walkthrough specific to LiFePO4, the step-by-step lithium install guide covers cell-level detail. For a full technical breakdown of which battery suits your use case, the lithium vs AGM comparison is a useful reference before committing to either chemistry.
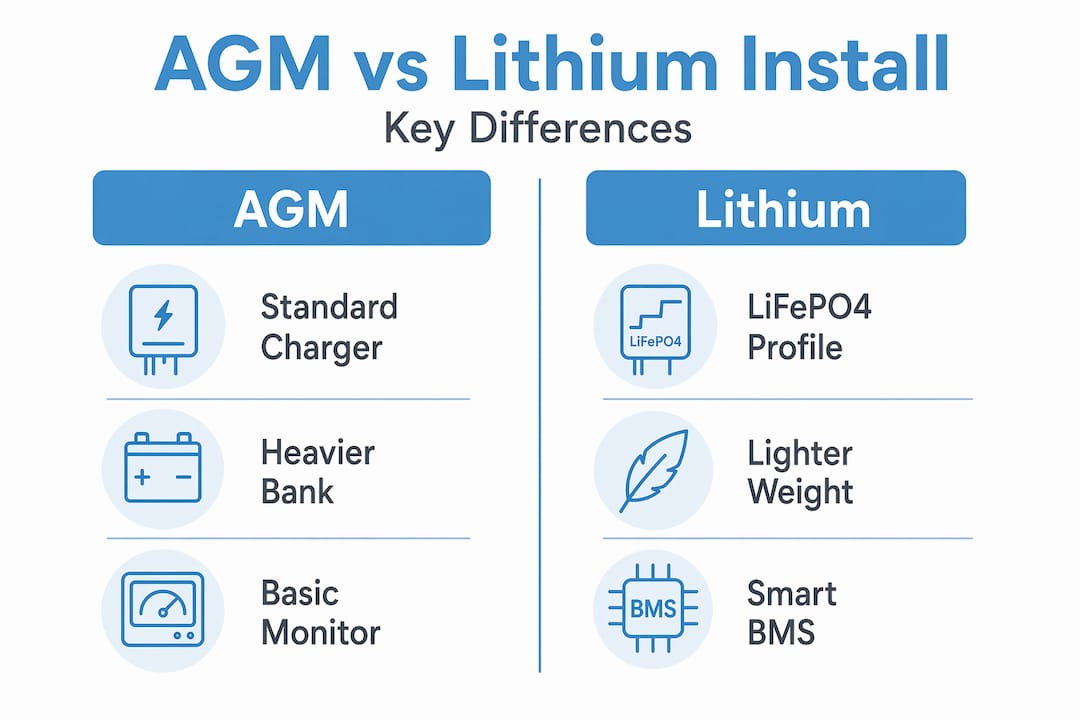
AGM vs lithium: key installation differences
| Installation step | AGM | LiFePO4 |
|---|---|---|
| Charger profile | Standard lead-acid multi-stage | Lithium-specific (constant current, specific absorption voltage) |
| BMS requirement | None externally | Mandatory (internal or external) |
| Ventilation | Required for off-gassing | Required for heat management |
| Charge termination | Voltage-based | BMS-controlled |
| Drop-in replacement | Yes (same chemistry) | No, requires full charger/profile review |
Pro Tip: Pre-label every cable with a cable tag at both ends before installing. Use a simple code such as B+ (battery positive), S- (solar negative), and so on. When you revisit the system six months later or hand it to a technician, the documentation pays for itself in minutes saved.
Battery management essentials: monitoring State of Charge and avoiding common errors
With your new system fitted, avoiding common monitoring mistakes is key to always knowing how much power remains.
State of Charge (SoC) is the percentage of usable energy remaining in your battery bank. It is the single most important figure for off-grid planning. Get it wrong and you either under-use your battery out of caution, or over-discharge and shorten its life significantly.
Battery monitors such as the Victron SmartShunt calculate SoC by counting coulombs in and out of the battery via the shunt. The calculation sounds simple, but real-world accuracy depends on correct setup and regular synchronisation. As the SmartShunt manual states, SoC inaccuracies are commonly caused by misconfiguration or failure to synchronise the battery monitor’s SoC with true full and empty conditions.
Common SoC monitoring mistakes
- Entering the wrong battery capacity. If your battery is 200Ah but the monitor is set to 100Ah, every reading is wrong from the start.
- Not synchronising after a full charge. The monitor resets SoC to 100% only when specific tail current thresholds are met. If your charger terminates early, the monitor never synchronises.
- Connecting loads directly to the battery terminal. Any current bypassing the shunt is invisible to the monitor, making SoC drift progressively worse.
- Ignoring the Peukert exponent setting. This setting accounts for efficiency losses at high discharge rates. It varies between AGM and lithium and must be set correctly for accurate readings.
- Failing to account for temperature. Cold significantly reduces effective battery capacity. Many monitors offer temperature compensation inputs that should be connected and configured.
Technical note: Battery monitors do not measure voltage and call it SoC. They integrate current over time. This means that any unmonitored current path, whether a parasitic load or a charge source bypassing the shunt, accumulates as a permanent SoC error. Every connection in the system must pass through the shunt.
For a broader view of how monitoring integrates with the rest of your campervan’s electrical system, the energy storage monitoring guide covers system workflow in practical terms.
Pro Tip: Once a month, run your battery to a known state (fully charged, absorb stage complete) and allow the monitor to synchronise. This resets any accumulated drift and gives you a reliable baseline for the weeks ahead.
Safety and compliance: key rules for installing and upgrading in 2026
Once your system is running, ongoing safety and legal compliance keep your upgrades hassle-free and road legal.
The 2026 updates to BS 7671 are not optional guidance. They carry weight in insurance assessments and, increasingly, in campsite and ferry crossing acceptance checks. The revised BS 7671 requirements introduce a dedicated battery-storage chapter that applies to installations in leisure vehicles as well as fixed premises.
Practical compliance checklist
- Isolation: Every battery installation must include a main isolation device accessible without tools. Label it clearly as the battery isolator.
- Overcurrent protection: Fuse or breaker must be within 300mm of the battery positive terminal where practicable, sized for the cable not the load.
- Ventilation: Battery compartments must have passive or forced ventilation to prevent gas accumulation. For AGM, hydrogen off-gassing during charge is the primary risk. For lithium, thermal management and heat dissipation matter most.
- Fire-risk mitigation: Maintain clearance between battery terminals and any metal vehicle body panels. Use insulating terminal covers. Avoid routing positive cables near sharp edges.
- Serviceability: Every component must be reachable without dismantling fixed cabinetry. Access panels are an acceptable solution.
- Documentation: Keep a system wiring diagram, component datasheets, and installation date records in the vehicle. This is increasingly required for insurance claims after electrical incidents.
UK compliance note: If your campervan has been converted and you intend to sell it, or if you require commercial vehicle liability insurance, compliance with BS 7671 is a direct requirement. Non-compliant systems can void cover. This also applies to campsite hook-up access in some managed sites.
For a detailed breakdown of how battery chemistry affects compliance requirements, the AGM and lithium battery safety guide covers the specific rules for each type.
Why most campervan energy upgrades fail and what actually works
Most campervan electrical failures are not random. They are predictable outcomes of specific, avoidable decisions. After looking at many installations, the same root causes appear repeatedly.
Underspecced wiring is the leading cause. Owners frequently size cables for the device they are connecting rather than the maximum potential current draw of the circuit. A 12V inverter drawing 100 amps through 4mm² cable generates serious heat and voltage drop. Cable gauge must be sized for the run length and the peak current, not the average.
Mismatched battery and charger combinations are the second most common failure point. This is especially true when owners upgrade batteries but retain their original charger. A 10-year-old AGM charger running against a new LiFePO4 bank will either undercharge (short cycling), overcharge (trigger BMS shutdown), or, in the worst case, damage cells. The in-depth lithium battery setup guide addresses exactly this scenario.
Copying unverified online guides is a consistent problem. Many YouTube walkthroughs show installations that would fail a BS 7671 inspection: missing fuses at the battery terminal, AGM chargers connected to lithium banks, and no battery monitors fitted. These videos receive high view counts precisely because they skip the steps that matter most. Checking against credible UK-specific guidance before committing to an installation approach is not optional if you want a system that is safe and insured.
Skipping monitoring hardware saves money once and costs repeatedly. Without a battery monitor, SoC is guesswork. Owners either over-discharge lithium banks (damaging cells and voiding warranties) or run AGM banks flat (permanently reducing capacity). A quality shunt-based monitor typically pays for itself after a single avoided battery replacement.
The practical approach is to plan the entire system before buying any individual component. Define your daily energy consumption in watt-hours. Size the battery to deliver that with margin. Size the charging sources to replenish the bank in a realistic timeframe. Size every cable to handle the maximum current of its circuit. Then verify every element against BS 7671 requirements before installation. That sequence, followed consistently, is what separates reliable systems from frustrating ones.
Upgrade your system with reliable, compliant solutions
For those seeking peace-of-mind upgrades with no corners cut, these solutions are a smart next step.
Skyenergi supplies professional-grade energy storage components and complete upgrade kits designed specifically for the UK market. Every product is selected for verified compatibility, UK compliance suitability, and long-term reliability.

The range covers everything from solar and battery kits combining Victron MPPT controllers with high-output solar panels, through to precision battery interface solutions for advanced monitoring and system integration. Many products feature Bluetooth-enabled BMS units, allowing real-time SoC tracking and system health checks directly from your phone. Browse the full energy upgrade range to find components matched to your system size, chemistry, and compliance requirements. Expert guidance is available for owners unsure which configuration best suits their setup.
Frequently asked questions
Do I need to change my charger when switching from AGM to lithium batteries?
Yes. Lithium batteries require specific charging profiles and a compatible BMS. As confirmed in guidance on LiFePO4 installations, treating lithium as a drop-in AGM replacement without checking charge compatibility risks cell damage or BMS shutdown.
What’s the most common mistake with battery monitors in campervans?
Misconfiguring the monitor or failing to synchronise State of Charge after a full charge cycle is the most common error. The SmartShunt documentation identifies this as the primary source of SoC inaccuracy in real-world installations.
Does my campervan energy system need to meet the latest UK regulations?
Yes. The updated BS 7671 standard now includes a dedicated battery-storage chapter covering installation design, isolation, ventilation, and fire-risk mitigation requirements applicable to leisure vehicles.
How do I keep my energy storage system safe?
Follow the BS 7671 requirements for isolation, ventilation, overcurrent protection, and regular inspection. Use quality components from reputable suppliers and keep system documentation in the vehicle at all times.
Recommended
Prev post

The role of lithium in mobile power for off-grid adventures
Updated on 16 May 2026
Next post

Why install lithium in motorhomes: Key benefits explained
Updated on 14 May 2026


