


Essential solar installation checklist for UK leisure vehicles 2026
Complete solar installation checklist for UK leisure vehicles covering energy needs, panel selection, UK electrical standards, battery choices, and safe setup for reliable off-grid power.
Installing solar panels on your leisure vehicle transforms how you explore the UK, offering genuine energy independence without relying on campsite hookups. Yet many owners struggle with choosing the right components, understanding electrical standards, and ensuring safe installation that actually delivers reliable power throughout the year. This comprehensive checklist guides you through every critical decision, from calculating your energy needs based on realistic UK solar yields to selecting compatible batteries and monitoring systems. You’ll learn which panel types suit British weather, how to comply with UK wiring regulations, and practical installation steps that prevent costly mistakes. Whether you’re converting a campervan or upgrading a motorhome, this structured approach ensures your solar system works efficiently from day one.
Table of Contents
- Understanding Your Energy Criteria
- Choosing Your Solar Panel Type And Placement
- Understanding UK Electrical Standards And Safe Installation
- Selecting Batteries And Monitoring For Optimal Performance
- Explore Professional Solar Kits And Expertise At Skyenergi
- FAQ
Key takeaways
| Point | Details |
|---|---|
| Energy needs drive system size | Calculate daily consumption against seasonal UK solar output to determine panel wattage and battery capacity required. |
| UK electrical compliance is mandatory | Installations must follow BS 7671 Sections 712 and 721 for safety, voltage limits, and proper insulation standards. |
| Battery choice affects long-term performance | Lithium batteries offer superior lifespan and energy density compared to AGM, with monitoring systems reducing failures significantly. |
| Panel placement maximises efficiency | Roof mounting with mono-crystalline panels captures limited UK sunlight most effectively when positioned away from shade. |
| Modular systems provide best value | Compatible, quality components allow future expansion and ensure reliable integration across your entire power setup. |
Understanding your energy criteria
Before purchasing any solar equipment, you need a realistic picture of your daily energy consumption. List every device you’ll power regularly: lights, water pump, phone chargers, laptop, fridge, heating fan. Assign each item its wattage and estimated hours of daily use, then multiply to get watt-hours consumed. A typical setup might consume 800-1,500Wh daily, but your actual needs depend entirely on lifestyle and appliances.
UK solar yields fluctuate dramatically between seasons, directly impacting how much energy your panels generate. A 300W campervan solar panel will typically generate 900-1,200Wh per day in a UK summer, providing ample power for moderate consumption. However, in winter, a 300W campervan solar panel output is much lower, generating 150-300Wh per day in the UK, which barely covers essential loads. This seasonal variation means you must dimension your system for worst-case scenarios or accept reduced capability during darker months.
Use your consumption figure alongside estimated solar output to calculate minimum panel wattage and battery capacity. If you consume 1,000Wh daily and expect 300Wh winter generation from solar, you’ll need substantial battery reserves to bridge the gap, plus alternator charging or mains hookup during extended periods. Solar works best as part of a balanced energy system rather than sole power source in UK conditions. Review our solar battery connection guide for integration strategies that maximise reliability.
Pro Tip: Start with a realistic energy budget that accounts for UK climate limitations, then build a modular system you can expand later. Installing 200W initially with proper wiring and mounting allows easy addition of another 100-200W panel when budget permits, avoiding over-investment upfront whilst maintaining upgrade flexibility.
Consider these key factors when sizing your system:
- Daily energy consumption based on actual appliance usage patterns
- Seasonal solar yield variation requiring battery buffer capacity
- Alternator charging contribution during driving to supplement solar
- Future expansion possibilities through modular component selection
- Realistic expectations for winter performance in UK latitudes
Once you’ve established your energy criteria, explore campervan battery upgrade steps to ensure your storage capacity matches panel output effectively.
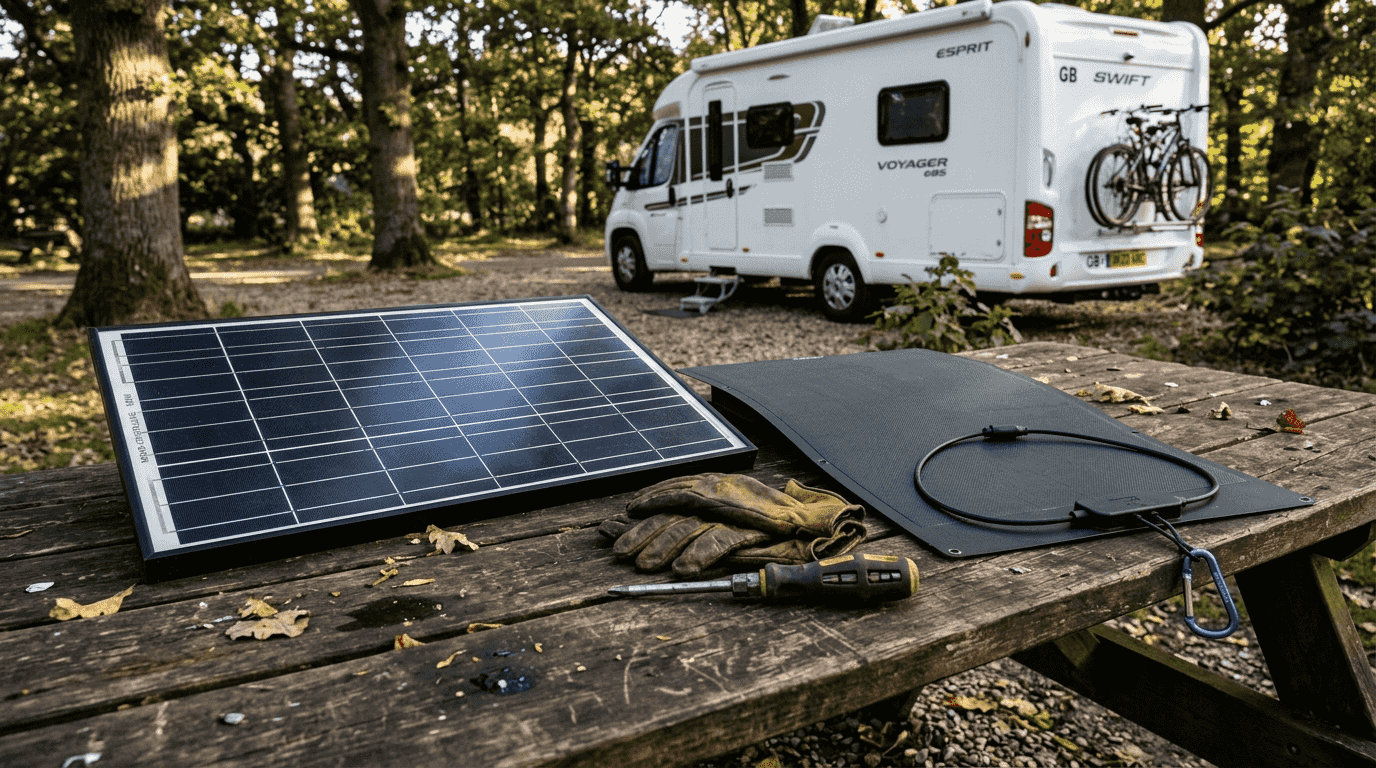
Choosing your solar panel type and placement
Solar panels for leisure vehicles come in two main formats: rigid and flexible. Rigid panels offer superior durability, better heat dissipation, and typically higher efficiency ratings, making them ideal for permanent roof installations. Flexible panels are lighter and conform to curved surfaces, but generally cost more per watt, degrade faster, and suffer efficiency losses from heat buildup. For UK conditions where every percentage of efficiency matters during limited sunlight hours, rigid panels represent better long-term value.
Mono-crystalline panels are the preferred technology for British leisure vehicles due to their superior performance in low-light conditions. Solar panel efficiency typically ranges from 18-22% for rigid panels, with mono-crystalline variants achieving the higher end of this spectrum. Mono-crystalline panels deliver 20-22% efficiency with adjustable mounts, ideal for capturing limited UK sunlight. This efficiency advantage translates directly into more usable power from the same roof space, critical when vehicle dimensions constrain total panel area.
The optimal placement for solar panels on a caravan is typically the roof, maximising direct sunlight exposure. Avoid positioning panels where roof vents, aerials, or air conditioning units cast shadows, as even partial shading dramatically reduces output. Survey your roof layout carefully, measuring available clear space and noting any obstructions that move with sun angle throughout the day.
Follow these steps for secure panel mounting:
- Clean the roof surface thoroughly with isopropyl alcohol, removing all dirt, grease, and old sealant residue.
- Position panels to avoid existing roof penetrations and maintain access to vents or skylights.
- Mark fixing points using the panel frame as template, ensuring adequate spacing from roof edges.
- Apply marine-grade sealant to mounting feet or brackets before securing with self-tapping screws into roof structure.
- Run cables to roof entry point using cable glands with double waterproof seals rated for outdoor exposure.
- Apply additional sealant around all penetrations and allow full curing time before testing.
Common installation methods include:
- Adhesive mounting using VHB tape or sikaflex for lightweight panels on smooth surfaces
- Bracket mounting with screws into roof battens for maximum security and adjustability
- Spoiler mounting systems that elevate panels for airflow and angled positioning
- Integrated mounting rails allowing multiple panel expansion with consistent aesthetics
For practical guidance on optimising your setup after installation, review our expert solar charging tips covering positioning, maintenance, and performance monitoring.
Understanding UK electrical standards and safe installation
UK wiring regulations under BS 7671 govern solar installations on leisure vehicles to ensure safety and prevent electrical hazards. Two key sections apply: Section 712 covers photovoltaic power supply systems, whilst Section 721 addresses caravans and motor caravans specifically. Understanding these standards protects you legally and ensures your installation won’t void vehicle insurance or fail safety inspections.
Section 712 allows up to 1500 V DC with double or reinforced insulation for solar PV systems on motorhomes, far exceeding typical leisure vehicle system voltages. Most campervan solar setups operate at 12V or 24V, well within safe limits when properly insulated. Installations must conform to Section 721 for protective measures and Section 712 for solar PV, with no voltage limits beyond these when compliant. This means following correct cable sizing, fusing, and earthing procedures matters more than arbitrary voltage restrictions.
Voltage classification determines insulation requirements for your installation. SELV (Separated Extra-Low Voltage) and PELV (Protective Extra-Low Voltage) systems under 50V AC or 120V DC require basic insulation, whilst higher voltages demand double or reinforced insulation. Most leisure vehicle solar operates in SELV territory, but all connections must still use appropriate cable types rated for DC voltage and outdoor conditions.
Implement these safety measures for compliant installations:
- Install appropriately rated fuses or circuit breakers within 300mm of battery positive terminal
- Use cable sizes that handle maximum current without voltage drop exceeding 3%
- Employ double-insulated cables rated for UV exposure and temperature extremes
- Fit weatherproof cable glands at all roof penetrations with IP67 minimum rating
- Label all DC circuits clearly indicating voltage and current ratings
- Maintain accessible isolation points for both solar and battery circuits
Pro Tip: Hire or consult a qualified electrician specialising in leisure vehicle solar for legal compliance and warranty protection. Whilst competent DIY installation is possible, professional verification ensures your work meets current standards and won’t create liability issues if problems arise later. Many insurers require certified electrical work for modified vehicles.
Safe cable entry requires careful execution to prevent water ingress and maintain vehicle structural integrity. Drill the smallest hole necessary for your cable gland, apply sealant generously around the gland body, and route cables with drip loops that prevent water tracking into the vehicle interior. Inside, protect cables with conduit or trunking, securing them away from sharp edges and moving parts. For detailed workflow guidance, see our solar charging workflow tutorial.
Selecting batteries and monitoring for optimal performance
Battery choice profoundly impacts your solar system’s reliability, lifespan, and daily usability. Two main technologies dominate the leisure vehicle market: lithium (LiFePO4) and AGM (Absorbed Glass Mat) lead-acid. Lithium batteries offer five times longer lifespan and 30-40% higher energy density compared to AGM alternatives. A 100Ah lithium battery provides usable capacity equivalent to a 200Ah AGM because you can safely discharge lithium to 20% remaining versus 50% for AGM without damaging the cells.
Lithium batteries also perform significantly better in cold UK winters, maintaining charge acceptance and delivery capacity down to freezing temperatures where AGM efficiency plummets. The higher upfront cost of lithium is offset by longer lifespan (typically 3,000-5,000 cycles versus 300-500 for AGM), reduced weight saving fuel, and faster charging from solar input. For serious off-grid use, lithium represents better long-term value despite initial expense.
Monitoring systems transform how you manage your leisure vehicle power, providing real-time visibility into battery state of charge, solar input, and consumption patterns. Bluetooth monitoring reduces power failures by up to 40% through proactive maintenance. Instead of guessing remaining capacity or discovering a dead battery, you receive accurate data via smartphone app, allowing informed decisions about energy usage and charging needs.
Size your battery bank by calculating total daily consumption, then multiplying by the number of days’ autonomy you want without solar input. If you consume 1,000Wh daily and want three days’ reserve for cloudy weather, you need 3,000Wh capacity. For a 12V system, that’s 250Ah usable capacity, requiring a 250Ah lithium battery or 500Ah AGM battery bank. Always account for seasonal solar variation when determining autonomy requirements.
| Battery Type | Lifespan (Cycles) | Usable Capacity | Weight (100Ah) | Cold Performance | Cost |
|---|---|---|---|---|---|
| Lithium LiFePO4 | 3,000-5,000 | 80-100% | 12-15kg | Excellent | High |
| AGM Lead-Acid | 300-500 | 50% | 25-30kg | Poor | Low |
| Gel Lead-Acid | 500-800 | 50% | 28-32kg | Moderate | Medium |
Pro Tip: Choose compatible, quality branded components for system longevity and safety. Mixing cheap controllers with premium batteries or using incompatible charge profiles damages cells and voids warranties. Stick with established brands like Victron, SRNE, or Skyenergi’s own lithium range that offer proven integration and proper battery management systems.
Consider these factors when selecting your battery:
- Chemistry compatibility with your solar charge controller settings
- Physical dimensions and weight distribution in your vehicle
- Built-in battery management system for cell balancing and protection
- Bluetooth monitoring capability for ongoing performance tracking
- Expandability for future capacity increases through parallel connection
- Manufacturer warranty terms and UK-based support availability
Explore our lithium battery setup guide for detailed installation instructions, and review solar battery integration benefits to understand how proper pairing maximises your investment.
Explore professional solar kits and expertise at Skyenergi
Building a reliable solar system for your leisure vehicle requires more than individual components. You need properly matched equipment that integrates seamlessly, backed by expertise that ensures correct specification for your specific requirements. Skyenergi specialises in complete solar power electrics systems combining inverter, charger, and battery management in turnkey solutions designed for UK leisure vehicles.

Our product range includes high-quality Victron components trusted by thousands of UK motorhome and campervan owners, such as the Victron Energy EasySolar-II system offering integrated solar charging, inverting, and monitoring in a single unit. We also supply our own lithium leisure batteries with intelligent BMS and Bluetooth monitoring, plus complete SRNE turnkey solutions for straightforward installation.
Visit Skyenergi to explore our full range and contact our technical team for bespoke advice on your solar project. We help you avoid costly mistakes by recommending compatible components matched to your energy needs and budget.
Key benefits of choosing Skyenergi:
- Quality components sourced directly from manufacturers for competitive pricing
- Complete system compatibility ensuring reliable integration and performance
- Expert technical support from specialists in leisure vehicle solar installations
- Expandable solutions allowing future capacity increases without replacing existing equipment
FAQ
How much solar power do I really need for my UK leisure vehicle?
Your required solar capacity depends on daily device usage and UK seasonal sunlight variation. Calculate total watt-hours consumed by all appliances, then compare against realistic solar generation for your planned travel months. Commonly, a 200-300W panel paired with suitable battery capacity works for moderate energy needs like lighting, phone charging, water pump, and occasional laptop use. Heavier loads such as electric heating, air conditioning, or constant fridge operation require larger arrays, potentially 400-600W, especially for winter use when solar output drops dramatically.
Can I install campervan solar panels myself or should I hire a pro?
Simple panel mounting is achievable for skilled DIYers comfortable with basic tools and following instructions carefully. You can safely handle physical installation, roof sealing, and cable routing if you research proper techniques and use quality materials. However, electrical work connecting panels to charge controllers, batteries, and distribution systems should meet UK standards and often requires qualified installer involvement for safety and warranty compliance. Many owners successfully mount panels themselves, then hire an electrician for final connections and system commissioning.
What maintenance does a leisure vehicle solar system require?
Regular cleaning of panels and visual checks of connections ensure optimal performance and longevity. Wash panels with clean water and soft cloth every few months, removing dirt, bird droppings, and tree sap that reduce output. Inspect cable connections annually for corrosion, loose terminals, or damaged insulation, tightening and treating as needed. Using Bluetooth monitoring can help proactively detect and prevent failures by alerting you to unusual voltage patterns, reduced charging current, or battery issues before they cause complete system shutdown. Most quality systems require minimal intervention beyond basic cleaning and occasional inspection.
Recommended
Prev post

Why use energy storage in campervans for off-grid freedom
Updated on 17 March 2026
Next post

What is energy storage for campervans: a 2026 UK guide
Updated on 15 March 2026


