


Examples of leisure battery setups for off-grid UK vehicles
Discover proven leisure battery setup examples for UK campervans and boats. Compare lithium vs AGM, explore DIY builds, and learn what works for reliable off-grid power.
Choosing the right leisure battery setup transforms your campervan or boat into a reliable off-grid home. UK owners juggle competing priorities: upfront cost versus long-term value, weight restrictions versus capacity needs, and charging flexibility versus system complexity. This article walks you through proven real-world examples, from DIY lithium builds delivering 3000+ cycles to standardised campervan systems combining solar MPPT and alternator charging. You’ll see exactly how experienced owners configure their setups, what components they choose, and why those decisions matter for your own installation.
Table of Contents
- Key Criteria For Choosing Your Leisure Battery Setup
- Example 1: DIY Lithium Lifepo4 Battery Bank For Boats
- Example 2: Standard UK Campervan Battery Setup
- Comparing Lithium And AGM Setups For Leisure Vehicles
- Explore Expert Leisure Battery Solutions At Skyenergi
- Frequently Asked Questions
Key takeaways
| Point | Details |
|---|---|
| LiFePO4 batteries deliver superior performance | Lithium setups offer 90-100% usable capacity and 3000-5000+ cycles compared to AGM’s 50% depth and 600-1200 cycles. |
| Charging flexibility maximises off-grid reliability | Combining solar MPPT, DC-DC alternator charging, and mains backup ensures power in all conditions. |
| DIY lithium builds reduce costs significantly | Building your own battery bank from quality cells with proper BMS cuts expenses whilst maintaining safety and longevity. |
| System integration requires careful planning | Correct cable sizing, protection devices, and battery management prevent voltage drop and hazards. |
| Chemistry choice impacts total ownership cost | Lithium costs more initially but delivers lower cost per cycle over the battery’s lifespan. |
Key criteria for choosing your leisure battery setup
Selecting your leisure battery setup starts with understanding how different factors interact. Battery type sits at the centre of every decision. Lithium batteries offer 90-100% depth of discharge and 3000-5000+ cycles, significantly outlasting AGM alternatives that provide only 50% usable capacity and 600-1200 cycles. This performance gap affects everything downstream: how much battery weight you carry, how often you replace components, and what charging infrastructure makes sense.
Weight matters enormously for campervans and boats. Lithium batteries weigh roughly half what AGM batteries do for equivalent usable capacity. A 200Ah lithium battery might weigh 25kg, whilst an AGM delivering similar usable power weighs 50kg or more. That weight difference compounds when you need multiple batteries, potentially freeing up payload for water tanks, equipment, or passengers.
Charging options shape system reliability and complexity. Charging methods include solar MPPT, alternator DC-DC chargers, mains hook-up with 3-stage chargers, and generators. Each method suits different scenarios: solar excels during sunny days at anchor or on site, alternator charging captures energy whilst driving, mains provides rapid top-ups at campsites, and generators offer backup when weather turns poor. Most robust setups combine at least two methods.
Safety features protect your investment and prevent hazards. Battery management systems monitor cell voltages, temperatures, and current flow. They disconnect loads or charging sources when parameters exceed safe limits. Quality BMS units also balance cells during charging, ensuring even wear across your battery bank. These systems prove essential for lithium setups where cell imbalance can reduce lifespan.
Compatibility determines whether components work together efficiently. Your alternator needs protection from lithium batteries’ aggressive charging behaviour, hence DC-DC chargers. Solar panels require MPPT controllers matched to battery voltage and chemistry. Inverters must handle your battery bank’s voltage and deliver enough power for your appliances. Cable sizing prevents voltage drop: undersized cables waste energy as heat and can create fire risks. Calculate cable cross-sectional area based on current draw and cable length, then add margin for safety.
Pro Tip: Always install main fuses or circuit breakers near battery terminals. These protect against short circuits and make maintenance safer by providing clear isolation points.
Key considerations checklist:
- Battery chemistry determines cycle life, weight, and charging characteristics
- Usable capacity differs from rated capacity, especially for AGM batteries
- Charging infrastructure should match your typical usage patterns
- Safety devices like BMS and fuses are non-negotiable for lithium setups
- Cable sizing affects efficiency and safety throughout your system
Example 1: DIY lithium LiFePO4 battery bank for boats
This marine installation demonstrates how DIY builders achieve professional results whilst controlling costs. The owner assembled a 30kWh LiFePO4 boat battery bank made from 56 CALB cells with Orion BMS2 and Victron solar supports 3000-5000 cycles and full off-grid living. Those 56 cells connect in series and parallel configurations to deliver both the voltage and capacity needed for extended cruising.
CALB cells offer exceptional value for DIY builders. These prismatic LiFePO4 cells come in various capacities, typically 100Ah to 300Ah per cell. The builder selected cells matching their voltage requirements, then connected them with heavy copper busbars to minimise resistance. Each cell requires compression to prevent internal movement during boat motion. Custom aluminium frames hold cells firmly whilst allowing thermal expansion.
The Orion BMS2 handles safety and monitoring duties. This system tracks individual cell voltages, disconnecting charging or loads if any cell strays outside safe parameters. It also balances cells during charging by bleeding excess energy from higher-voltage cells as heat. The BMS communicates via Bluetooth, letting you monitor battery health from your phone. High-voltage and low-voltage contactors provide physical disconnection when the BMS detects problems.
Solar charging uses six 395W panels feeding Victron MPPT controllers. That 2.4kW solar array generates substantial power in good conditions, often exceeding daily consumption during summer months. The Victron controllers adjust charging profiles automatically based on battery voltage and temperature, maximising charge speed whilst protecting cells. Multiple controllers distribute the solar array, improving performance when partial shading affects some panels.
This setup supports several days of full off-grid operation. The 30kWh capacity powers refrigeration, navigation electronics, water pumps, lighting, and entertainment systems without rationing. Even heavy usage days consuming 10kWh leave ample reserve. The lithium chemistry’s 3000-5000 charge cycles mean this battery bank should last a decade or more with proper care.
Pro Tip: Source cells directly from reputable suppliers and test each cell’s capacity before assembly. Mismatched cells cause imbalance issues that reduce overall bank performance.
Building your own lithium battery bank requires careful attention to safety, but the cost savings and performance gains make it worthwhile for experienced DIY enthusiasts who understand electrical systems.
Component breakdown:
- 56 CALB LiFePO4 prismatic cells in custom compression frames
- Orion BMS2 with high-voltage and low-voltage contactors
- Six 395W solar panels with Victron MPPT controllers
- Heavy copper busbars for low-resistance cell connections
- Bluetooth monitoring for real-time system visibility
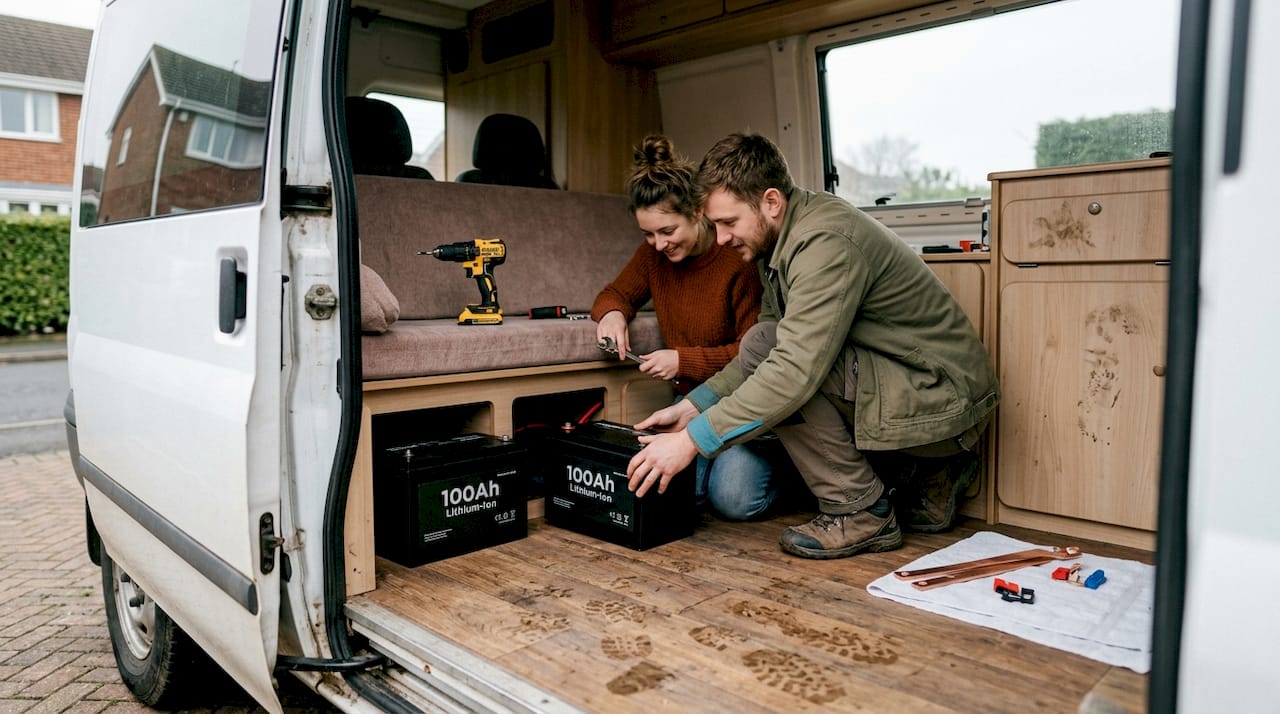
Example 2: standard UK campervan battery setup
This configuration represents industry best practice for UK campervan conversions. Typical UK campervan wiring: solar panels feed MPPT controllers which charge LiFePO4 batteries connected in series/parallel, distributing power via busbars to DC loads and inverter; alternator charges using DC-DC charger with main fuses and isolators. The design balances cost, reliability, and ease of installation.
Solar panels mount on the roof, typically 200W to 400W total capacity for a small campervan. These panels connect to MPPT charge controllers that extract maximum power regardless of shading or temperature variations. The controllers adjust their input voltage continuously, finding the sweet spot where panels deliver peak watts. This efficiency gain matters enormously during marginal weather when every watt counts.
LiFePO4 batteries form the system heart. Most campervan builders use two to four 100Ah batteries, configured in series for 24V systems or parallel for 12V systems. Series connections double voltage whilst maintaining capacity; parallel connections double capacity whilst maintaining voltage. The lithium battery setup guide for campervans explains these configurations in detail. Each battery includes an internal BMS protecting individual cells.
Busbars distribute power safely and efficiently. These copper or brass bars provide multiple connection points for positive and negative circuits. DC loads like lights, water pumps, and USB sockets connect directly to busbars through appropriately rated fuses. The inverter also connects to busbars, drawing power to generate 230V AC for laptops, phone chargers, and small appliances. Busbars simplify wiring and reduce connection points at battery terminals.
Alternator charging uses a DC-DC charger rather than direct connection. Lithium batteries accept charge aggressively, potentially overloading alternators designed for lead-acid batteries. The DC-DC charger limits current draw whilst optimising charge profiles for lithium chemistry. It also isolates the leisure battery from the starter battery, preventing you from flattening the starter battery and becoming stranded. Following proper solar battery connection steps ensures reliable operation.
Main fuses and isolators improve safety and maintenance access. A main fuse near the battery positive terminal protects against catastrophic short circuits. An isolator switch lets you disconnect the entire system for storage or maintenance without removing cables. These components cost little but provide essential protection.
| Component | Typical specification | Purpose |
|---|---|---|
| Solar panels | 200-400W total | Primary charging source during daylight |
| MPPT controller | 20-30A rating | Maximises solar panel efficiency |
| LiFePO4 batteries | 200-400Ah at 12V | Energy storage for off-grid operation |
| DC-DC charger | 30-50A output | Charges from alternator whilst driving |
| Inverter | 1000-2000W pure sine | Converts DC to AC for appliances |
| Busbars | 100-200A rating | Distributes power to multiple circuits |
System advantages:
- Multiple charging sources ensure power availability
- Lithium batteries provide high usable capacity in compact space
- Busbars simplify wiring and future modifications
- DC-DC charging protects vehicle alternator
- Main fuses and isolators enhance safety
Comparing lithium and AGM setups for leisure vehicles
The choice between lithium and AGM batteries shapes your entire electrical system. LiFePO4 batteries offer 90-100% depth of discharge, 3000-5000+ cycles, weigh 50% less, and charge faster than AGM, which have 50% usable capacity and 600-1200 cycles. These differences create cascading effects throughout your setup.
Weight savings from lithium batteries matter more than many owners initially realise. A 400Ah AGM battery bank might weigh 120kg, whilst an equivalent lithium setup weighs 60kg. That 60kg difference equals three weeks of food, extra water capacity, or additional equipment. For boats, weight affects performance and fuel consumption. For campervans, it preserves precious payload allowance.
Cycle life determines replacement frequency and long-term costs. AGM batteries reaching 50% depth of discharge daily last perhaps two years before capacity degrades noticeably. Lithium batteries used similarly might last eight to ten years. The higher upfront cost of lithium spreads across far more cycles, often resulting in lower cost per cycle despite the initial price premium. The lithium versus AGM comparison breaks down these economics thoroughly.
Charging efficiency affects how quickly you replenish energy. Lithium batteries accept charge at high rates throughout most of their charge cycle, often reaching 80% capacity in an hour or two. AGM batteries slow dramatically as they approach full charge, potentially taking six to eight hours for a complete charge. This difference matters when you have limited generator runtime or brief mains hook-up access.
Depth of discharge flexibility changes how you use your system. AGM batteries suffer shortened lifespan if regularly discharged below 50%, effectively halving their rated capacity. You need a 400Ah AGM bank to reliably deliver 200Ah daily. Lithium batteries handle 80-90% discharge routinely, so a 250Ah lithium bank delivers similar usable energy whilst weighing less and occupying less space.
| Factor | Lithium (LiFePO4) | AGM |
|---|---|---|
| Usable capacity | 90-100% of rated | 50% of rated |
| Cycle life | 3000-5000+ cycles | 600-1200 cycles |
| Weight | 50% lighter | Baseline |
| Charge speed | Fast throughout cycle | Slows significantly above 80% |
| Upfront cost | Higher | Lower |
| Cost per cycle | Lower over lifespan | Higher over lifespan |
| Temperature sensitivity | Good performance to 0°C | Better cold weather performance |
Pro Tip: Calculate total cost of ownership over five years rather than comparing upfront prices. Include replacement costs and the value of weight savings for a realistic comparison.
Lithium batteries revolutionise off-grid power by delivering more usable energy from less weight and space, whilst lasting several times longer than traditional alternatives despite higher initial investment.
Practical trade-offs to consider:
- Lithium requires compatible charging equipment and BMS
- AGM tolerates cold temperatures better, important for winter use
- Lithium delivers better return on investment for frequent users
- AGM suits occasional users on tight budgets
- Lithium systems need proper installation to realise benefits
Explore expert leisure battery solutions at Skyenergi
Skyenergi brings together the components discussed throughout this article into complete, integrated systems. Our solar power and electrics system combines quality batteries, charging infrastructure, and monitoring in packages designed specifically for UK leisure vehicles.

We supply Victron Energy components renowned for reliability and intelligent charging profiles that protect your batteries whilst maximising efficiency. The Victron Energy EasySolar II system integrates solar MPPT, inverter, and charger in one unit, simplifying installation and reducing potential failure points. System monitoring through Victron interfaces lets you track performance and diagnose issues quickly. Whether you’re building your first campervan electrical system or upgrading an existing boat installation, our team provides expert guidance tailored to your specific requirements and usage patterns.
Frequently asked questions
What types of leisure batteries are best for UK campervans?
LiFePO4 lithium batteries currently offer the best performance for most UK campervan applications. They deliver 90-100% usable capacity, last 3000-5000+ cycles, and weigh half what AGM batteries do for equivalent usable power. AGM batteries suit budget-conscious occasional users who can accommodate the extra weight and accept shorter lifespan. Gel batteries occupy a middle ground but rarely justify their cost premium over AGM for leisure vehicle use. Consider your usage intensity, weight restrictions, and budget when choosing. Frequent off-grid users benefit enormously from lithium’s advantages, whilst weekend campers might find AGM adequate. Review types of leisure batteries for detailed comparisons.
How can I extend the lifespan of my leisure battery setup?
Avoid deep discharges below 20% state of charge, even with lithium batteries rated for deeper discharge. Maintain appropriate charging voltages specific to your battery chemistry; incorrect voltages accelerate degradation. Use a quality battery management system that balances cells and prevents overcharge or over-discharge conditions. Keep batteries at moderate temperatures when possible, as both extreme heat and cold reduce lifespan. Store batteries at 50-60% charge if leaving your vehicle unused for extended periods. Regular monitoring helps catch problems early before they cause permanent damage. Clean terminals periodically to maintain good connections and prevent voltage drop from corrosion.
Is it safe to build a DIY lithium battery bank for off-grid use?
DIY lithium builds with proper BMS and contactors are safe and free from thermal runaway risks typical of other lithium chemistries. LiFePO4 cells used in leisure applications prove remarkably stable compared to lithium-ion chemistries in phones and laptops. The key lies in proper system design: quality BMS monitoring every cell, appropriately rated contactors that disconnect under fault conditions, correct fusing throughout the system, and proper cell compression to prevent internal movement. Source cells from reputable suppliers and test each cell before assembly. Follow established build guides and don’t improvise safety-critical components. If you lack electrical experience, consider pre-built battery systems with integrated BMS rather than DIY assembly.
What charging methods work best for leisure batteries in campervans and boats?
Common charging methods include solar MPPT controllers, alternator DC-DC chargers, mains 3-stage chargers, and generators, with recommendations to avoid mixing battery chemistries. Solar MPPT charging provides the most cost-effective power for sunny conditions and suits static camping or cruising. DC-DC chargers capture energy whilst driving, essential for touring campervans that move frequently. Mains hook-up with intelligent chargers offers rapid charging at campsites or marinas. Generators provide backup when weather prevents adequate solar generation. Most robust setups combine at least two methods, typically solar plus either DC-DC or mains. Match charging equipment to your battery chemistry; lithium batteries require different voltage profiles than AGM batteries. Never connect different battery types in parallel, as their different charging characteristics cause problems.
Recommended
Prev post

Achieve energy independence for motorhomes in 2026
Updated on 20 March 2026
Next post

Boat energy storage checklist: essential steps for UK owners 2026
Updated on 18 March 2026


