


Campervan energy independence workflow: UK guide
Master the campervan energy independence workflow with our UK guide! Learn to design and manage off-grid power systems effectively.
A campervan energy independence workflow is the structured process of designing, installing, and managing a mobile power system that reliably supports off-grid living. The industry term for this discipline is mobile energy systems design, and it covers everything from calculating daily consumption to selecting LiFePO4 batteries, sizing solar panels, and integrating DC-DC chargers. Get the workflow right and you can run a fridge, laptop, lighting, and charging points indefinitely without a hook-up. Get it wrong and you will be hunting for campsites with electric pedestals within two days. This guide covers the complete process, tailored to UK and northern European conditions where sunshine is never guaranteed.
What is a campervan energy independence workflow?
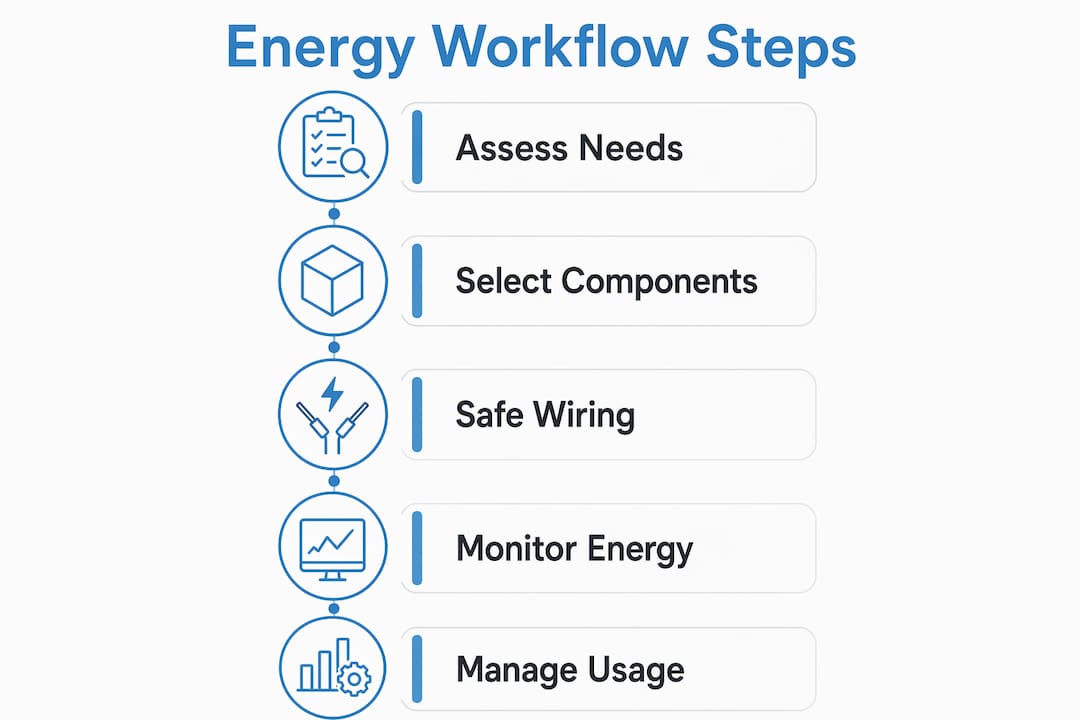
A campervan energy independence workflow is a repeatable, stage-by-stage process covering four phases: needs assessment, component selection, safe installation, and ongoing energy management. Each phase depends on the one before it. Skipping the needs assessment and jumping straight to buying panels is the single most common reason van owners end up with undersized or mismatched systems. The workflow applies equally to weekend users fitting a basic 100Ah setup and to full-time digital nomads running a multi-source charging strategy with 600W or more of solar.
Named entities appear throughout this guide because generic advice does not build reliable systems. Victron SmartSolar MPPT controllers, LiFePO4 leisure batteries, Victron SmartShunt monitors, and pure sine wave inverters are the specific components that define a well-engineered off-grid setup. Understanding how they interact is the core of the workflow.
How to assess your real daily energy needs
Accurate energy budgeting is the foundation of any off-grid campervan setup. Most people underestimate consumption because they forget standby loads, phone chargers, and the fridge compressor cycling overnight.
Follow this process to build a realistic energy budget:
- List every electrical device you plan to use, including the fridge, lighting, phone and laptop chargers, a diesel heater fan, a water pump, and any 240V appliances run through an inverter.
- Record the wattage of each device. Check the label or manufacturer specification. A 12V compressor fridge typically draws 40-60W when running, but only cycles 30-50% of the time.
- Estimate daily use hours for each device. A laptop running 6 hours at 45W consumes 270Wh per day. A fridge cycling at 50% for 24 hours at 50W consumes 600Wh.
- Total your daily Wh figure and add a 20% buffer for inefficiencies, wiring losses, and inverter conversion losses.
- Factor in autonomy days. Three-day cloudy weather scenarios are standard design criteria for campervan energy systems, which means your battery bank must cover at least three days of consumption without solar input.
- Adjust for lifestyle. A weekend user with a 150Wh daily load needs a very different system from a digital nomad requiring 600W or more of solar and 200-300Ah of LiFePO4 capacity to maintain energy security year-round.
Geography matters significantly here. A van parked in the Scottish Highlands in January will receive roughly 1-2 peak sun hours per day. The same van in southern Spain in July receives 6-7. Your system must be designed for your worst-case location, not your best.
Pro Tip: Build your energy budget in a spreadsheet with a column for summer and a column for winter. The gap between the two figures tells you exactly how much you need to rely on alternator charging or shore power during low-sun months.
Which components should you select for your system?
Component selection follows directly from your energy budget. The table below summarises the key hardware categories, the main options, and the recommended choice for most campervan builds.
| Component | Options | Recommended choice |
|---|---|---|
| Battery chemistry | AGM, Gel, LiFePO4 | LiFePO4 for longevity and usable capacity |
| Solar panels | Rigid monocrystalline, flexible | Rigid monocrystalline for efficiency and durability |
| Charge controller | PWM, MPPT | MPPT: 15-25% more energy harvest than PWM |
| DC-DC charger | Direct split charge relay, B2B charger | Isolated DC-DC charger for smart alternator compatibility |
| Inverter | Modified sine wave, pure sine wave | Pure sine wave for sensitive electronics |
LiFePO4 batteries are the correct choice for the vast majority of builds. A typical off-grid setup uses 200-400Ah of LiFePO4 capacity paired with 200-400W of solar panels and an MPPT charge controller. LiFePO4 cells tolerate deep cycling, weigh significantly less than AGM equivalents, and deliver a flat discharge curve that makes usable capacity predictable. For a deeper look at the different cell formats and configurations, the Skyenergi guide to lithium battery types covers the options clearly.
MPPT charge controllers, particularly the Victron SmartSolar range, outperform PWM controllers by converting excess panel voltage into additional charging current. On a roof with limited space, that efficiency gain is not marginal. It is the difference between a battery that reaches full charge by midday and one that never quite gets there.
A 30A DC-DC charger replenishes roughly 30Ah per hour of driving, making it a critical backup source in poor weather. Modern vehicles use smart alternators that vary output voltage, which means a direct connection or split charge relay will not work correctly. An isolated DC-DC charger is the only reliable solution.
Pro Tip: Size your pure sine wave inverter based on peak load, not average load. If you plan to run a 1,000W kettle, your inverter needs a continuous rating above 1,000W and a surge rating well above that. A 2,000-3,000W inverter covers most van builds without headroom issues.
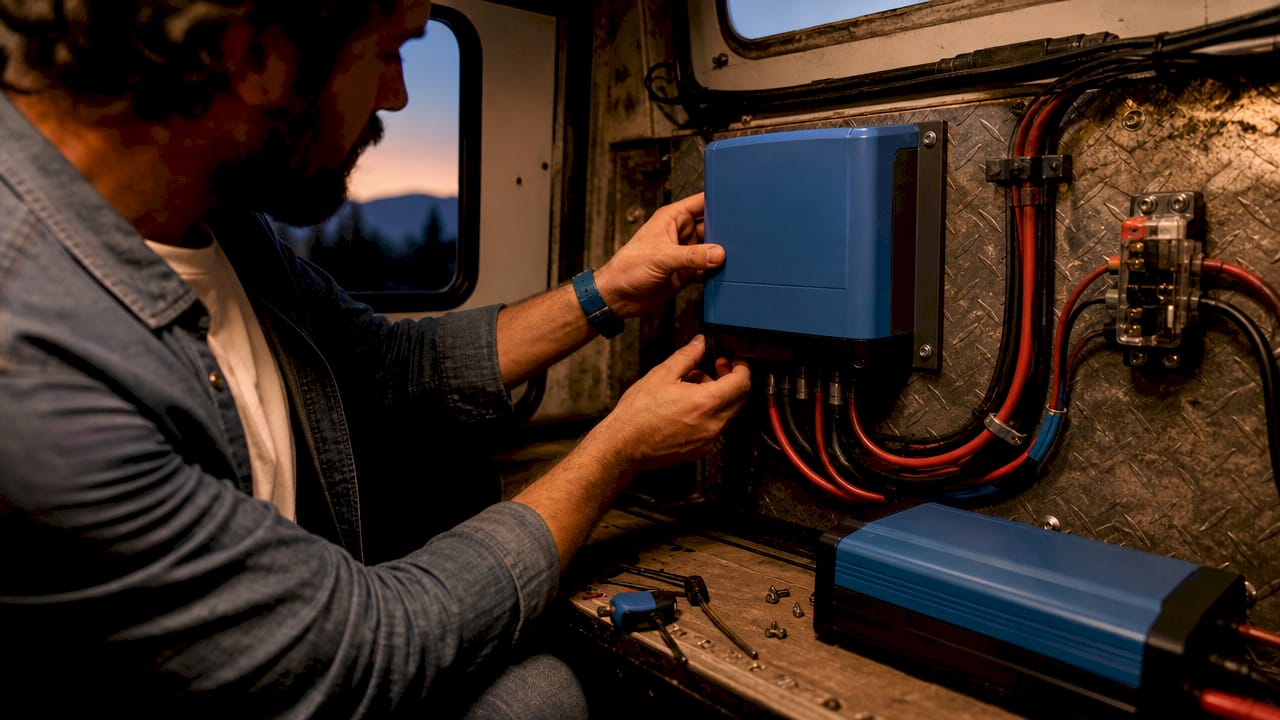
How to wire your campervan electrical system safely
Safe wiring is not optional. Incorrect wiring is a leading cause of electrical faults and fires in campervans, and the consequences of a wiring fault at 200A are severe. Follow this installation sequence:
- Mount the battery bank in a secure, ventilated location. LiFePO4 batteries do not off-gas under normal conditions, but airflow prevents heat build-up.
- Install the main fuse or ANL fuse holder within 12 inches of the battery positive terminal. Fuse placement within 12 inches of the battery positive is the single most critical safety rule in 12V systems.
- Run the main cable to a busbar or distribution block, then wire the MPPT charge controller, DC-DC charger, and inverter from the busbar with individual fuses for each circuit.
- Wire the 12V consumer circuits through a fused distribution panel. Each circuit, including lighting, USB sockets, water pump, and fridge, should have its own fuse rated to the cable, not the device.
- Connect the battery monitor shunt in the negative cable between the battery negative terminal and the chassis ground point. Every current flow in and out of the battery passes through the shunt for accurate state-of-charge tracking.
- Document everything. A comprehensive wiring diagram reduces troubleshooting time and is indispensable for future upgrades or fault-finding on the road.
Cable gauge is not a place to cut costs. A cable that is too thin for its current load will heat up, degrade insulation, and create a fire risk. As a reference point, a 2,000W inverter drawing up to 170A at 12V requires 70mm² cable for runs up to one metre.
“Incorrect or undocumented wiring is a major cause of electrical faults on the road. Clear wiring diagrams are not just for installation. They are essential for ongoing maintenance.”
For practical examples of how different solar configurations are laid out and wired, the Skyenergi solar setup examples page shows real-world van builds with component placement and cable routing.
How to monitor and manage your energy on the road
A well-designed system is only as reliable as the habits and tools used to manage it. Voltage alone is a poor indicator of battery state for LiFePO4 cells because the discharge curve is almost flat between 20% and 80% state of charge. A dedicated battery monitor is not a luxury. It is a requirement.
Key monitoring and management practices include:
- Use a Victron SmartShunt or equivalent coulomb counter. These devices track every amp-hour in and out of the battery, giving you an accurate state-of-charge percentage rather than a misleading voltage reading. Accurate SOC readings are indispensable for efficient energy management.
- Check solar input data daily. Your MPPT controller logs daily yield, which tells you whether your panels are performing as expected or whether shading, soiling, or a connection issue is reducing output.
- Adapt consumption in low-production periods. On overcast days, reduce inverter use, switch to LED lighting if you have not already, and plan driving routes that allow the DC-DC charger to contribute meaningfully.
- Plan for seasonal shifts. In winter, solar input in the UK can drop to a fraction of summer levels. A hybrid approach combining solar, alternator charging via a DC-DC charger, and occasional shore power is the only realistic path to true energy independence in northern Europe.
- Consider portable panels as a supplement. A 100W portable panel deployed on a sunny pitch can add meaningful charge when roof panels are shaded by trees or buildings.
Pro Tip: Set a low-battery alert on your Victron SmartShunt at 20% state of charge. This gives you time to respond before the battery management system disconnects the load, which protects cell longevity and prevents data loss on connected devices.
Common pitfalls in campervan energy independence workflows
Even well-intentioned builds fail because of predictable, avoidable mistakes. Recognising these pitfalls before installation saves significant time and money.
- Undersized solar panels. A 200Ah LiFePO4 battery requires 200-400W of solar to recharge fully within 4-5 peak sun hours. Fitting 100W and expecting it to keep pace with a fridge and laptop is a common miscalculation.
- Ignoring DC-DC charger integration. Many van owners treat solar as their only charging source. Relying solely on solar is insufficient in winter or cloudy conditions. An alternator-fed DC-DC charger is a non-negotiable part of a resilient system.
- Incorrect fuse placement. Fuses installed far from the battery positive terminal leave long cable runs unprotected. A fault anywhere on that unprotected run can cause a fire before the fuse blows.
- Skipping the battery monitor. Without a coulomb counter, you are guessing at state of charge. Guessing leads to either chronic undercharging, which degrades LiFePO4 cells over time, or unexpected shutdowns.
- Poor panel placement and shading. A single shaded cell can reduce output from an entire panel string. Roof vents, aerial mounts, and roof bars all create shading. Plan panel placement before drilling any holes.
- No wiring documentation. Undocumented systems become unmanageable the moment a fault develops or a component needs replacing six months later.
Key takeaways
A reliable campervan energy independence workflow requires accurate load assessment, correctly sized LiFePO4 batteries and solar panels, isolated DC-DC charging, MPPT control, and active monitoring with a dedicated battery shunt.
| Point | Details |
|---|---|
| Start with a load audit | List every device, wattage, and daily use hours before selecting any components. |
| Size for worst-case conditions | Design for three days without solar and for winter sun hours in your target region. |
| Use MPPT over PWM | MPPT controllers harvest 15-25% more energy, which is critical on limited roof space. |
| Install a DC-DC charger | A 30A DC-DC charger adds roughly 30Ah per hour of driving, essential for cloudy periods. |
| Document your wiring | A complete wiring diagram reduces fault-finding time and supports future upgrades. |
Why the workflow matters more than the hardware
I have seen van builds with expensive Victron kit that performed poorly because the owner skipped the load audit and bought panels based on a forum recommendation. I have also seen modest 200W systems that ran reliably for years because the owner understood their actual consumption and designed accordingly.
The uncomfortable truth about off-grid power is that most people overestimate how much sunshine they will get, particularly in the UK and northern Europe. I have found that building a system around a realistic winter scenario, rather than an optimistic summer one, is what separates a van that genuinely achieves energy independence from one that needs a hook-up every few days from October to March.
Combining solar with a properly sized DC-DC charger changes the entire dynamic. Driving two hours on a grey November day contributes meaningfully to your battery state of charge in a way that no amount of extra panel wattage can replicate when the sun simply is not there. The off-grid power tips that actually hold up in practice are the ones built around this hybrid mindset, not a solar-only approach.
Behavioural adaptation is underrated. Shifting high-draw tasks like boiling a kettle or running a laptop to midday when solar production peaks costs nothing and extends your autonomy significantly. The workflow is not just a one-time installation checklist. It is an ongoing practice.
— John
Skyenergi solutions for your campervan power system
Skyenergi supplies the hardware that makes a well-designed campervan energy independence workflow deliverable in practice.

The Victron 610W solar and MPPT kit pairs a high-output Victron solar panel with a Smart MPPT charge controller, mounting hardware, and cabling, covering the solar and charge control elements of your system in a single, matched package. For a complete power system including a 3kVA inverter/charger, battery-to-battery charger, and monitoring, the SRNE turnkey system from Skyenergi delivers every major component pre-specified for compatibility. Skyenergi sources directly from manufacturers, which keeps pricing competitive without compromising on specification. Contact the team for advice on matching components to your specific load audit.
FAQ
What is a campervan energy independence workflow?
A campervan energy independence workflow is the structured process of assessing energy needs, selecting components, installing the system safely, and managing power on the road. It covers load auditing, battery and solar sizing, charge control, and ongoing monitoring.
How many solar panels does a campervan need?
A 200Ah LiFePO4 battery requires 200-400W of solar panels to recharge fully within 4-5 peak sun hours. Digital nomads or full-time travellers typically need 600W or more, combined with a DC-DC charger for cloudy periods.
Why use an MPPT controller instead of PWM?
MPPT charge controllers harvest 15-25% more energy than PWM controllers by converting excess panel voltage into additional charging current. On a van roof with limited space, that efficiency gain directly affects how reliably your battery reaches full charge each day.
Do I need a DC-DC charger if I have solar panels?
A DC-DC charger is necessary for any van with a smart alternator, which covers most vehicles built after 2014. Solar alone is insufficient in winter or overcast conditions, and a 30A DC-DC charger adds approximately 30Ah of capacity per hour of driving.
How do I monitor battery state of charge accurately in a campervan?
A Victron SmartShunt or equivalent coulomb counter is the correct tool for LiFePO4 batteries. Voltage readings are unreliable for LiFePO4 cells due to the flat discharge curve between 20% and 80% state of charge. A shunt-based monitor tracks every amp-hour in and out for a precise percentage reading.
Recommended
Prev post

Portable energy storage explained: a 2026 guide
Updated on 09 June 2026
Next post

The role of power electronics in storage systems
Updated on 07 June 2026


