


Step by step campervan electrics: 2026 UK guide
Master step by step campervan electrics with our 2026 UK guide. Ensure reliable power for your adventures with expert tips and full coverage.
A campervan electrical system is a 12V DC network connecting a leisure battery bank to lights, appliances, and charging sources through fused, correctly sized cables. Done right, step by step campervan electrics give you reliable off-grid power without the risk of overheating cables or flat batteries mid-trip. The process covers four distinct phases: power budgeting, component selection, physical wiring, and post-installation testing. Each phase feeds the next, so skipping ahead creates problems that are expensive to fix later. This guide walks you through every phase with the specifics you need, including cable sizing, fuse placement, and lithium versus lead-acid decisions.
How to calculate power requirements and design your wiring blueprint
The power budget in watt-hours drives every subsequent design decision, including battery capacity, cable sizing, and charging methods. Start here before buying a single component.
Listing your appliances and daily use
Write down every device you plan to run, its wattage, and the estimated hours of daily use. A typical starting list looks like this:
| Appliance | Power (W) | Daily Use (h) | Daily Consumption (Wh) |
|---|---|---|---|
| LED lighting | 10 | 5 | 50 |
| Compressor fridge (30% duty cycle) | 40 | 7.2 | 288 |
| Phone and laptop charging | 30 | 2 | 60 |
| Water pump | 60 | 0.5 | 30 |
| Total | 428 |
Add a 20% safety margin to account for wiring losses and inefficiencies. In this example, 428Wh becomes roughly 514Wh per day as your working target. That figure tells you how large your battery bank needs to be and how much solar or DC-DC charging capacity to install.
Producing a complete wiring diagram
A wiring diagram is indispensable for installation, troubleshooting, and future upgrades. Draw it before cutting a single length of cable. Your diagram must show:
- The leisure battery with its main fuse
- The starter battery and DC-DC charger connection
- Solar panels and MPPT controller
- Distribution fuse box with individual circuit fuse ratings
- All branch circuits: lights, fridge, pump, sockets
- Inverter connection if included
- Shore power charger input if fitted
Keep a printed copy inside the van. When something stops working at a campsite, you will be grateful it is there.
Pro Tip: Use free tools like LibreOffice Draw or dedicated van wiring apps to produce a clean, colour-coded diagram. Colour-coding positive and negative runs separately prevents connection errors during installation.
Which components do you need and how do you size them?
A typical UK 12V campervan system includes a starter battery, DC-DC charger, leisure battery with main fuse, distribution fuse box, branch circuits, and an optional inverter. Sizing each component correctly is where most DIY builds go wrong.
Battery bank: lead-acid versus lithium
Battery capacity is measured in amp-hours (Ah). Most starter builds use 100–200Ah. The chemistry you choose changes how much of that capacity you can actually use.
| Battery Type | Usable Capacity | Weight (100Ah) | Typical Cost | Cycle Life |
|---|---|---|---|---|
| AGM Lead-Acid | ~50% (80% rule) | ~28 kg | Lower | 300–500 cycles |
| LiFePO4 Lithium | ~80–100% | ~12 kg | Higher | 2,000+ cycles |
Lithium batteries do not strictly follow the lead-acid 80% rule. They allow deeper discharge, but longevity depends on avoiding frequent full-depletion cycles. Misapplying lead-acid rules to a lithium system leads to an oversized battery bank and unnecessary cost. A 100Ah LiFePO4 battery delivers roughly the same usable energy as a 200Ah AGM. For a detailed look at the benefits of lithium leisure batteries, Skyenergi covers the key differences in depth.
Fuses: protecting cables, not appliances
Fuses protect cables from overheating, not the devices connected to them. This is the single most misunderstood rule in DIY camper electrics. Size every fuse to the cable’s maximum current capacity, then place it within 30cm of the battery positive terminal. A fuse installed further away leaves a length of unfused cable that can overheat dangerously in a fault condition.
Cable sizing and voltage drop
Target a voltage drop of 3–5% on 12V circuits. A 100W load at 12V draws approximately 8A. The correct cable gauge depends on both that current and the total cable run length. Longer runs require thicker cable to stay within the voltage drop target. Use an online cable sizing calculator, entering amps and one-way cable length, to confirm the correct cross-section in mm² before purchasing.
Charging sources
Three charging inputs cover most builds:
- Solar panels with MPPT controller. A Victron SmartSolar MPPT controller extracts maximum power from panels and charges the leisure battery efficiently. Match the controller’s input voltage range to your panel configuration.
- DC-DC charger. Charges the leisure battery from the vehicle’s alternator without damaging the starter battery. Typical units run at 20–50A.
- Shore power charger. Allows mains charging at campsites. Size the charger output in amps to match your battery bank capacity.
Pro Tip: For solar panel selection, a complete solar panel bundle that includes the MPPT controller, cabling, and mounting hardware removes the guesswork from component matching.
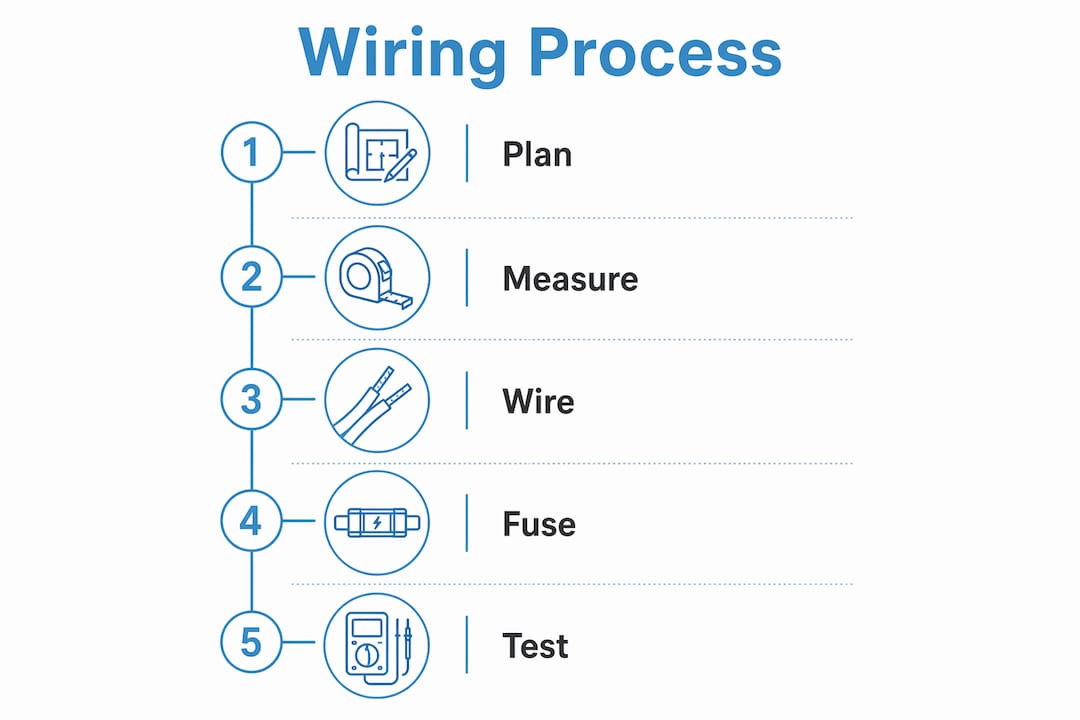
What is the step-by-step wiring and installation process?
Physical installation follows the wiring diagram exactly. Work through the sequence below and do not skip steps.
- Mount the battery securely. Fix the leisure battery in a ventilated, accessible location. Use a battery box or dedicated tray with hold-down straps. LiFePO4 batteries can be mounted on their side, but confirm this with the manufacturer’s data sheet first.
- Mount the fuse box and charge controller. Position the distribution fuse box centrally to minimise cable run lengths to branch circuits. Mount the MPPT controller close to the battery, away from direct heat sources.
- Route all cables following the diagram. Run positive and negative cables together where possible to reduce electromagnetic interference. Use split conduit or loom to protect cables passing through bulkheads or near sharp edges. Secure cables every 30–50cm with cable clips.
- Install the main battery fuse first. Fit the main fuse within 30cm of the leisure battery positive terminal before connecting any other cables. This protects the entire system from the outset.
- Wire the DC-DC charger. The correct sequence is: starter battery positive → fuse near starter battery → DC-DC charger input → DC-DC charger output → fuse near leisure battery positive → leisure battery. Dual fuse placement on both battery sides protects the longer cable runs between them.
- Connect the MPPT controller. Wire the solar panels to the controller input first, then connect the controller output to the leisure battery. Never connect the battery side first when panels are in sunlight.
- Install the inverter last. Mount the inverter as close to the leisure battery as possible using heavy-duty cable with a fuse within 20–30cm of the battery terminal. Leave at least 10cm clearance around the inverter for ventilation.
- Connect branch circuits. Wire each circuit from the fuse box to its load. Label every fuse position clearly.
Safety note: Do not connect the leisure battery’s main positive terminal until all other wiring is complete and double-checked against your diagram. This keeps the system de-energised during installation and prevents accidental shorts.
Pro Tip: Use a multimeter to verify polarity on every connection before the final battery connection. A reversed polarity fault on a DC-DC charger or MPPT controller will destroy the unit instantly.
What mistakes should you avoid in a campervan electrical build?
Common installation errors cause overheating, system failures, and in serious cases, fires. Knowing them in advance is far cheaper than fixing them later.
- Undersized cables. Using cable that is too thin for the current it carries generates heat. Always calculate cable size using amps and run length, not guesswork.
- Fuse placed too far from the battery. Installing fuses too far from the battery leaves unfused cable sections that can overheat in a fault. The 30cm rule is not a guideline. It is a hard limit.
- Inverter mounted too far from the battery. Long cable runs to an inverter create significant voltage drop under load and increase the risk of cable overheating. Keep the run as short as physically possible.
- No ventilation around the inverter. Poor airflow causes thermal shutdowns and reduces inverter lifespan. Mount it away from enclosed spaces and heat sources.
- Reusing old vehicle wiring. Never repurpose existing van wiring for new circuits. Old cables may be corroded, undersized, or incorrectly fused for your new loads.
- No post-installation documentation. Skipping a final wiring record makes future faults significantly harder to diagnose. Verify each circuit by measuring voltage and checking for heat spots, then photograph and file the completed diagram.
Pro Tip: Run each circuit under load for 10 minutes after installation and check cable temperatures by hand. Warm cables are normal. Hot cables indicate an undersized conductor or a loose connection that needs immediate attention.
Key takeaways
A safe campervan electrical installation requires a watt-hour power budget, a complete wiring diagram, correctly sized cables and fuses, and a verified post-installation test on every circuit.
| Point | Details |
|---|---|
| Start with a power budget | Calculate daily watt-hours and add 20% before sizing any component. |
| Fuses protect cables, not devices | Size fuses to cable ampacity and place them within 30cm of the battery terminal. |
| Lithium changes the sizing rules | LiFePO4 batteries offer deeper usable capacity than lead-acid, reducing the Ah needed. |
| Follow the wiring diagram exactly | A complete diagram prevents cable errors and supports future fault-finding. |
| Test every circuit before use | Check voltage, polarity, and cable temperature under load before your first trip. |
Why i always start with the diagram, not the shopping list
Most DIY campervan electrical builds go wrong at the planning stage, not the wiring stage. The temptation is to buy a battery, a solar panel, and a fuse box, then figure out how they connect once everything arrives. That approach almost always results in undersized cables, misplaced fuses, or a charger that cannot deliver enough current to keep up with daily consumption.
The wiring diagram is not a formality. It is the only way to catch sizing errors before they are built into the van. When I review builds that have developed problems, the root cause is nearly always a decision made without a complete picture of the system. A cable that is one size too small. A fuse rated to the appliance rather than the cable. An inverter mounted 2 metres from the battery because there was no plan for where it would go.
Lithium batteries have changed the economics of campervan electrical setups considerably. The lithium battery installation workflow is slightly different from lead-acid, and the sizing rules are genuinely different. Applying the old 80% depth-of-discharge rule to a LiFePO4 system wastes money on capacity you do not need. Understanding that distinction before you buy saves a significant amount.
My practical advice: spend twice as long on the diagram as you think you need to. Size every cable run independently. Place every fuse within the required distance from the battery terminal. Then build it. A system built to a good plan rarely needs rework. A system built without one almost always does.
— John
Build your campervan electrical system with Skyenergi
Skyenergi supplies the components you need to complete a reliable campervan electrical setup, from lithium leisure batteries and DC-DC chargers to Victron solar panels and MPPT controllers.

The Victron 305W solar panel and Smart MPPT bundle includes the panel, charge controller, cabling, and mounting hardware in a single kit. It removes the component-matching guesswork for a typical campervan build. For real-time system monitoring, the SRNE BS 48500 battery monitor gives you live state-of-charge data and helps you spot issues before they become failures. Skyenergi sources directly from manufacturers, keeping prices competitive without compromising on specification.
FAQ
What size battery do i need for a campervan?
Most campervan builds start with 100–200Ah of leisure battery capacity. Calculate your daily watt-hour consumption first, then size the battery to cover at least two days of use without recharging.
Where should i place fuses in a campervan electrical system?
Every positive cable connected to the battery requires a fuse placed within 30cm of the battery terminal. This protects the cable from overheating in a short-circuit fault.
Can i use a lithium battery instead of AGM in my campervan?
Yes. LiFePO4 batteries offer deeper usable capacity and longer cycle life than AGM. A 100Ah lithium battery delivers roughly the same usable energy as a 200Ah AGM, making them a practical upgrade for most builds.
How do i charge a campervan leisure battery from the alternator?
A DC-DC charger connects the starter battery to the leisure battery and charges it safely while the engine runs. Wire it with fuses on both the starter and leisure battery sides to protect the full cable run.
What voltage drop is acceptable in a 12v campervan system?
Target a maximum voltage drop of 3–5% on 12V circuits. Exceeding this reduces appliance performance and indicates undersized cabling for the current and run length involved.
Recommended
Prev post

Why battery bank capacity matters for off-grid power
Updated on 16 June 2026
Next post

Battery bank setups: a practical guide for 2026
Updated on 14 June 2026


