


Solar array configuration explained for DIY builders
Learn what is solar array configuration and how to optimize your solar panels for maximum power. Build an efficient DIY solar system today!
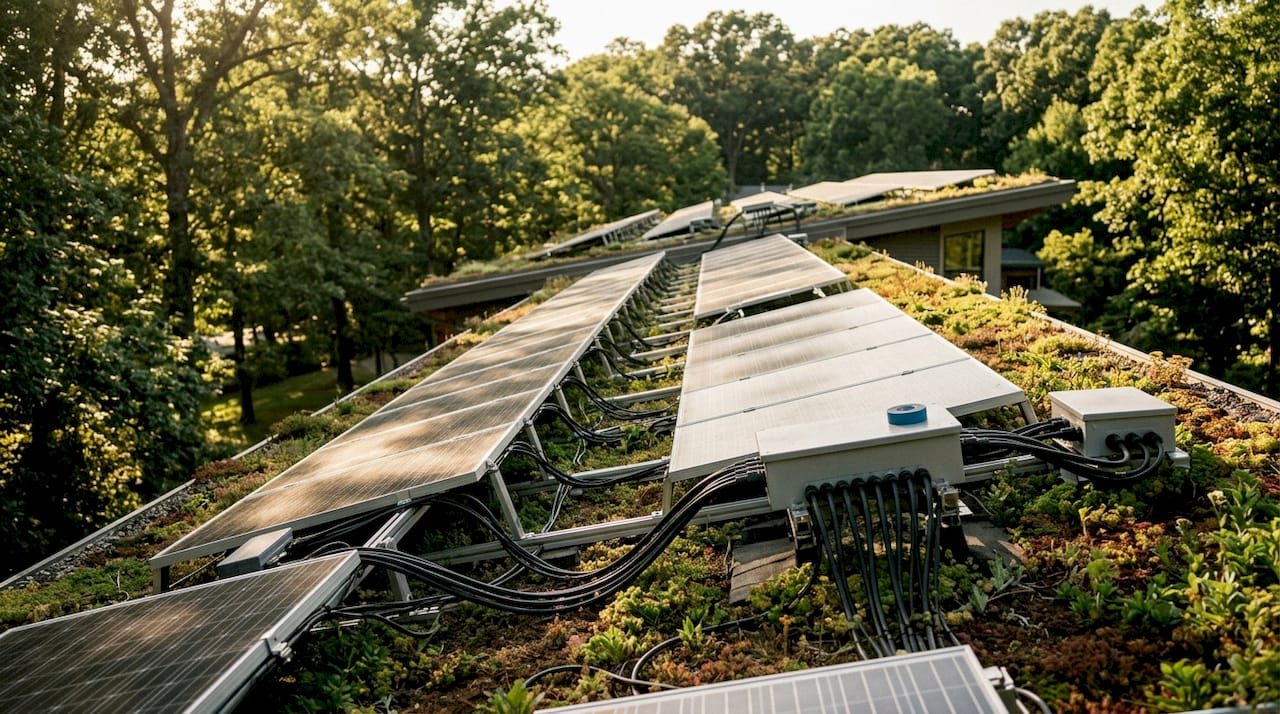
Solar array configuration is defined as the electrical wiring layout that connects multiple solar panels together to achieve a specific voltage and current output suited to your inverter or charge controller. Getting this right determines whether your system produces its rated power or falls short by a significant margin. A typical residential array produces 3–10 kW, with 6 kW being a common average across UK homes. The industry term for this wiring design is “stringing,” and understanding what is solar array configuration is the first step to building a system that actually works.
What is solar array configuration and why does it matter?
Solar array configuration is the method of connecting solar panels in series, parallel, or a combination of both to match the electrical requirements of your inverter or MPPT charge controller. The wiring method you choose directly controls the voltage and current your system delivers. Get it wrong and your inverter may shut down, underperform, or refuse to start on cold mornings.
Three fundamental wiring configurations exist: series, parallel, and series-parallel. Each has distinct electrical behaviour and suits different system types. Choosing between them depends on your inverter’s input window, your shading conditions, and whether you are building a grid-tied or off-grid setup.
The configuration also affects how your system responds to faults. A single shaded panel in a series string can cut the output of every other panel in that string. Understanding this from the outset saves you from expensive redesigns later.
What are the main types of solar array configurations?
Series configuration
In a series string, panels are wired positive terminal to negative terminal in a chain. Voltage adds up across each panel, while current stays constant at the level of a single panel. Ten 40V panels wired in series produce 400V at the same current as one panel.
Series wiring is the most common choice for grid-tied systems because modern string inverters require a high DC input voltage, typically 200V or above, to operate efficiently. The drawback is shading sensitivity. Partial shading drastically reduces output in series strings, because the weakest panel limits the current for the entire string.
Parallel configuration
Parallel wiring connects all positive terminals together and all negative terminals together. Current adds up across each panel, while voltage stays constant at the level of a single panel. This suits battery-based off-grid systems that operate at lower voltages, such as 12V, 24V, or 48V battery banks.
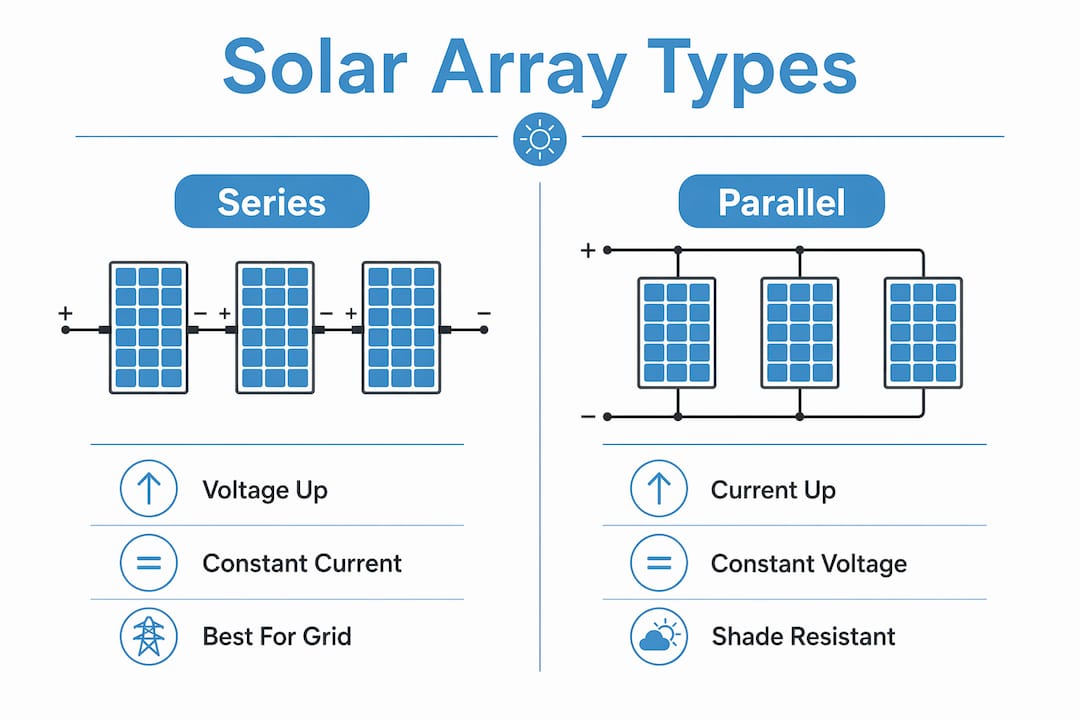
The trade-off is wiring complexity. More panels mean more cables, larger combiner boxes, and heavier overcurrent protection. Parallel arrays are also less affected by shading, because a shaded panel only reduces its own contribution rather than dragging down the whole string.
Series-parallel configuration
Series-parallel combines both methods. Panels are grouped into series strings first, then those strings are connected in parallel. This balances voltage and current within the inverter’s MPPT input window while spreading shading risk across multiple strings.
Series-parallel is chosen for wiring simplicity and cost, but it remains vulnerable to shading within each individual string. It is the most widely used arrangement in residential systems above 4 kW.
| Configuration | Voltage effect | Current effect | Best use case |
|---|---|---|---|
| Series | Adds up | Stays constant | Grid-tied, high-voltage inverters |
| Parallel | Stays constant | Adds up | Off-grid, low-voltage battery systems |
| Series-parallel | Balanced | Balanced | Residential, hybrid systems |
Pro Tip: Always check your inverter’s MPPT voltage window before deciding how many panels to wire in series. The string voltage must sit inside that window at both peak summer heat and the coldest winter morning.
How do you size a solar array and calculate string length?
Solar array sizing starts with your daily energy demand. The standard formula is: daily energy need (kWh) divided by peak sun hours, divided by a system efficiency factor of 0.75–0.85. System losses typically run 20–25%, covering inverter inefficiency, soiling, wiring resistance, and temperature effects. Apply this derate factor before you buy a single panel.
String length, meaning the number of panels per series string, is set by your inverter’s MPPT voltage window. The string must stay inside that window across all temperature conditions, not just at standard test conditions printed on the panel datasheet.
Here is a practical sizing sequence:
- Calculate your daily kWh demand from your appliance load list.
- Divide by local peak sun hours (typically 2.5–4 hours per day in the UK).
- Divide by 0.80 as a working efficiency factor to account for real-world losses.
- Select panels and check the inverter’s MPPT voltage range.
- Calculate maximum string voltage using the panel’s open-circuit voltage (Voc) at the coldest expected temperature.
- Calculate minimum string voltage using the panel’s maximum power voltage (Vmp) at the hottest expected temperature.
- Adjust panel count per string until both figures sit inside the MPPT window.
Cold weather raises Voc by 20–30% above the datasheet figure. This is the figure that must not exceed your inverter’s maximum input voltage, or you risk permanent damage to the inverter. Hot weather lowers Vmp, which must not fall below the inverter’s minimum MPPT voltage, or the inverter stops tracking power efficiently.
The DC-to-AC inverter sizing ratio recommended by industry practice sits between 1.1 and 1.3. This means your panel array can be 10–30% larger in DC watts than your inverter’s AC output rating. This accounts for the fact that panels rarely produce their nameplate output in real UK conditions.
Pro Tip: Use your panel’s temperature coefficient for Voc, found on the datasheet, to calculate cold-weather voltage precisely. Multiply the coefficient by the temperature difference from 25°C and add the result to the standard Voc.
| Sizing factor | Typical value | Why it matters |
|---|---|---|
| System efficiency factor | 0.75–0.85 | Accounts for real-world losses |
| DC-to-AC ratio | 1.1–1.3 | Prevents inverter clipping losses |
| Cold weather Voc rise | 20–30% above datasheet | Sets maximum string voltage limit |
| UK peak sun hours | 2.5–4 hours/day | Determines array size needed |
How does shading affect solar array performance?
Shading is the single biggest performance killer in a poorly designed array. In a series string, one shaded cell reduces the current for every panel in that string. A shadow from a chimney covering just one panel can cut string output by 50% or more during peak hours.
Parallel wiring reduces this risk. A shaded panel in a parallel array only loses its own output. The remaining panels continue producing at full current. The downside is that parallel arrays at residential scale require larger cables and more complex protection circuits.
Row spacing matters as much as wiring method. Rows should be spaced 2.5–3.5 times the panel height to prevent the front row casting a shadow on the row behind during low winter sun angles. Ignoring this during the layout stage causes self-shading losses that no wiring configuration can fix.
Advanced configurations exist for heavily shaded sites. Total-Cross-Tied (TCT) arrays connect panels in a grid pattern, providing multiple current paths around shaded cells. Module-level power electronics, such as DC optimisers, allow each panel to operate at its own maximum power point regardless of what its neighbours are doing.
Module-level optimisers and microinverters improve shading resilience significantly, but they add upfront cost and installation complexity. For a simple roof with no obstructions, a well-designed series-parallel string remains the most cost-effective choice.
In heavy shading zones, module-level optimisers can yield better overall reliability and annual output despite the higher initial investment. The decision depends on your site, not a blanket rule.
Practical tips for configuring a DIY off-grid or small residential array
DIY installers make the same mistakes repeatedly. The most common is assuming nameplate panel ratings equal real output. DIY installers frequently ignore the 20–25% derate factor, which leads to undersized arrays and flat batteries by mid-afternoon in winter.
Follow these steps to avoid the most common pitfalls:
- Match your string voltage to the MPPT input range of your charge controller or inverter before purchasing panels.
- Size cables for the maximum expected current, not the average. Use the parallel string current plus a 25% safety margin.
- Fit a fuse or circuit breaker on each parallel string to protect against reverse current faults.
- Plan for expansion. Wire your combiner box with spare terminals if you intend to add panels later.
- Use a solar panel sizing guide to verify your calculations before committing to a layout.
- Check your local planning rules. UK permitted development rights cover most domestic roof arrays, but ground-mounted systems may need planning permission.
MPPT charge controller compatibility dictates string sizing for off-grid systems. Panel count per string must keep voltage inside the MPPT tracker range across temperature extremes for efficient energy harvest throughout the year.
Pro Tip: For a campervan or motorhome build, keep your array simple. A single series string matched to a quality MPPT controller is easier to fault-find and expand than a complex parallel arrangement in a confined space.
Monitoring tools help you verify that your configuration is working as designed. Many MPPT controllers offer Bluetooth data logging, letting you compare actual output against your calculated figures and spot underperformance early.
Key takeaways
Correct solar array configuration is the foundation of a reliable, efficient solar system, whether you are building an off-grid campervan setup or a residential rooftop array.
| Point | Details |
|---|---|
| Configuration type sets voltage and current | Series adds voltage, parallel adds current; choose based on your inverter’s MPPT window. |
| Apply a 20–25% derate factor | Real-world losses from heat, soiling, and wiring mean nameplate output is never achieved. |
| Cold weather sets the voltage ceiling | Voc rises 20–30% in cold conditions; this must not exceed your inverter’s maximum input voltage. |
| Shading hits series strings hardest | One shaded panel reduces current for the whole string; row spacing and layout prevent self-shading. |
| MPPT compatibility is non-negotiable | String voltage must sit inside the MPPT window at all temperatures for efficient year-round output. |
Why I think most DIY builders overcomplicate this
Most people planning their first solar array spend weeks comparing panel brands and inverter models, then spend about ten minutes on the actual wiring configuration. That is the wrong order of priorities.
The configuration is the architecture. Everything else is furniture. I have seen well-specified systems produce a fraction of their rated output because the string voltage sat below the inverter’s MPPT minimum on summer afternoons, when the panels were hottest and Vmp had dropped below the threshold. The inverter was fine. The panels were fine. The configuration was wrong.
My honest view is that the DC-to-AC sizing ratio gets overlooked far too often by beginners. Sizing your panel array at 1.2 times your inverter’s rated output is not overbuilding. It is accounting for the reality that UK irradiance is rarely at standard test conditions. A 4 kW inverter paired with a 4.8 kW panel array will outperform a matched 4 kW-to-4 kW system on every overcast day of the year.
The trend toward module-level electronics is real and worth watching. DC optimisers are becoming more accessible in price, and for a roof with even moderate shading, they change the economics of the whole project. But for a clean, unshaded roof or a simple off-grid build, a well-calculated series-parallel string with a quality MPPT controller remains the most practical and cost-effective starting point. Get the configuration right first. Then choose your hardware.
— John
Skyenergi’s solar solutions for DIY array builds
Skyenergi supplies a range of solar panels, MPPT charge controllers, and complete system bundles suited to DIY off-grid and residential array configurations.

The Victron Solar Home System 200 MPPT is a complete, ready-to-configure kit that includes an MPPT charge controller, making it straightforward to match your panel string to the correct voltage window. For larger builds, Skyenergi also stocks the Victron 610W panel and Smart MPPT bundle, which includes cabling and mounting hardware. Both options are compatible with Victron’s Bluetooth monitoring ecosystem, so you can verify your array configuration is performing as calculated from day one.
FAQ
What is the difference between series and parallel solar wiring?
Series wiring adds panel voltages together while keeping current constant, making it suitable for high-voltage grid-tied inverters. Parallel wiring adds current while keeping voltage constant, which suits low-voltage off-grid battery systems.
How many solar panels can I wire in series?
The number of panels per series string is limited by your inverter’s maximum input voltage. String voltage must stay within the inverter’s MPPT window across all temperature conditions, including cold-weather Voc rises of 20–30%.
What is solar array sizing and how do I calculate it?
Solar array sizing is the process of determining the total panel capacity needed to meet your daily energy demand. Divide your daily kWh need by peak sun hours, then divide by an efficiency factor of 0.75–0.85 to account for real-world system losses.
Does shading affect all solar array configurations equally?
No. Series configurations are most sensitive to shading because one shaded panel reduces current for the entire string. Parallel and series-parallel arrangements spread the shading impact, and module-level optimisers can mitigate it further at additional cost.
Do I need planning permission for a solar array in the UK?
Most domestic rooftop solar arrays in the UK fall under permitted development rights and do not require planning permission. Ground-mounted systems and installations on listed buildings are subject to additional rules and may require a formal application.
Recommended
Prev post

Important off-grid system upgrades for 2026
Updated on 01 July 2026
Next post

Top 5 SolarPanelsVenue.com Alternatives 2026
Updated on 29 June 2026


