


How to size a battery bank for off-grid power
Learn how to size a battery bank for off-grid power effectively. Avoid costly mistakes with our step-by-step guide and expert tips!
TL;DR:
- Correctly sizing a battery bank requires precise load auditing, accounting for inverter losses, and selecting appropriate chemistry and depth of discharge to ensure efficiency and longevity.
- Adding at least a 20% safety margin and choosing the right voltage configuration tailored to system size are essential steps for reliable off-grid energy storage.
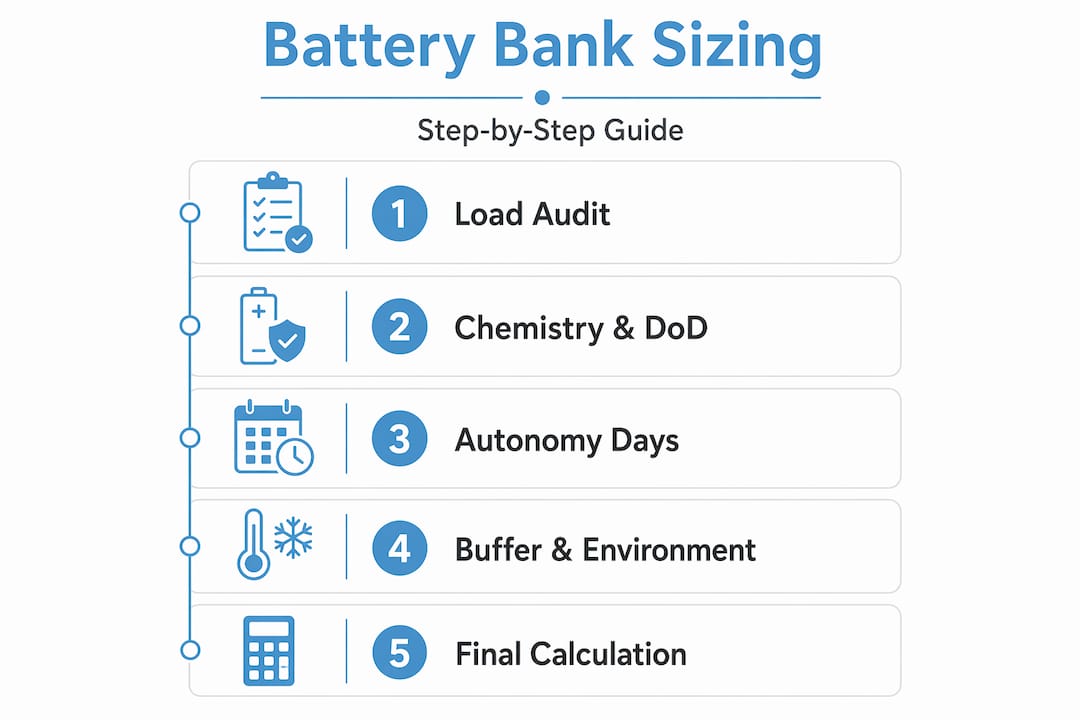
Getting your battery bank sizing wrong is one of the most expensive mistakes in off-grid energy planning. Size too small and you lose power mid-use. Size too large and you overspend on capacity you never touch. Knowing how to size a battery bank correctly starts with understanding four variables: your daily load in watt-hours, how many days of autonomy you need, your battery chemistry, and its usable depth of discharge. This guide walks through each step with concrete calculations, so you arrive at a figure grounded in real data, not guesswork.
Table of Contents
- Key takeaways
- How to size a battery bank: the load audit
- Battery chemistry and depth of discharge
- Autonomy days and environmental factors
- Calculating bank size and voltage configuration
- Common sizing mistakes and maintenance
- My take on sizing: what the numbers miss
- Power your off-grid system with confidence
- FAQ
Key takeaways
| Point | Details |
|---|---|
| Start with a load audit | Itemise every device, its wattage, and daily usage hours to calculate total watt-hours consumed per day. |
| Account for inverter losses | Add 10–15% to AC loads to reflect inverter inefficiency before you run any sizing calculation. |
| Chemistry determines usable capacity | LiFePO4 delivers up to 80% DoD versus 50% for lead-acid, directly reducing the gross battery size required. |
| Apply a 20% sizing buffer | Cover degradation, weather variation, and future load growth by adding a 20% safety margin to your final figure. |
| Match voltage to system scale | Use 24V or 48V for larger systems to reduce cable losses and keep wiring manageable. |
How to size a battery bank: the load audit
Before any calculation can begin, you need an accurate picture of your daily energy consumption. This is your load audit, and it is the single most important input in the entire sizing process.
Start by listing every electrical device you plan to run. For each one, note its power draw in watts and your estimated daily usage in hours. Multiply the two figures together to get watt-hours for that device. Then add everything up.
A practical example for a campervan setup might look like this:
- 12V compressor fridge: 45W × 24h = 1,080 Wh (compressor cycles, so actual draw is roughly 40–50% of that, around 450 Wh)
- LED lighting: 20W × 4h = 80 Wh
- Laptop via inverter: 65W × 3h = 195 Wh
- Phone charging and small devices: 15W × 2h = 30 Wh
- Water pump: 60W × 0.5h = 30 Wh
That gives a subtotal of approximately 785 Wh per day. For a step-by-step energy audit process, Skyenergi’s energy storage setup guide covers the full approach for leisure vehicles in detail.
AC loads introduce an additional layer. Inverter losses add 10–15% to any AC load when sizing your battery bank, because a pure sine inverter typically operates at 85–90% efficiency. In the example above, the laptop load becomes closer to 225 Wh once inverter inefficiency is factored in, pushing the daily total to around 815 Wh.
Pro Tip: If you are uncertain about a device’s real-world draw, use a plug-in energy monitor for a few days before you spec the system. Manufacturers often quote peak wattage, not average consumption.
Round up your daily total and treat it as your working figure for all subsequent calculations. Underestimating here is the root cause of most undersized battery banks.
Battery chemistry and depth of discharge
Not all battery capacity is usable capacity, and this is where many first-time builders go wrong. The rated amp-hour figure printed on a battery label is the total stored energy, not what you can safely draw before damaging the cells or drastically shortening their life.
Different battery chemistries have different depth of discharge values that directly determine usable capacity. Here is how the main types compare:
| Chemistry | Typical DoD | Usable capacity (100Ah rated) | Notes |
|---|---|---|---|
| Flooded lead-acid | 50% | 50 Ah | Regular maintenance required; heavy |
| AGM | 50–60% | 50–60 Ah | Sealed, lower maintenance, still bulky |
| LiFePO4 | 80–90% | 80–90 Ah | Longest cycle life, lighter, higher upfront cost |
The practical consequence is direct. If you need 400 Wh of usable storage at 12V (approximately 33 Ah usable), a lead-acid bank requires around 66 Ah of rated capacity to deliver that safely. A LiFePO4 bank needs only around 42 Ah rated. The lithium bank is smaller, lighter, and will outlast the lead-acid option by thousands of cycles.
Depth of discharge is not just a conservative setting. It is critical to battery longevity. Regularly discharging lead-acid below 50% can reduce cycle life from 500 cycles to fewer than 200. LiFePO4 cells tolerate deeper cycling with far less degradation, which is a core reason they have become the preferred chemistry for serious off-grid builds. Skyenergi’s article on lithium battery advantages covers the practical benefits in more detail.

Pro Tip: Always size your battery bank based on usable capacity, not rated capacity. Using the rated figure without applying DoD is one of the most common sizing mistakes in off-grid energy planning.
Autonomy days and environmental factors
Once you have your daily load and chemistry sorted, you need to decide how many consecutive days your battery bank should sustain your loads without any recharge input. This is your autonomy period, and it is directly proportional to cost.
Autonomy recommendations vary by climate and application, with typical ranges sitting between 1 and 5 days. Practical guidance by scenario:
- Campervan or motorhome with shore power access: 1–2 days autonomy is usually sufficient
- Off-grid cabin in southern England with regular sun: 2–3 days
- Off-grid home in Scotland or Northern Europe with long cloudy periods: 4–5 days
- Marine or critical backup systems: 3–5 days depending on charging availability
Temperature has a measurable impact that is often ignored during planning. Cold temperatures reduce lead-acid capacity significantly. At 0°C, a lead-acid bank may deliver only 70–80% of its rated capacity. At minus 18°C, that drops to 50–60%. LiFePO4 chemistry handles cold better, though charging below 0°C requires a battery management system that prevents charge acceptance to protect the cells.
Beyond temperature, you should add a general buffer to account for battery ageing and unpredictable consumption. A 20% buffer on your calculated size covers capacity degradation over time, weather variability, and any load increases you had not planned for. This buffer is not wasted money. It is the difference between a system that performs for a decade and one that disappoints in its third year.
Calculating bank size and voltage configuration
With daily load, DoD, and autonomy days established, the calculation is straightforward. The standard battery bank sizing formula is:
(Daily Wh × Autonomy days) ÷ (System voltage × DoD) = Required Ah
Here is a worked example using the 815 Wh/day figure from earlier, with a 2-day autonomy period, a 12V system, and LiFePO4 at 80% DoD:
- Multiply daily load by autonomy days: 815 × 2 = 1,630 Wh total
- Multiply system voltage by DoD: 12 × 0.80 = 9.6
- Divide: 1,630 ÷ 9.6 = 170 Ah required
- Add 20% buffer: 170 × 1.20 = 204 Ah
Round up to the nearest commercially available size. In this case, two 100 Ah LiFePO4 batteries wired in parallel gives 200 Ah, which is close and acceptable. Alternatively, one 200 Ah battery if available.
Voltage choice matters beyond just the calculation. Here is a comparison:
| System voltage | Best suited for | Advantage |
|---|---|---|
| 12V | Small van builds, caravans, boats | Simple wiring, widely compatible components |
| 24V | Medium off-grid cabins, larger motorhomes | Reduced current, smaller cable cross-section |
| 48V | Residential off-grid, large solar arrays | Lowest current, best efficiency at scale |
Series wiring increases voltage; parallel wiring increases amp-hour capacity. Four 12V 100 Ah batteries wired in series produce 48V at 100 Ah. The same four wired in parallel give 12V at 400 Ah. Never mix batteries of different brands, ages, or capacities in the same bank. Mismatched cells cause imbalance, premature failure, and in worst cases, safety risks.
Pro Tip: If you plan to expand your system later, build for 24V or 48V from the start. Retrofitting higher voltage after the fact means replacing cables, fuses, and often the inverter.
Understanding the core battery terminology around voltage, amp-hours, and state of charge helps you interpret monitor readings and avoid misunderstandings when specifying components.
Common sizing mistakes and maintenance
Even with the right formula, practical errors undermine well-sized systems. The most frequent:
- Sizing to rated capacity instead of usable capacity, which produces a bank that is effectively undersized from day one
- Ignoring inverter efficiency losses on AC loads, consistently underestimated in off-grid builds
- Skipping seasonal variation, which leaves UK-based systems short in winter months
- Mixing old and new batteries in the same bank, creating charge imbalances that degrade the stronger cells
- Setting charge controllers without temperature compensation on lead-acid systems
On the maintenance side, battery monitors extend system lifespan by tracking state of charge and voltage in real time, allowing you to catch problems before they cause damage. For LiFePO4, maintenance is minimal, but reviewing the battery management system log periodically is good practice. Lead-acid and AGM banks benefit from equalisation charges and electrolyte checks where applicable.
Consistent shallow cycling and accurate monitoring are the two habits that consistently separate long-lived battery banks from premature replacements.
My take on sizing: what the numbers miss
I have reviewed a lot of off-grid builds, both on campervans and residential installs, and the pattern in failed systems is almost always the same. The builder trusted a ballpark figure instead of completing a genuine load audit. They rounded down instead of up, skipped the DoD adjustment because it seemed overcautious, and ended up back at the start six months later wondering why their system underperforms.
What I have found is that the formula is not the hard part. Most people can follow the maths once they understand it. The hard part is the load audit. People consistently underestimate consumption on devices like compressor fridges, heating fans, and entertainment systems. A fridge that cycles 40% of the time in summer may cycle 70% in winter if it is in a poorly insulated space. That shift alone can move your daily load by 200 Wh or more.
My honest recommendation: spend more time on the audit than on the calculation. Get actual wattage readings where you can. And always apply the 20% buffer. Not because the formula is imprecise, but because real life adds loads you have not planned for. A second device, a longer trip, a cold week in February. The buffer absorbs all of it.
Investing in a proper battery chemistry from the start, specifically LiFePO4 with a quality BMS, also removes a huge amount of the long-term risk. The upfront cost is higher, but the reduction in sizing uncertainty and maintenance overhead pays back quickly in a working system that does not need early replacement.
— John
Power your off-grid system with confidence

Getting the sizing right is only half the job. The other half is pairing your battery bank with efficient, reliable charging hardware. Skyenergi supplies the Victron solar panel and Smart MPPT controller bundle, which pairs a high-output 610W panel with Victron’s smart charge control for precise, battery-safe solar input. For complete system builds, the 3kVA solar electrics system includes an inverter/charger, DC-to-DC charger, and monitoring, everything needed to complement a correctly sized battery bank. Browse the full range at Skyenergi and spec your system with confidence.
FAQ
How do I calculate battery bank size in Ah?
Use the formula: (Daily Wh × Autonomy days) ÷ (System voltage × DoD) = Required Ah. Add a 20% buffer to the result to account for real-world inefficiencies and capacity degradation.
What depth of discharge should I use for LiFePO4?
LiFePO4 batteries are typically rated at 80% DoD, meaning you can safely use 80 Ah from a 100 Ah battery. Staying within this limit protects cycle life and maintains long-term performance.
How many autonomy days do I need in the UK?
For UK off-grid systems, 3 to 5 autonomy days is advisable due to the frequency of overcast periods, particularly in winter. Sunnier regions can work with 2 to 3 days.
Can I mix different batteries in one bank?
No. Mixing batteries of different brands, ages, or capacities creates charge imbalance and accelerates cell degradation. Always use matched batteries from the same batch where possible.
Does temperature affect my battery bank size calculation?
Yes. Cold temperatures reduce effective capacity, particularly in lead-acid systems where capacity can drop to 50–60% at minus 18°C. Include a temperature buffer in your sizing if the installation location is subject to low temperatures.
Recommended
Prev post

What is lithium battery recycling: a clear guide
Updated on 25 May 2026
Next post

Lithium battery terminology explained: a clear guide
Updated on 23 May 2026


