


7 Crucial Skyenergi Lithium Battery Compartment Installation Steps
Planning a lithium battery compartment installation? Follow our 7-step guide for safe, secure fitting of Skyenergi batteries and SRNE charge controllers.
Last Updated: November 9, 2026
Quick Summary
To install a Skyenergi lithium battery compartment, measure floor space, headroom and distance to the charger before drilling, then pick a dry spot with airflow and reachable terminals. Secure the battery with a proper bracket, fuse every positive cable and match cable gauge to current.
- Leave a gap around the battery casing so warm air can move and heat can escape.
- Fuse every positive cable close to the battery terminal and fit a disconnect switch.
- Place the battery low and as close to the axle as practical for weight distribution.
- Wire the SRNE controller battery first, then solar panels, then loads.
- The Skyenergi Elite range includes heat pad technology; the Edge range does not.
Table of Contents
- Assessing Your Space for a Lithium Battery Compartment
- Campervan Lithium Battery Ventilation Requirements
- Lithium Battery Installation Safety Standards to Follow
- Securing Your Battery: Mounting and Weight Distribution
- SRNE Solar Charge Controller Wiring and System Integration
- Thermal Management and Cold Weather Performance
- Troubleshooting Your Installation and Next Steps
- Frequently Asked Questions
Assessing Your Space for a Lithium Battery Compartment
Getting the space right before you drill a single hole is the difference between a clean install and a running repair. Skyenergi lithium battery compartment installation starts with honest measurement, not guesswork. Most failed builds we see began with someone buying a battery first and finding a home for it second.
Walk to your van with a tape measure and a torch. Check three things:
- Floor dimensions against your chosen battery's footprint, plus clearance for cables and a mounting bracket
- Headroom for terminal access and any future shunt or monitoring wiring
- Distance to the charger and inverter, because long cable runs create voltage drop
The Skyenergi Edge 100Ah and Edge 280Ah are available for different space requirements, and the Elite range adds heat pad technology and Victron CAN-Bus integration, which matters if you plan a smart system.
Pick a spot that stays dry, sits close to the charger, and lets you reach the terminals without dismantling furniture. That last point gets ignored, and it costs people hours later.
Campervan Lithium Battery Ventilation Requirements
Campervan lithium battery ventilation requirements are simpler than lead-acid rules, but they are not zero. You do need airflow to manage heat.
A few practical rules:
- Leave a gap around the battery casing so warm air can move
- Avoid fully sealing the compartment with no route for heat to escape
- Keep the compartment away from direct sun and heat sources
- Do not block any existing vents in the van body
Thermal runaway is rare in quality lithium iron phosphate cells, but it is why airflow and correct charging matter. For a deeper walkthrough, our guide on safe ventilation for campervan battery banks covers ducting and layout in detail.
Lithium Battery Installation Safety Standards to Follow
Fuse protection, correct cable gauge and a proper isolation switch are important parts of any lithium installation.
The essentials:
- Fuse every positive cable close to the battery terminal. Size the fuse to suit your battery and cable run, and use a quality fuse rated for the fault current.
- Match cable gauge to current so cables do not overheat under load. Longer runs need thicker cable to limit voltage drop.
- Fit a battery disconnect switch so you can isolate the bank for maintenance. A latching relay or a manual isolator rated for the full load current is acceptable.
- Ground the system correctly to the van chassis. Use a dedicated earth point with a star washer to ensure a low-resistance connection. Do not rely on the vehicle's original earth straps alone.
- Check your insurance policy covers a DIY lithium install before you start. Many UK insurers require proof of professional installation or a periodic electrical inspection (e.g., every 3 years) for leisure vehicles with lithium banks. Without this, a claim could be refused.
A common mistake is undersizing cable and then wondering why terminals run warm. Terminal torque matters too: loose connections create resistance and heat. Tighten terminals to the torque specified by the manufacturer.
For the DC side, follow the manufacturer's instructions and use components rated for the environment. If you are unsure whether lithium is right for your van at all, our guide to lithium battery safety in a van answers the wider questions first.
Securing Your Battery: Mounting and Weight Distribution
A lithium leisure battery is still a heavy item that must not move. Secure mounting and sensible weight placement keep your van handling predictably.
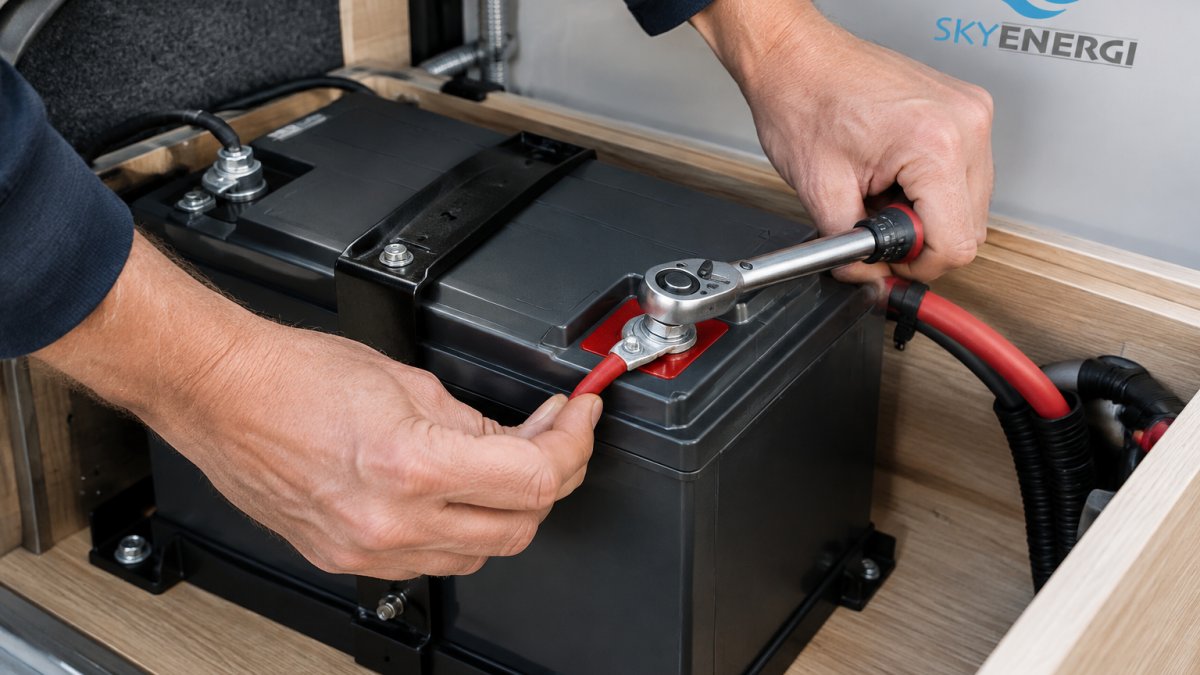
Use a proper mounting bracket and bolt the battery down.
Weight distribution is the angle most guides miss. Place the battery low and as close to the axle as practical. Keep heavy items balanced across the van rather than loading one rear corner. For the full picture, read our advice on balancing campervan weight for better handling.
SRNE Solar Charge Controller Wiring and System Integration
SRNE solar charge controller wiring follows a fixed order: battery first, then solar panels, then loads (Solar Charge Controller Basics: How to Set Up Off-Grid Power for Your Cabin or Farm). Getting that sequence wrong can damage the controller.
The wiring workflow:
- Connect the controller to the battery bank, observing correct polarity
- Confirm the controller reads battery voltage
- Connect the solar panel input
- Connect any load output last
- Set the charging profile to suit lithium iron phosphate
An MPPT solar controller like the SRNE range manages the charging profile and protects the battery from overcharge. Use a wiring harness rated for your current and keep runs short to limit voltage drop. If your controller runs hot, our guide on preventing solar charge controller overheating explains the causes and fixes.
Thermal Management and Cold Weather Performance
Cold weather performance is where lithium earns its reputation for fussiness. Charging a lithium iron phosphate battery below freezing can damage the cells, so thermal management is not optional for year-round use. But most guides stop at 'fit a heat pad' without explaining why heat distribution matters.
Lithium batteries generally charge less efficiently in cold conditions, and their battery management systems limit charging when the cells are too cold (Battery University).
The Skyenergi Elite range includes heat pad technology, while the Edge range does not include Bluetooth or heat pad technologies, so if you camp through winter, plan for that difference.
Practical steps:
- Insulate the compartment where possible, but leave it vented to avoid trapping heat in summer.
- Site the battery away from external walls that get coldest. In a campervan, the floor near the rear wheel arch is often the coldest spot; a central location under a seat is better.
- If you charge in freezing conditions, consider a battery with built-in heating, such as the Skyenergi Elite range.
- Monitor state of charge with a shunt or battery monitor. Voltage-based readings are unreliable in cold; a shunt (e.g., Victron SmartShunt) counts coulombs and gives a true state of charge.
Watch out: do not insulate the battery so thoroughly that summer heat cannot escape.
For the full picture on winter use, read our guide on whether lithium leisure batteries are safe in cold weather.
Troubleshooting Your Installation and Next Steps
Most post-installation problems trace back to three things: a loose connection, a wrong charging profile, or a BMS that has tripped to protect the cells. Check those first before assuming a faulty battery.
Quick troubleshooting checklist:
- No power at all: check the disconnect switch and main fuse
- Battery will not charge: confirm the charging profile matches lithium
- Voltage drops under load: check cable gauge and terminal torque
- BMS cuts out: the cells may be too cold or too hot; let them settle
The Skyenergi Edge and Elite ranges both use JBD battery management systems and EVE lithium cells, and the Edge and Elite housings are rated IP65 and IP67 respectively. Pair an Edge with a Victron SmartShunt if you want live monitoring.
Most post-installation problems trace back to a few common causes, so check these first.
| Symptom | Likely cause | Fix |
|---|---|---|
| No power at all | Disconnect switch or main fuse | Check the disconnect switch and main fuse |
| Battery will not charge | Wrong charging profile | Confirm the charging profile matches lithium |
| Voltage drops under load | Cable gauge or terminal torque | Check cable gauge and terminal torque |
| BMS cuts out | Cells too cold or too hot | Let them settle |
Getting a lithium system right is about patience in the planning and precision in the wiring. At Skyenergi, we supply the batteries, SRNE charge controllers, and 12V accessories to build a system that lasts, backed by UK-based support and fast delivery. Get started with Skyenergi and build a power system you can trust off-grid.
Frequently Asked Questions
Do lithium batteries need to be vented in a campervan compartment?
Ensure the space is not completely sealed and has some passive vents to prevent heat build-up, especially if the compartment is near a heat source like an inverter or charger.
Can I install a Skyenergi lithium battery in an existing lead-acid battery compartment?
Skyenergi Edge and Elite batteries are lithium leisure batteries; check the dimensions of your chosen model against your available space. The key considerations are securing the new battery properly, as it weighs less, and ensuring your charging system is compatible. You may need to update your charger's profile to a lithium setting or add a DC-to-DC charger to protect your alternator. Always check the voltage and charging profile of your existing equipment.
How do I secure a lithium battery in a campervan battery box?
Use a dedicated battery tray or mounting bracket that is bolted through the vehicle floor or chassis for maximum strength. The battery should be clamped down firmly so it cannot move during transit. Secure the battery tightly so it cannot move. Use a strap or metal bracket that fits snugly over the battery case. Check the torque on the terminal bolts regularly, as vibration can loosen connections over time.
What is the recommended clearance for lithium battery compartments?
Allow adequate clearance around the battery for airflow, and avoid packing the compartment tightly with other equipment. Do not pack the compartment tightly with other equipment. The goal is to allow natural convection to move air around the battery and electronics to keep temperatures within the optimal operating range.

Prev post

7 Steps to Improve Campervan Fridge Ventilation
Updated on 12 November 2026
Next post

Skyenergi Seat Base Lithium Battery Dimensions Explained
Updated on 10 November 2026


