


7 Steps to Improve Campervan Fridge Ventilation
Campervan fridge ventilation is the fix for a fridge that runs hot, with vent placement, a 12V extraction fan and clearance tips to keep it cool in summer.
Last Updated: November 10, 2026
Quick Summary
To improve campervan fridge ventilation, keep at least 50mm of clearance on all sides of the fridge, place a low inlet vent and a high outlet vent apart from each other, and add a 12V extraction fan controlled by a thermostat. Seal warm-air gaps around cable and pipe entries, and insulate the cavity while keeping the vent paths clear.
- Maintain a minimum clearance of 50mm on all sides of the fridge.
- Place the inlet vent low and the outlet vent high to follow the natural rise of warm air.
- Position a high extraction fan with airflow matched to the free area of your vent grilles.
- Mount the temperature sensor inside the cavity near the condenser, not on the outside wall.
- Fuse the fan at or just above its rated current to reduce fire risk in an enclosed van.
Table of Contents
- Understanding Airflow Requirements for a Campervan Fridge
- What You'll Need Before Starting
- Step 1 to 3: Clearing Space and Positioning Inlet and Outlet Vents
- Step 4 to 5: Installing a Campervan Fridge Ventilation Fan
- Step 6: Sealing Gaps and Insulating the Fridge Cavity
- Improving 12V Compressor Fridge Efficiency and Absorption Fridge Ventilation
- Your Next Step: Booking a Ventilation Check With Your Electrical Setup
- Frequently Asked Questions
Understanding Airflow Requirements for a Campervan Fridge
Your campervan fridge needs air to work well. A 12V compressor fridge pulls heat out of its cabinet and throws it into the surrounding space, which is why good campervan fridge ventilation matters. If that heat has nowhere to go, the fridge works harder, runs longer and drains your leisure battery faster.
The fridge needs space around it to breathe. Maintain a minimum clearance of 50mm on all sides of the fridge for adequate airflow. Inlander Low Voltage installation guidelines for built-in 12V compressor fridges.
Ventilation matters more in hot weather. Well-placed ventilation grilles and a fan can make a clear difference to cooling performance when the ambient temperature rises. Thetford guidance on absorption versus 12V compressor fridge ventilation
Think of it as a simple loop. Cool air comes in low, picks up heat from the fridge, and leaves high. Blocked vents break that loop.
What You'll Need Before Starting
Gather your tools and parts before you cut anything. This saves time and stops mistakes.
- Grille or vent covers sized for your fridge cavity
- A 12V extraction fan with a suitable cutout size
- Insulation board and sealing tape
- A tape measure and pencil
- A jigsaw or hole saw
- Fused 12V wiring and a clean power distribution point
For the power side, a neat distribution box makes the job tidier. The SRNE DB12 distribution box is a clean way to organise fridge circuit wiring. SRNE DB12 distribution box guide.
If your fan runs on a fused high-current circuit, a fused distribution point keeps the wiring tidy. Skyenergi's range of power distribution and protection equipment can help you assemble one.
Step 1 to 3: Clearing Space and Positioning Inlet and Outlet Vents
Start by clearing the area around the fridge before you begin your campervan fridge ventilation work. Remove stored items, loose cables and anything that sits against the cabinet.
Next, mark your inlet and outlet vent positions. Place the inlet low and the outlet high. This follows the natural rise of warm air.
Keep the two vents apart. Vents placed too close together can let hot air loop straight back in, so aim for separation across the cavity.
Check that nothing blocks either vent. Floor vents can help, but they can also let dust and debris into the living space. FarOutRide DIY camper conversion notes on floor vents.
Step 4 to 5: Installing a Campervan Fridge Ventilation Fan
A fan turns passive venting into active cooling. Before you cut anything, decide which way the air should move. The usual layout is an extraction fan high on the cabinet, pushing warm air out, with a low inlet vent drawing cooler air in. If the fan blows inwards, it will pull warm air from the van interior back across the condenser and undo the benefit.
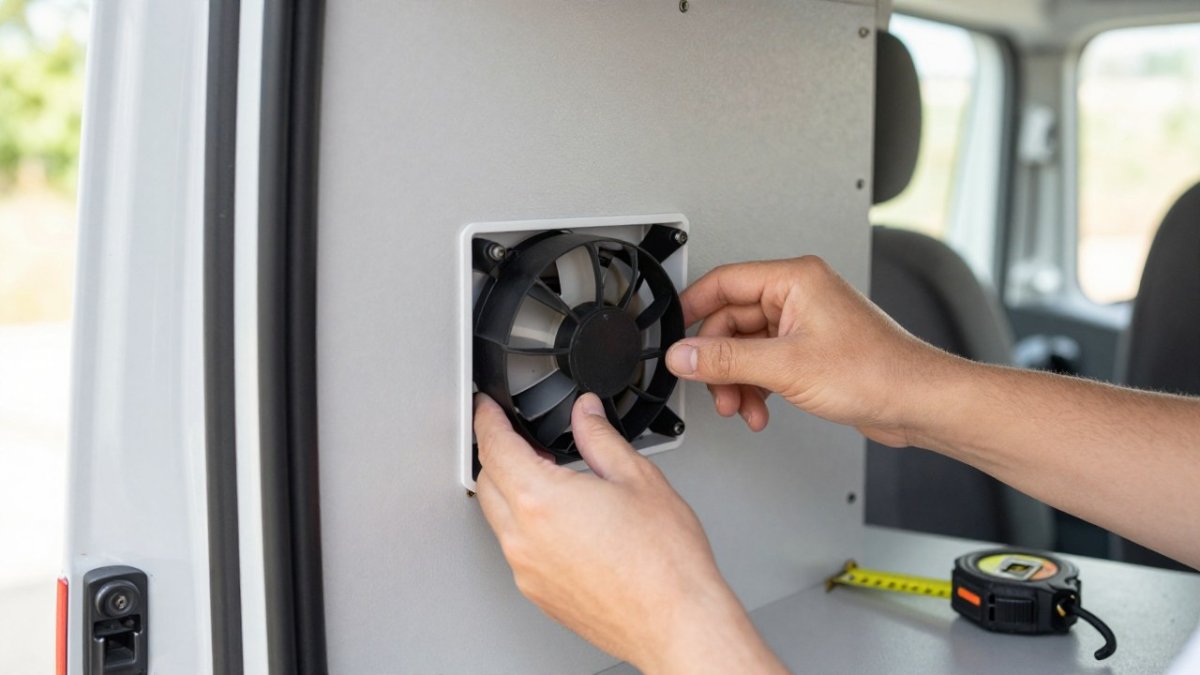
The chimney effect explains why height matters. Warm air is less dense, so it rises and collects at the top of the cavity. A fan placed high and an inlet placed low let that natural rise do part of the work, and the fan only has to overcome the resistance of the vents and the cavity. Placing the fan low, or both openings at the same height, forces the fan to fight the natural flow and gives you poorer results for the same power draw.
Size the fan to the cutout you can actually make. Check the fan's airflow rating in cubic metres per hour and compare it against the free area of your vent grilles. A powerful fan behind a small or heavily louvred grille will be noisy and inefficient, because the air is forced through a restriction.
Controlling the fan automatically. A manual switch is the simplest option. A better option is a thermal switch or thermostat module that turns the fan on above a set temperature and off below it. Mount the temperature sensor inside the cavity near the condenser, not on the outside wall of the van. This keeps the fan quiet on cool nights and running only when the fridge is working hard. Wire the switch in series with the fan's positive supply, behind the fan's own fuse, so the control unit can be serviced without touching the main fridge circuit.
Keeping it quiet. Fan noise usually comes from vibration transmitted into the bodywork rather than from the fan itself. Fit rubber or silicone grommets at each mounting point, and add a thin layer of foam or butyl damping pad to the panel the fan is screwed into. Where you can, choose a fan with sleeve or fluid bearings, as these can run more quietly over time. Set the fan speed lower with a PWM controller, since a fan running at reduced speed moves less air but is far quieter, and for many fridges that trade is worth it.
Watch out: a fan wired to a circuit with no fuse, or with an undersized fuse, is a fire risk in an enclosed van. Fuse the fan at or just above its rated current, use cable rated for the load and the run length, and keep every connection crimped and protected from heat and vibration.
When the fan is fitted, run it for a few minutes with the fridge on and check the direction of airflow by holding a strip of tissue at each vent. Confirm the cavity temperature drops after a short run, and that the fan switches off as intended once the thermostat threshold is reached.
Step 6: Sealing Gaps and Insulating the Fridge Cavity
Warm air sneaks in through small gaps, and every gap that lets warm cabin air reach the condenser makes the fridge run longer. Sealing these gaps is a key part of campervan fridge ventilation, and the effect is easy to underestimate. A gap that looks trivial around a cable grommet can let a steady stream of warm air across the condenser for hours each day. Ensuring these seals remain airtight prevents unnecessary power draw, which is a fundamental aspect of proper van electrical system maintenance.
Start by finding the leaks. On a warm, still day with the fridge running, hold the back of your hand around the cabinet edges, cable entries, pipe penetrations and the join between the fridge and the furniture. Any area that feels warm or draughty is a candidate. A cheap smoke pen or a stick of incense will show the air movement more clearly.
Seal the gaps with a flexible, temperature-rated sealant or closed-cell foam tape. Closed-cell foam resists moisture better than open-cell types, which matters in a van that sees condensation. Avoid sealing the cabinet so tightly that the fridge has no route for its own exhaust heat. The aim is to stop uncontrolled warm air entering the cavity, not to trap heat inside it, so keep the designed inlet and outlet paths open.
Insulation reduces the heat reaching the fridge in the first place. Fit rigid insulation board to the walls of the cavity where space allows, leaving the vent paths clear. Choose a board with a stable closed-cell structure, and mount it so it does not block the airflow path you planned in the earlier steps. Insulating the wall that faces the hottest part of the van, such as a wall near the engine bulkhead or a sun-exposed side, usually gives the biggest gain for the least work.
Watch out: if you seal the cavity and remove the vent openings at the same time, the fridge can overheat within a short time in warm weather, and the compressor may fail early. Check the vents remain open and unobstructed after every sealing job, and test the fridge cavity temperature before and after the work so you can see whether the changes helped.
Finally, recheck your seals after the first few weeks of use. Vibration on rough roads loosens tape and shifts foam, so a quick inspection every few months keeps the cavity doing its job.
Improving 12V Compressor Fridge Efficiency and Absorption Fridge Ventilation
Compressor and absorption fridges handle heat differently. A 12V compressor fridge needs strong airflow across the condenser. An absorption fridge relies on a steady flow of air to dissipate heat from its burner side.
To improve efficiency, baffles can direct air straight across the cooling unit. Physical baffles stop heat from getting trapped near the fridge body. YouTube guides on fridge baffles and heat management
A complete 12V system helps here too. Power supply and wiring affect how well the fridge runs, so consider the full system. 12V campervan electrical system kit guide.
If your fridge keeps cutting out, check your voltage and ventilation together. Low voltage and blocked vents often cause the same symptom. Our troubleshooting guide covers the common fixes. Why your campervan fridge cuts out: 7 fixes.
Your Next Step: Booking a Ventilation Check With Your Electrical Setup
Better campervan fridge ventilation starts with the right airflow and the right power. Skyenergi supplies lithium leisure batteries, solar charging and power management equipment, including SRNE products, for campervan electrical systems.
Pricing depends on system size, components and delivery, so check the Skyenergi website for current prices or ask for a quote. Get in touch with Skyenergi to plan a ventilation fix that matches your setup.
Frequently Asked Questions
Does a campervan fridge need ventilation?
Yes. A compressor fridge rejects heat from its condenser, and that heat has to leave the cavity or the unit works harder and cools less effectively. Manufacturers' installation guidance sets out the minimum clearance each fridge needs for adequate airflow. Without it, heat builds up behind the unit, which is most noticeable in warm weather or when the van is parked in direct sun. Good ventilation keeps the fridge running at a steadier temperature and reduces the time the compressor runs.
Will a campervan fridge ventilation fan drain my leisure battery?
A small 12V fan draws only a modest current, and it usually runs for a short time, so its effect on the battery is limited. The bigger gain comes from the fridge itself working less often. Running the fan from a switched circuit, or linking it to a thermostatic control so it only runs when the cavity is warm, keeps the draw low. A lithium leisure battery's state-of-charge reading can show the effect in practice.
Can poor ventilation make a campervan fridge stop cooling?
It can. When warm air is trapped behind the fridge, the condenser cannot shed heat efficiently, and the cooling performance falls. In hot conditions the unit may struggle to hold its set temperature. Check that the inlet and outlet vents are clear, that nothing blocks the airflow path, and that the fridge has its recommended clearance. If the problem continues after these checks, look at the voltage supplied to the fridge, since low voltage can also reduce cooling.
Do campervan fridge vents need to be at the top and bottom?
Ideally, yes. Cool air enters through a lower vent and warm air leaves through a higher one, so the natural convection of the air carries heat out of the cavity. Placing the inlet low and the outlet high uses this chimney effect. Vent trims and a baffle can help direct the airflow across the condenser coils. Keep the vents clear of dust and debris, and fit a fine mesh where they open into the living area.

Prev post

SRNE Solar Panel Kits for UK Rooftops: What to Choose
Updated on 13 November 2026
Next post

7 Crucial Skyenergi Lithium Battery Compartment Installation Steps
Updated on 11 November 2026


