


How Do You Connect an SRNE Inverter to Wi-Fi?
Learn how to connect your srne inverter wi-fi module, set up the app, register the device and fix offline connections. Follow the steps here.
Last Updated: November 17, 2026
Quick Summary
To connect an SRNE inverter to Wi-Fi, fit the SRNE Wi-Fi module into the inverter's dedicated data port, confirm compatibility first, then join your 2.4 GHz network and bind the device in the SRNE app. The srne inverter wi-fi link then lets you view live operating data from your phone.
- Check the module's part number against your inverter's manual before ordering or connecting.
- Your router should broadcast a 2.4 GHz network, as some modules will not join a 5 GHz band.
- Isolate the battery and switch the inverter off before touching any connections.
- Confirm the module's pinout and port match the manual, as wrong wiring can damage the communication circuit.
- If the app shows frozen values while the inverter display is live, the fault lies in the communication link.
Table of Contents
- What the SRNE Wi-Fi Module Does and Which One You Need
- Checking Compatibility Before You Buy or Connect
- SRNE Wi-Fi Module Setup: Fitting and Powering the Module
- Registering the Device and Binding It in the App
- SRNE Inverter Monitoring App: Viewing Live Data
- SRNE Inverter Wi-Fi Troubleshooting: Fixing Pairing and Offline Problems
- Booking Your Next Step: Getting Your SRNE Monitoring Running with Skyenergi
- Frequently Asked Questions
If your SRNE inverter is sitting in the van with no way to see what it's doing, an SRNE inverter Wi-Fi module is the fix. This guide walks you through what the module does, how to check it fits your setup, and how to connect it to your Wi-Fi network and the monitoring app. Most of the work is in the checks before you start, so take those seriously.
What the SRNE Wi-Fi Module Does and Which One You Need
The SRNE Wi-Fi module is a small external adapter that plugs into a dedicated data port on the inverter, turning it into a srne inverter wi-fi connection you can monitor from your phone. It lets you view operating status and parameters on your phone through the SRNE app. The module is optional, so the inverter works without it, but you lose remote visibility.
Check the part number before you order. The module you need depends on your inverter model. Match the module to the inverter's manual rather than assuming one fits all.
Checking Compatibility Before You Buy or Connect
Compatibility is where most srne inverter wi-fi setups go wrong, and the fix is to work from the inverter's own label rather than from a product listing. Look up your exact inverter model and read its user manual before buying anything. The manual shows which communication port the inverter has and what the Wi-Fi module expects.
Before you start, confirm three things:
- The inverter model number matches the module's listed compatibility.
- Your router supports the Wi-Fi band the module uses.
- The data cable and connector match the inverter's port.
Model-by-model module selection
SRNE inverters do not all share one data interface, so the module and connection method follow the model family. Use the table below as a starting point, then confirm against the manual for your exact model and revision.
| Inverter family or series | Typical data interface | Module and connection method to confirm |
|---|---|---|
| SRNE hybrid and off-grid inverter families with a dedicated Wi-Fi/RS485 data port | Dedicated RJ45-style data port, often carrying RS485 on defined pins | SR-WF-1 Wi-Fi module plugged directly into the data port; verify pinout in the manual |
| SRNE inverter families with a separate communication terminal block | Screw-terminal RS485 A/B pair | Wi-Fi module or gateway wired to the A/B terminals; confirm terminal labels and cable |
| SRNE inverter families with an optional module bay or expansion slot | Manufacturer-specific slot | Only the module listed for that slot; do not force a dongle into an unrelated port |
| Older or non-networked SRNE models | No data port or limited monitoring | External monitoring may not be supported; check the manual before ordering |
This table is a guide, not a substitute for the manual. SRNE has revised boards and connectors across production runs, so the same model name can appear with different communication hardware. If the manual and the label disagree, check with the manufacturer's documentation before you order.
What to check on the module and cable
- Confirm the module part number matches the one named in your inverter manual, not just the SRNE brand.
- Check that the supplied cable or connector is the one specified for your port; a cable that fits physically can still carry the wrong signals.
- Confirm the module's supported Wi-Fi band before you plan the router position.
- Check the module's power source: some draw power from the inverter's data port, others need a separate supply, and the manual will say which.
Skip this step and you can waste an evening on a module that will never connect. A five-minute check of the model label and manual page saves the return postage and the reinstall.
SRNE Wi-Fi Module Setup: Fitting and Powering the Module
Switch the inverter off and isolate the battery before you touch any connections. Work in the van's electrical compartment with the inverter in reach and good light.
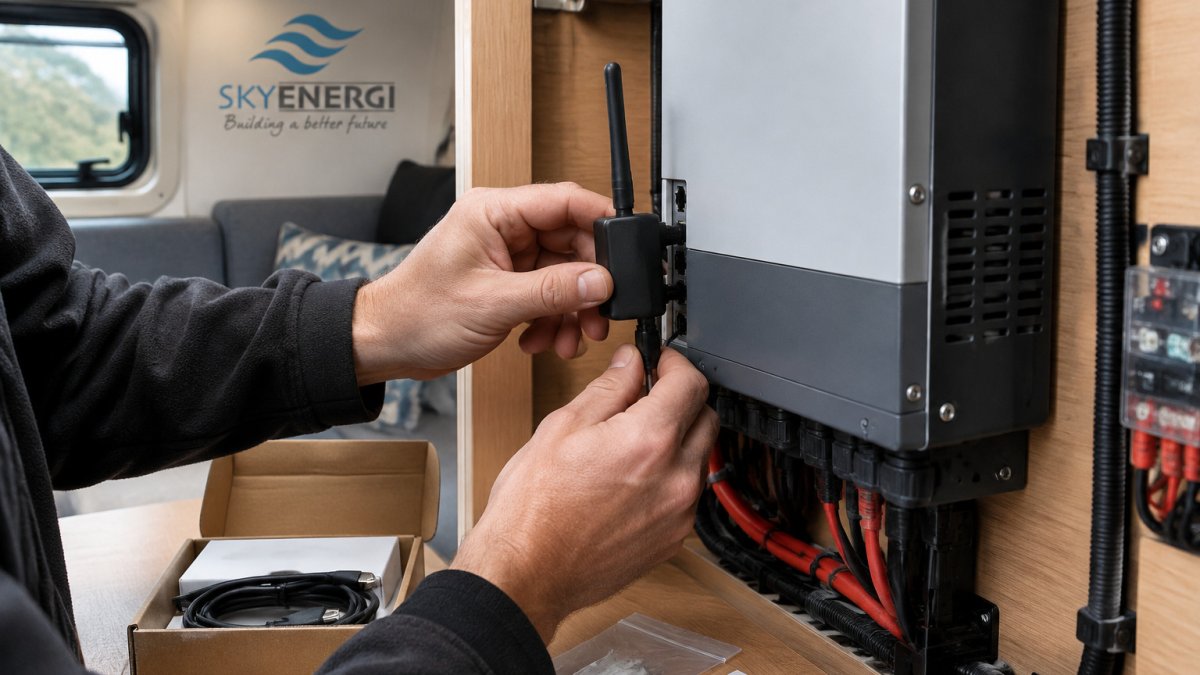
Locating the Dedicated Data Interface and Checking the Pinout
Find the dedicated data interface on the inverter. Check the inverter manual's pinout before you connect anything, because connector details can differ between models. Verify the pinout against your own inverter manual.
Watch out: connecting a module to the wrong port or with the wrong pinout can damage the communication circuit. Confirm the port and pinout first.
Connecting the Module to Your Wi-Fi Network
Plug the module into the data interface, then power it up as the manual describes. Once it powers on, open the SRNE app on your phone and add the device.
Enter your Wi-Fi network name and password when prompted. Check which Wi-Fi band your module supports and connect to a network on that band. If the module cannot find your network, check the band before anything else.
Registering the Device and Binding It in the App
Create or sign in to your account in the SRNE app. Registration ties the module to your login, so use an account you control and can recover.
Bind the module to your account by following the on-screen prompts. Binding means the app links the physical device to your profile, so you can see its data from any phone signed in to that account. Keep the account details somewhere safe.
SRNE Inverter Monitoring App: Viewing Live Data
Once the srne inverter wi-fi module is bound, the app shows the inverter's live data. You can check operating status, battery voltage and the other parameters the manual lists. Open the device screen and confirm the figures match what the inverter shows on its own display.
Check the data over a day or two of normal use. If the values stay steady and update, the connection is working. If they freeze or drop out, move to troubleshooting.
SRNE Inverter Wi-Fi Troubleshooting: Fixing Pairing and Offline Problems
Most failures with a srne inverter wi-fi setup fall into a few groups. Work through them in order, starting with what the module is telling you before you change any settings.
Read the module's indicator first
Before touching the app, look at the module's status light. The pattern tells you which layer has failed:
- No light at all: the module is not receiving power. Check the data port connection and confirm the inverter is on and supplying the port.
- Light on but not flashing, or flashing in a pattern the manual describes as unconnected: the module has power but has not joined your Wi-Fi network. Go to the network checks.
- Light showing a connected state but the app shows offline: the module is on the network but cannot reach the SRNE cloud service or the inverter. Go to the registration and communication checks.
- Light cycling between states: the module is repeatedly losing and regaining the network. Treat this as a signal-strength problem first.
Exact light colours and flash patterns vary by module revision, so match what you see to the table in your module manual rather than to a generic description.
Network checks
- Confirm your router broadcasts a 2.4 GHz network the module supports. A dual-band router that shares one network name can confuse some modules.
- Check the password characters. Some modules reject passwords with symbols or spaces, so try a simpler password on a test network if pairing keeps failing.
- Move the router closer or reduce interference nearby. Metal van walls, inverters and battery banks all weaken the signal at the installation point.
- Confirm the phone is on the same 2.4 GHz network during setup, not on mobile data or a 5 GHz band.
Registration and app checks
- Make sure the app is signed in to the account you intend to use, and that the device is bound to that account rather than to a previous installer's login.
- If the app will not add the device, retry the "+" add-device step after closing and reopening the app, and confirm the module is in pairing mode as the manual describes.
- If the device shows offline after setup, sign out and back in to refresh the device list before assuming a hardware fault.
Communication checks between module and inverter
- Confirm the module is in the port the manual specifies, not a similar-looking port nearby.
- Check the pinout and cable against your inverter's manual. A wiring fault mimics most of the symptoms above: the module powers up, joins Wi-Fi and binds, but the data never arrives.
- Restart the module and the inverter in the order the manual gives, then check the app again.
- Compare the app's readings with the inverter's own display. If the display shows live values and the app shows frozen ones, the fault is in the communication link, not the inverter.
Isolate the inverter and battery before you reseat or rewire the module.
If none of these fix it, check the pinout and cable against your inverter's manual, since a wiring fault can mimic most of these symptoms.
Booking Your Next Step: Getting Your SRNE Monitoring Running with Skyenergi
With the module connected and live data showing, you can get more from the system. Our guide on matching SRNE solar kits to your household energy use helps you check whether your setup covers your daily load. If you are still choosing hardware, SRNE solar panel kits for UK rooftops shows which options suit a van roof. Once monitoring is running, tracking battery health step by step explains what to watch in the app data.
Visit skyenergi.com or call 01777 801450 to get in touch about SRNE products.
Frequently Asked Questions
How do I connect an SRNE inverter to Wi-Fi?
Connect the Wi-Fi module to the inverter's dedicated data interface, power it up as the inverter manual describes, then add the device in the monitoring app using the '+' control. The app will ask you to join the module to your home Wi-Fi network. Check the manual for the exact port and steps for your model, because the connection details can differ between SRNE models. Once the module is linked to your account, the inverter's data should appear in the app.
Which Wi-Fi module is compatible with my SRNE inverter?
Compatibility depends on the inverter model, so start with the inverter's user manual, which identifies the supported module and its connection. Check the model number on the inverter against the module documentation before ordering. Do not assume that one module works with every SRNE unit. If you are unsure which module fits your inverter, check the inverter manual or the module documentation before you buy.
Does an SRNE inverter need a 2.4 GHz Wi-Fi network?
Many Wi-Fi modules connect to 2.4 GHz networks, and the module documentation is the authority on this for your model. Check the module's manual for supported bands before you configure it. If the module cannot find your network, try enabling the 2.4 GHz band on your router or creating a separate 2.4 GHz network for the inverter. Confirm the requirement in the documentation that came with your module.
Why is my SRNE inverter Wi-Fi module not connecting?
The most common causes are an incorrect connection to the data interface, a module that is not powered, a wrong Wi-Fi password, or a network band the module does not support. Check the cable and port first, then confirm the password and band, and restart the module. If the module is still offline after these checks, work through the troubleshooting steps in this guide or consult the inverter manual for further guidance.

Prev post

Solar Panel Mounting Kits for Rainy UK Conditions
Updated on 20 November 2026
Next post

How to Match SRNE Solar Kits to Your Household Energy Use
Updated on 17 November 2026


