


SRNE DB12 Distribution Box: 7-Step Installation Guide
Learn how to install the SRNE DB12 distribution box, covering wiring, fuse sizes, Bluetooth monitoring setup and common checks for your 12V campervan.
Quick Summary
The SRNE DB12 distribution box is a 12-way DC power distribution hub that takes power from your battery and splits it into twelve separately fused outputs for lights, fans, pumps and USB sockets. It gives a campervan one organised point where every 12V circuit starts. Installation follows a seven-step sequence, beginning with planning the layout and ending with checking every connection before connecting the battery.
- Confirm your system runs at 12V or 24V before buying or wiring the DB12.
- Size each fuse just above the calculated load current, never larger than the cable can carry.
- Use 1.5mm² cable for a 5A fuse and 2.5mm² cable for a 10A fuse on short runs.
- Connect the battery only after every cable is secure, labelled and polarity-checked.
- Pair the DB12 with the SRNE app over Bluetooth and test each channel individually.
Table of Contents
- What the SRNE DB12 Distribution Box Does in a Campervan
- Before You Start: Compatibility and Pre-Installation Checks
- SRNE DB12 Wiring Diagram: Battery, Source and Load Connections
- SRNE DB12 Fuse Sizes and Wire Gauge Guidance
- 12V Campervan Distribution Box Installation: Step-by-Step Sequence
- SRNE DB12 Bluetooth Monitoring Setup and Commissioning
- Troubleshooting a Circuit That Will Not Work and Booking Your Next Step
- Frequently Asked Questions
What the SRNE DB12 Distribution Box Does in a Campervan
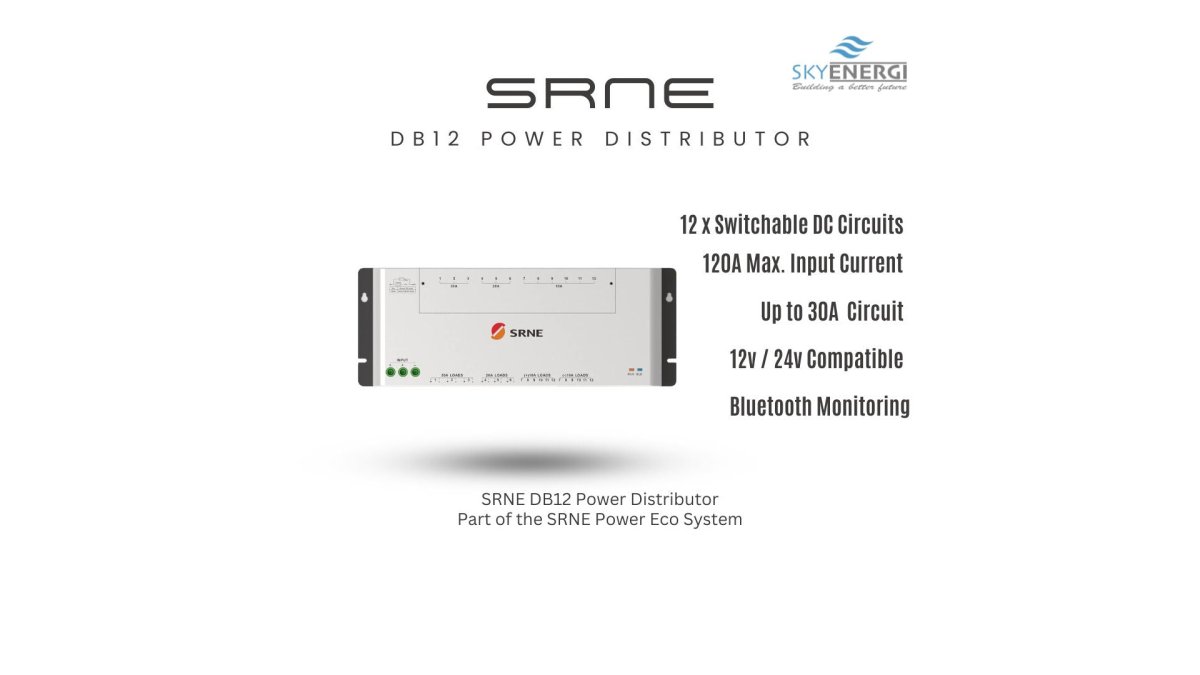
The SRNE DB12 is a 12-way DC power distribution hub. It takes power from your battery and splits it into twelve separately fused outputs for lights, fans, pumps, USB sockets and other 12V loads. Instead of running a tangle of cables from one battery terminal, you get one organised point where every circuit starts.

That matters in a campervan, where space is tight and wiring tends to grow over time. The DB12 is designed for 12V and 24V systems.
When paired with the SRNE CU2 Control Centre, the DB12 can report current and voltage for each circuit, viewable on an RMA7 touch screen or in the SRNE App. The DB12 is compatible with SkyEnergi LiFePO₄ batteries.
Before You Start: Compatibility and Pre-Installation Checks
Check compatibility before you touch a single cable. Confirm that your system runs at 12V or 24V and that the DB12 is suitable for it.
Next, check your input and output needs:
- Output count: The DB12 provides 12 independent circuits. List every load you plan to run.
- Control method: Decide whether you want switching from the SRNE CU2 relay outputs or via Bluetooth and Wi-Fi control.
- Space: Measure the mounting area and allow room for cable bends and access to the fuses.
Write down your load list before you buy any cable. It will guide your fuse and wire choices later in this guide.
SRNE DB12 Wiring Diagram: Battery, Source and Load Connections
Wiring is where most installs go wrong, so work through it slowly. Turn off all power sources before you connect anything. The DB12 has dedicated terminals for the main battery input, a secondary input, and twelve fused outputs. The exact terminal layout is shown in the manual, but the sequence below applies to any 12V or 24V campervan system.
Terminal-by-Terminal Connections
Main battery input: Connect the positive cable from the battery to the main positive terminal, and the negative cable to the negative terminal. Keep the run as short as possible and fit an appropriately rated fuse close to the battery positive terminal.
Secondary input: This is for a second power source. Connect the positive to the secondary positive terminal and the negative to the common negative bus, and protect the source with an appropriately rated fuse.
Twelve output channels: Each channel has a positive terminal and shares the common negative bus. Connect the load positive to the channel terminal and the load negative to the negative bus. Fit a fuse rating that matches the load and cable (see the fuse sizing section below).
Control link: If you are using the SRNE CU2 Control Centre or RMA7 touch panel, connect the control link as described in the product documentation.
Cable Routing and Protection
Route positive and negative cables separately where practical, and keep all runs clear of moving parts, heat sources, and sharp edges. Use trunking or conduit for runs along van walls. Label both ends of every cable before you connect anything, a label maker or numbered heat-shrink is ideal.
For 10mm² cable, Skyenergi stocks red and black at £2.84 per metre (K3BA1010R and K3BA1010B). Blue WD-10 trunking at £4.95 is a practical way to protect and hide runs.

Watch out: Reversing polarity on the main input can damage equipment. Double-check that the battery positive goes to the positive terminal before you tighten anything.
SRNE DB12 Fuse Sizes and Wire Gauge Guidance
Size each fuse to protect the cable, and size the cable to carry the load current with acceptable voltage drop. The fuse must never be larger than the cable's current-carrying capacity. Work through each circuit using the steps below. Careful fuse and cable sizing is one part of preventing electrical issues in vehicle modifications, alongside the practical considerations associated with Lee Mods.
Step 1: Calculate the Load Current
For each circuit, add up the current draw of every device on that channel. Use the manufacturer's rated current, or calculate from wattage: current (A) = power (W) ÷ voltage (V). For example, a 60W fridge on a 12V system draws 5A. Add 10-20% headroom for startup surges or future additions.
Step 2: Choose the Fuse Rating
Select a fuse rating just above the calculated current, from the standard blade fuse sizes: 5A, 7.5A, 10A, 15A, 20A, 25A, 30A. For the 5A fridge example, a 7.5A fuse is appropriate. Never fit a larger fuse to stop nuisance blowing, find the cause instead.
Step 3: Select the Cable Gauge
Choose cable that can carry the fuse rating continuously. As a guide for short runs (under 3 metres):
- 5A fuse: 1.5mm² cable
- 10A fuse: 2.5mm² cable
- 15A fuse: 4mm² cable
- 20A fuse: 6mm² cable
- 30A fuse: 10mm² cable
For longer runs, increase the gauge to keep voltage drop below 3%. A 10A load on a 10-metre run may need 4mm² rather than 2.5mm².
Worked Example
A campervan has a 12V water pump rated at 8A and a 12V LED light circuit drawing 2A. The pump gets a 10A fuse and 2.5mm² cable. The lights get a 5A fuse and 1.5mm² cable. Both are well within the DB12's 30A per-channel limit.
Watch out: A fuse protects the cable, not the device. If you fit a 30A fuse to a 1.5mm² cable, the cable can overheat and catch fire before the fuse blows.
The article gives these fuse and cable pairings for short runs under 3 metres, so you can match them quickly.
| Fuse rating | Cable gauge (runs under 3 m) | Note |
|---|---|---|
| 5A | 1.5mm² | Suits a 5A load such as a 60W fridge |
| 10A | 2.5mm² | Suits an 8A water pump with headroom |
| 15A | 4mm² | Carries 15A continuously |
| 20A | 6mm² | Carries 20A continuously |
| 30A | 10mm² | Maximum per-channel limit on the DB12 |
12V Campervan Distribution Box Installation: Step-by-Step Sequence
Follow this order to keep the job safe and tidy:
- Plan the layout. Sketch where the DB12, battery and loads will sit.
- Mount the DB12. Fix it somewhere dry, ventilated and easy to reach.
- Connect the battery input. Use the input terminals and correct cable gauge.
- Fit the input fuse. Place it close to the battery, as your fuse diagram shows.
- Wire each load. Work through your load list one channel at a time.
- Connect the control link. Attach the CU2 or RM12 if you are using them.
- Check every connection. Tighten terminals, check polarity, and confirm labels.
Only connect the battery once every cable is secure and checked.
SRNE DB12 Bluetooth Monitoring Setup and Commissioning
Once the wiring is complete, power up the system and pair the DB12 with the SRNE app over Bluetooth. Check that each channel reports sensible voltage and current readings. If a channel reads zero when its load is on, recheck that circuit's wiring and fuse.
Set up control on the RMA7 touch panel or app next. Assign each output a clear name, such as "Fridge" or "Water pump", so you can find it quickly later. Test every channel one at a time, switching each on and off to confirm it responds.
Troubleshooting a Circuit That Will Not Work and Booking Your Next Step
If a circuit does not work, start with the simplest checks. Look at the fuse for that channel first. A blown fuse is the most common cause. Next, check the cable connections at both ends, then confirm the load itself works on a known-good supply.
If a circuit keeps blowing its fuse, do not replace it with a bigger one. Find out why the circuit draws too much current, whether that is a faulty load or a cable that is too thin for the run.
To read more about the SRNE DB12 Distribution Box before you order.
BUTTON: Plan your DB12 install CARD_TITLE: Ready to wire your campervan? CARD_TEXT: Skyenergi supplies the SRNE DB12 distribution box, cable and fuse components for UK campervan builds.
Frequently Asked Questions
What does the SRNE DB12 distribution box do?
The SRNE DB12 is a 12-way DC power distribution hub for campervans, motorhomes, caravans and boats. It gives each 12V load its own fused output, so lights, fans, pumps and USB outlets can be separated and managed from one place. It works with 12V and 24V systems and can be controlled through the SRNE CU2, RMA7 touch panel or the SRNE App. Skyenergi supplies the DB12 at £297.00.
Can you install an SRNE DB12 yourself?
A competent DIY installer can fit the DB12 if they are comfortable with 12V DC wiring, fusing and isolation. The unit's manual sets out the connection order and terminal layout, and following the manufacturer's documentation is important. If you are unsure about any connection, or if the work involves mains-linked equipment, use a qualified electrician. Check the manufacturer documentation before you start.
Does the SRNE DB12 support Bluetooth monitoring?
Yes. The DB12 can be controlled and monitored via Bluetooth and Wi-Fi, and when paired with the SRNE CU2 it shows current and voltage for each circuit on the RMA7 touch screen or in the SRNE App. Set up the CU2 first, then pair the app with the system and confirm each channel reports correctly before closing the installation.
Which battery types are compatible with the SRNE DB12?
The DB12 is designed for 12V and 24V DC systems and integrates with SkyEnergi LiFePO4 batteries, as well as the SRNE BS48500 Battery Shunt for monitoring. Confirm your battery voltage suits a 12V or 24V system and that your charging equipment matches your battery chemistry before connecting it.

Prev post

Skyenergi Seat Base Lithium Battery Dimensions Explained
Updated on 10 November 2026
Next post

How to Monitor Caravan Water Tank Levels: 7 Methods
Updated on 08 November 2026


