


How to Install Lithium Batteries Safely in Your Vehicle
Learn how to install lithium batteries in motorhomes or boats with this step-by-step UK guide. Achieve a safe and reliable upgrade to your energy system.
Every british vehicle owner installing lithium batteries faces safety concerns that cannot be ignored. With fire risks and electrical hazards still a major issue, over 60 percent of battery mishaps stem from improper preparation and setup. Whether you are fitting out a caravan or upgrading a classic car, laying the groundwork correctly protects your investment and your peace of mind. This guide provides step by step instructions to help you avoid common mistakes and achieve reliable, secure battery installation.
Table of Contents
- Step 1: Prepare The Installation Area And Tools
- Step 2: Disconnect Existing Power Supplies Safely
- Step 3: Position And Secure The Lithium Batteries
- Step 4: Connect Cables And System Components
- Step 5: Configure Battery Management And Settings
- Step 6: Test And Verify Lithium Battery Installation
Quick Summary
| Key Point | Explanation |
|---|---|
| 1. Prepare a clean workspace | Ensure a well-ventilated area and organised space to maintain safety during installation. |
| 2. Disconnect power safely | Always disconnect the negative terminal first to prevent electrical shorts and injury. |
| 3. Secure batteries effectively | Use non-conductive materials and secure mounting to prevent battery movement and mechanical damage. |
| 4. Connect cables precisely | Follow proper techniques for secure connections to ensure functionality and avoid shorts. |
| 5. Test thoroughly after installation | Conduct comprehensive checks to verify safety, performance, and integrity of the entire system. |
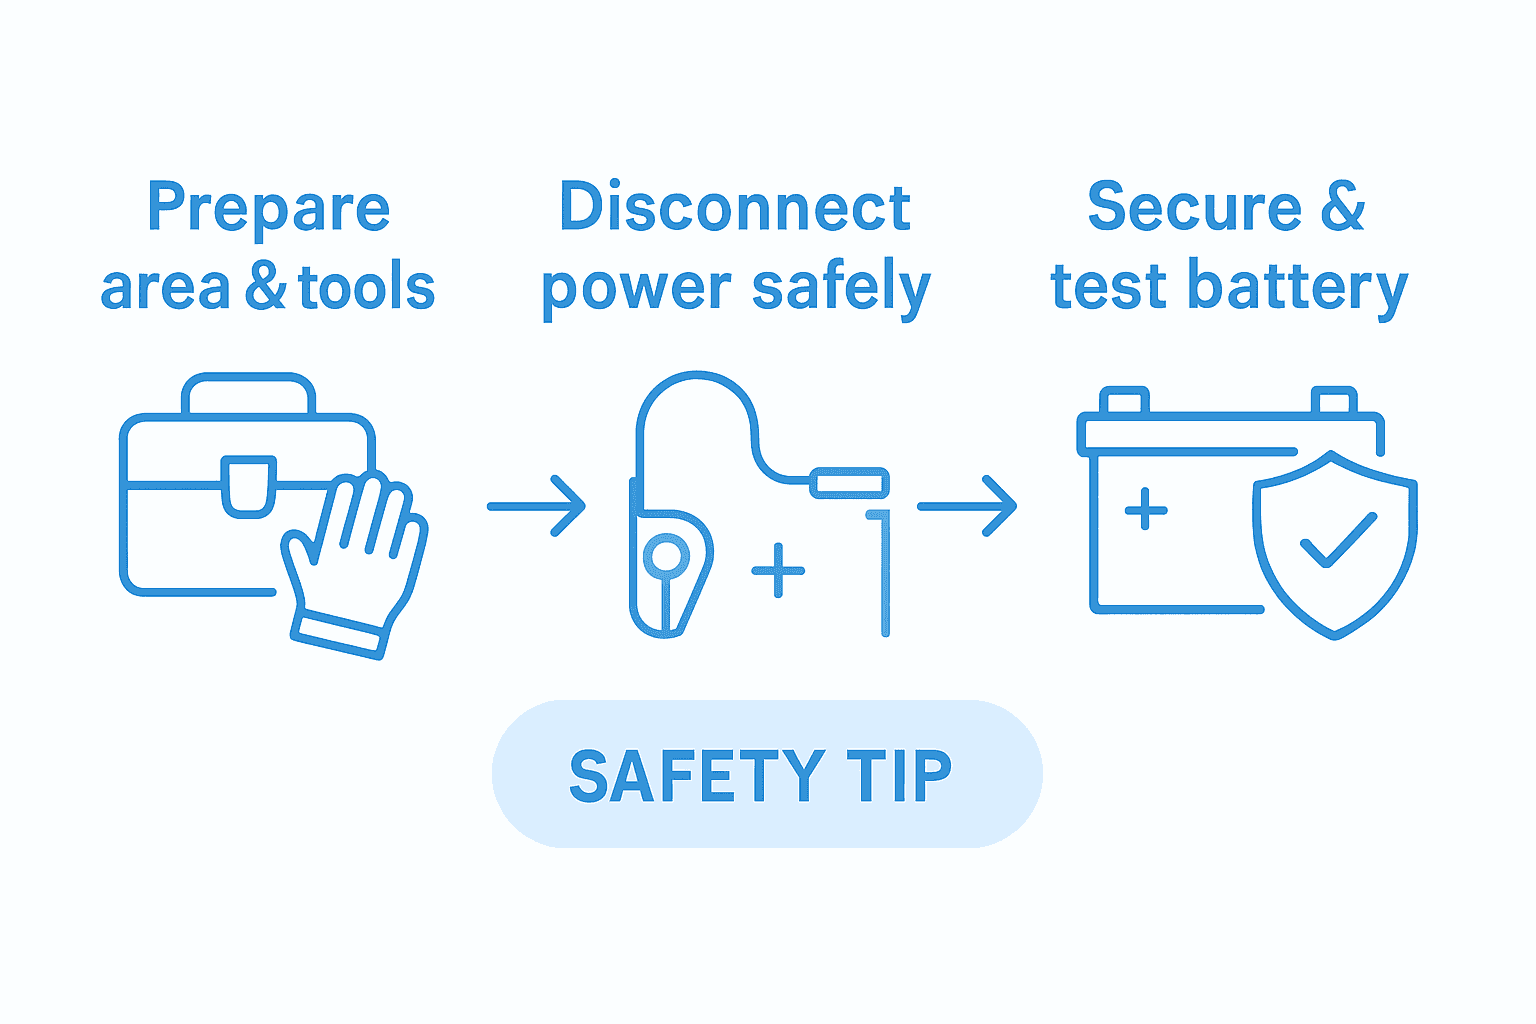
Step 1: Prepare the Installation Area and Tools
Preparing your workspace correctly is fundamental when installing lithium batteries in your vehicle. This critical first step ensures safety and sets the foundation for a smooth installation process. You will need to create a clean, organised workspace with appropriate protective equipment and tools.
Start by selecting a well-ventilated area away from potential ignition sources. According to UK Maritime and Coastguard Agency guidance on electrical installations, proper environmental conditions are essential for battery safety. Clear your workspace of any flammable materials and ensure good air circulation. Lay out a clean, non conductive surface like a rubber mat where you will perform the installation.
Gather all necessary tools before beginning: multimeter, torque wrench, wire strippers, insulated gloves, safety glasses, electrical tape, cable cutters, and appropriate mounting hardware. Check each tool for proper condition and functionality. Verify you have the correct battery specifications and mounting dimensions for your specific vehicle model.
Advanced Tip: Have a non conductive fire extinguisher nearby as an additional safety precaution during the lithium battery installation process.
Step 2: Disconnect Existing Power Supplies Safely
Safety is paramount when disconnecting existing power supplies in your vehicle. This crucial step requires methodical attention to prevent electrical shorts, potential damage to your electrical systems, or personal injury. Understanding the correct procedure will protect both you and your vehicle’s sensitive electrical components.
Swansea University’s standard operating procedures emphasise the importance of systematic power disconnection. Begin by locating your vehicle’s main battery or power source. Wear insulated gloves and safety glasses as protective gear. For vehicles with multiple power sources, disconnect the negative terminal first to minimise electrical risk. This means carefully loosening the negative battery cable connection using an appropriately sized spanner, ensuring you do not touch metal tools against any other part of the electrical system.
After disconnecting the main power source, check all auxiliary electrical systems such as solar panels, alternator connections, or additional battery banks. Systematically isolate each power source by removing cables or activating dedicated isolation switches. Ensure each disconnected cable is carefully secured and cannot accidentally make contact with conductive surfaces.
Advanced Tip: Label each disconnected cable with its original connection point to simplify reconnection during the final installation stages.
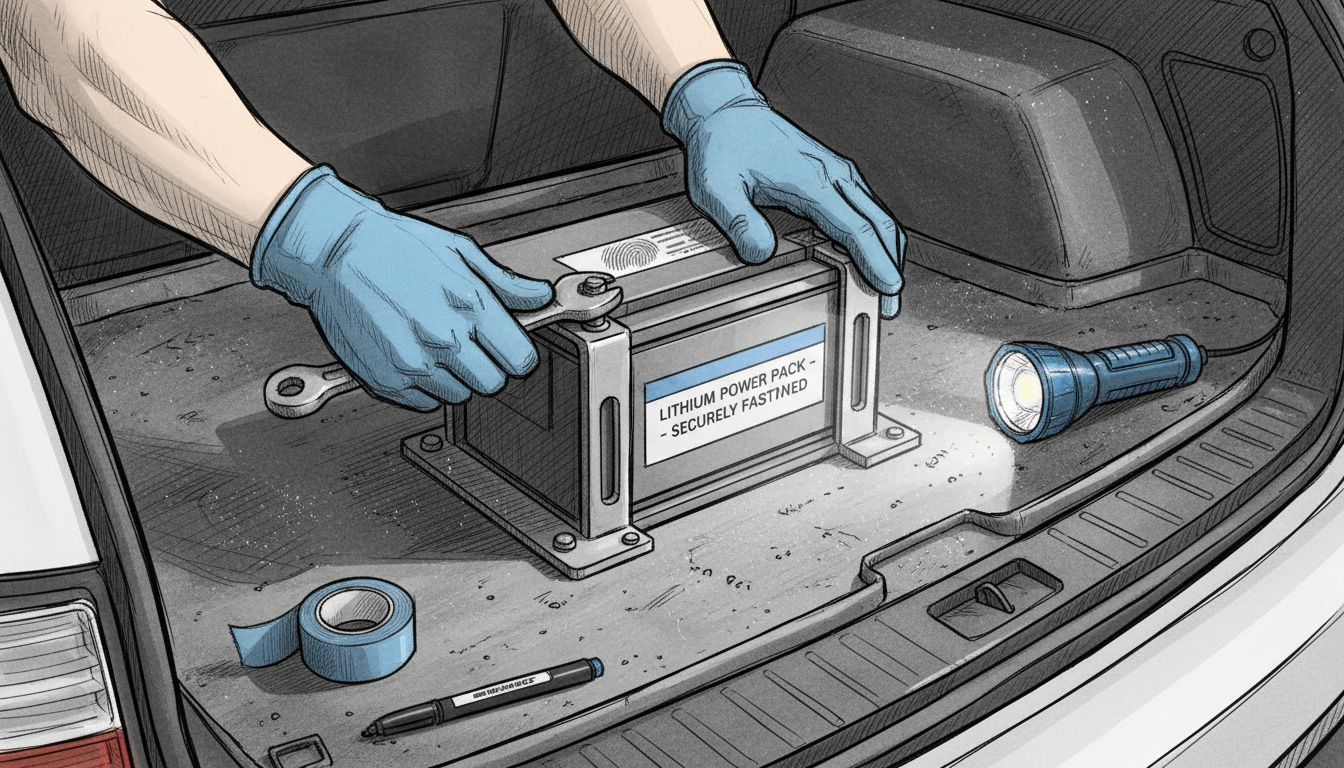
Step 3: Position and Secure the Lithium Batteries
Positioning and securing your lithium batteries correctly is a critical step that directly impacts the safety and performance of your vehicle’s electrical system. This phase requires precision and careful attention to prevent potential mechanical damage or unexpected battery movement during transit.
UK Maritime and Coastguard Agency guidance emphasises the importance of stable battery mounting. Select a location that is dry, well ventilated, and away from direct heat sources. The mounting surface should be completely flat and capable of supporting the battery’s weight without flexing. Use robust mounting brackets or specialised battery trays that match the exact dimensions of your lithium battery. Ensure these mounting points are made from non conductive materials to prevent any potential electrical shorting.
Carefully align the battery so that it sits level and secure. Use vibration resistant mounting hardware such as rubber isolators or specialised battery mounting straps. Verify that the battery cannot move more than a few millimetres in any direction when fully secured. Leave sufficient space around the battery for ventilation and potential heat dissipation. Double check that no sharp edges or potential abrasive surfaces are near the battery casing that could compromise its protective outer shell.
Advanced Tip: Measure and mark your mounting points before drilling to ensure precise and symmetrical battery placement.
Step 4: Connect Cables and System Components
Connecting cables and system components requires precision and careful attention to ensure a safe and efficient electrical system in your vehicle. This critical step bridges your lithium batteries with the vehicle’s electrical infrastructure, demanding methodical approach and technical understanding.
UK Maritime and Coastguard Agency guidelines emphasise the importance of proper cable connection techniques. Begin by selecting cables with appropriate amperage rating and sufficient thickness for your specific battery system. Always use high quality copper cables with robust insulation. Start with the positive terminal connection first, ensuring a tight and secure fit using appropriate torque specifications. Apply a thin layer of electrical contact grease to prevent corrosion and enhance electrical conductivity.
Carefully route cables away from moving mechanical parts and potential heat sources. Use cable ties and mounting clips to secure cables and prevent unnecessary movement or potential abrasion. Create gentle curves in cable routing rather than sharp bends that might stress the cable insulation. Verify each connection point for proper tension and alignment. Double check all connections are clean, tight and correctly orientated before final system activation. Ensure any exposed cable sections are appropriately protected with heat shrink tubing or electrical tape to prevent accidental shorting.
Advanced Tip: Use a digital multimeter to verify cable continuity and connection resistance before final system commissioning.
Step 5: Configure Battery Management and Settings
Configuring your battery management system is a critical phase that determines the long term performance and safety of your lithium battery installation. This step involves precise programming and calibration to ensure optimal energy storage and system protection.
UK Maritime and Coastguard Agency guidelines emphasise the importance of systematic battery management configuration. Begin by accessing your battery management system interface and verifying the default settings. Set appropriate charge and discharge voltage limits that match your specific battery specifications. Configure temperature protection parameters to prevent overheating and implement cell balancing protocols to ensure even energy distribution across battery cells. Pay close attention to cut off voltages and charging current limits to protect the battery from potential damage.
Establish monitoring parameters for state of charge and depth of discharge tracking. Create alert thresholds for critical events such as low voltage or excessive temperature. If your system supports Bluetooth or wireless monitoring, pair your mobile device and download the corresponding management application. Test communication protocols and verify real time data streaming. Ensure all safety shut off mechanisms are correctly programmed and responsive. Periodically review and adjust these settings based on your specific usage patterns and environmental conditions.
Advanced Tip: Calibrate your battery management system annually to maintain accurate performance tracking and preserve battery health.
Step 6: Test and Verify Lithium Battery Installation
Testing and verifying your lithium battery installation represents the final critical phase ensuring safety, performance, and reliability of your vehicle’s electrical system. This comprehensive assessment will confirm that every component functions precisely as intended.
UK Maritime and Coastguard Agency guidelines emphasise systematic verification procedures. Begin with a visual inspection checking all cable connections for tightness and correct orientation. Use a digital multimeter to measure voltage across battery terminals and verify open circuit voltage matches manufacturer specifications. Test each electrical connection for resistance and continuity. Simulate potential load scenarios by connecting key electrical components and monitoring system performance under controlled conditions.
Proceed with a comprehensive functional test of your battery management system. Verify temperature sensors are functioning correctly by observing their readings under different ambient conditions. Check that cell balancing mechanisms activate appropriately and that wireless monitoring applications display accurate real time data. Run a complete charge discharge cycle while monitoring battery performance metrics. Document all test results and compare them against manufacturer recommended parameters. Pay special attention to state of charge readings and ensure they track accurately throughout the test sequence.
Advanced Tip: Conduct these verification tests during daylight hours and in a well ventilated area to ensure maximum safety and clarity during the assessment process.
This comparison highlights common lithium battery installation mistakes and how to prevent them:
| Common Mistake | Why it Happens | How to Avoid |
|---|---|---|
| Poor ventilation | Overlooking airflow requirements | Always install in ventilated area |
| Incorrect cable routing | Rushing cable connections | Plan routes, use cable ties |
| Neglecting battery management | Leaving default settings unchanged | Configure settings for your battery |
| Skipping load simulation tests | Failing to simulate real use | Conduct thorough functional tests |
Here is a summary of key safety considerations at each lithium battery installation stage:
| Installation Step | Primary Safety Focus | Recommended Equipment |
|---|---|---|
| Preparation | Fire & chemical safety | Insulated tools, gloves, fire extinguisher |
| Power Disconnection | Electrical shock prevention | Insulating gloves, safety glasses |
| Positioning & Securing | Vibration/fire risk | Non-conductive brackets, rubber mats |
| Cable Connections | Short circuit avoidance | Cable ties, contact grease |
| Battery Management Configuration | System parameter limits | Monitoring software/app |
| Testing & Verification | Functional system integrity | Digital multimeter, temperature sensors |
Secure Your Vehicle’s Power with Expert Lithium Battery Solutions
Installing lithium batteries safely requires careful preparation, precise cable connections, and reliable battery management systems to avoid common pitfalls such as poor ventilation or incorrect wiring. At Skyenergi, we understand these challenges and provide high-quality lithium leisure batteries and smart energy solutions designed specifically for campervans, motorhomes, and marine applications. Our products feature advanced battery management technology with Bluetooth monitoring, helping you maintain optimum system health and safety.

Take control of your vehicle’s energy system by choosing trusted components from Skyenergi. Whether you are fitting new batteries or upgrading your existing setup, our comprehensive range ensures compatibility and durability. Visit Skyenergi today to explore our intelligent lithium battery systems and expert support that will guide you each step of the way. Make your installation safer and more efficient by starting here.
Frequently Asked Questions
What should I prepare before installing lithium batteries in my vehicle?
To ensure a safe installation, create a clean and organised workspace with proper tools and protective equipment. Gather essentials like a multimeter, torque wrench, insulated gloves, and a fire extinguisher, and select a well-ventilated area to perform the installation.
How do I safely disconnect existing power supplies in my vehicle?
Always start by wearing insulated gloves and safety glasses, and disconnect the negative terminal of your vehicle’s main battery first. Isolate all auxiliary power sources systematically to prevent electrical shorts and ensure each disconnected cable is securely labelled for easy reconnection later.
What steps should I follow to position and secure lithium batteries?
Choose a dry, well-ventilated location for mounting, and ensure the surface is flat and non-conductive. Use appropriate mounting hardware and check that the battery is stable; it should not move more than a few millimetres once secured.
How can I connect the cables and system components correctly?
Start by connecting the positive terminal first using high-quality copper cables with robust insulation. Route cables away from mechanical parts and secure them with cable ties to avoid movement or abrasion, ensuring all connections are clean and tight.
What key settings should I configure in the battery management system?
Access the battery management system and set the appropriate charge and discharge voltage limits, along with temperature protection parameters. Ensure that cell balancing protocols are activated and establish alert thresholds for low voltage or excessive temperature conditions.
How do I test and verify the lithium battery installation?
Conduct a visual inspection to check all cable connections and use a digital multimeter to measure voltage. Simulate load scenarios by connecting key components and run a complete charge-discharge cycle to monitor performance, documenting all results for reference.
Recommended
- What Is a Lithium Leisure Battery and Why It Matters – Skyenergi
- Lithium vs AGM — What’s Best for Campervans? – Skyenergi
- Advantages and Disadvantage of Lithium Batteries – Skyenergi
- Victron Energy Lithium SuperPack 12,8V 100Ah (M8) High Current - BAT51 – Skyenergi
- 7 anschauliche Beispiele für Autobatterien erklärt - accu.blog
Prev post

7 Essential Tips for Motorhome Shows 2026 in the UK
Updated on 21 December 2025
Next post

Best 4 SRNE SAA – Expert Comparison 2025
Updated on 19 December 2025


