


How to Mount Solar Panels on a UK Roof with a Skyenergi Kit
Mounting kit choices for UK roofs, with Skyenergi kit contents, compatibility checks and how an SRNE MPPT charge controller fits an off-grid solar system.
Quick Summary
A Skyenergi mounting kit fixes solar panels to a UK roof by bonding brackets to the surface without drilling, but only when the roof covering and adhesive are compatible. The 7 Piece ABS kit suits rigid-framed panels on flat, sound roofs, and the roof type should guide every choice before you buy.
- The Skyenergi 7 Piece ABS kit is priced at £18.99 and includes four corner sections, two centre sections and an entry gland.
- The kit bonds to the roof without drilling, so its hold depends entirely on the adhesive and surface preparation.
- Clean every bonding point and let the surface dry fully before applying adhesive to the bracket base.
- Do not load brackets with panels until the adhesive has cured completely, or the bracket may lift off the roof.
- Flexible panels and curved or corrugated roofs are unsuitable, so use a rail-based system or the Z Bracket Set instead.
Table of Contents
- Why the Right Solar Panel Roof Mounting Kit Matters on UK Roofs
- Roof Coverings That Change Your Mounting Choice
- Solar Panel Mounting Kit Compatibility: Panel Size, Frame and Rails
- What the Skyenergi 7 Piece Kit Includes and Where It Is Limited
- Step-by-Step: Fitting a Roof Mount Safely
- Connecting the Array to an SRNE MPPT Solar Charge Controller
- Planning Your Next Step: Choosing Your Mounting Kit and Controller
- Frequently Asked Questions
Why the Right Solar Panel Roof Mounting Kit Matters on UK Roofs
Choosing a mounting kit is one of the most consequential decisions in any solar installation. The panels generate the power, but the kit determines whether they stay put through wind, rain and years of temperature change. For UK campervans, motorhomes and caravans, the roof is the only realistic place to mount the array, which makes the bracket choice a structural decision as much as an electrical one.
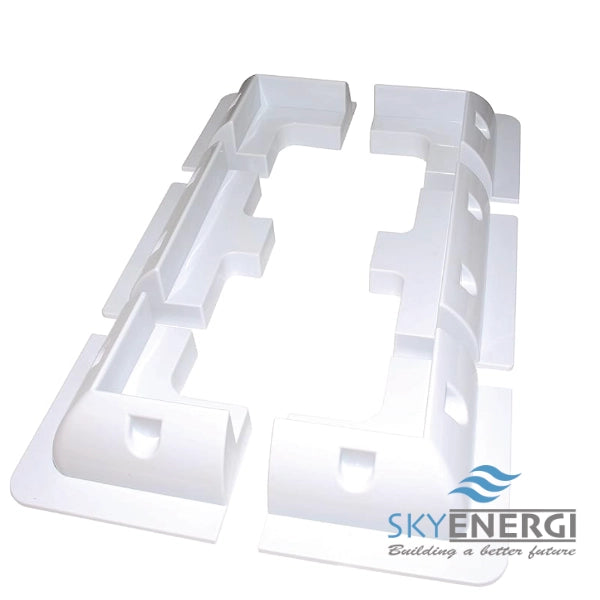
Skyenergi's range is built around this problem. The corner and centre brackets in the 7 Piece ABS kit are designed for rigid-framed panels on flat surfaces, and they bond to the roof without requiring holes to be drilled through the body. That approach suits many leisure vehicles, but it only works when the roof surface, the adhesive and the panel frame are all compatible.
Many owners underestimate how much the roof covering matters. Adhesive that performs well on one surface can fail on another, so it helps to identify what the roof is made of before buying anything. The sections below walk through each roof type and what it means for the mounting setup.
Roof Coverings That Change Your Mounting Choice
Roof covering decides how the kit attaches, and getting it wrong is the most common reason mounts fail. Check the roof material first, then match the kit to it. Where the manufacturer's guidance on adhesive or fixings is unclear, follow it and confirm with the product supplier before you fit anything.
Pitched roofs: tile, slate and shingle
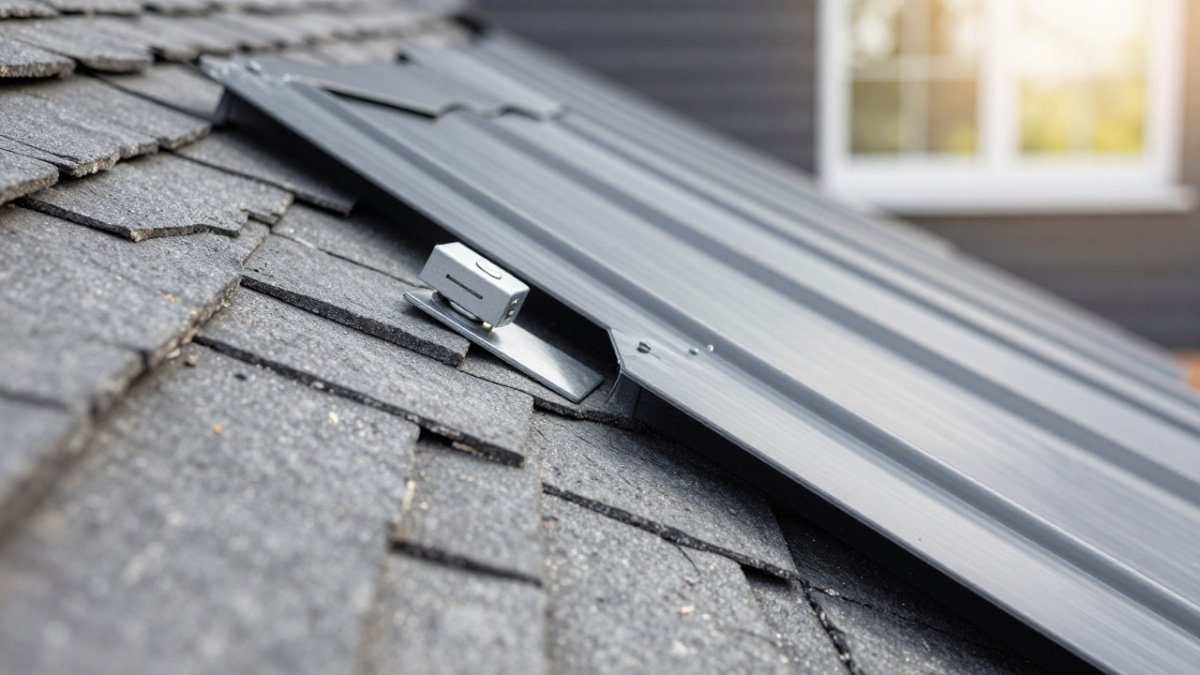
Pitched roofs bring their own challenges. The slope affects how the panels catch wind, and the surface may not be flat enough for a bonded bracket to seat evenly. Tiles and slates also make it harder to get a clean, sealed fixing point. If the roof is not flat, a bracket designed for flat surfaces may not sit correctly, so check the fit before committing.
For a pitched roof, the practical choice is usually between a bonded bracket and a mechanical fixing that penetrates the covering. Bonded brackets rely on a flat, sound surface and are best suited to low-profile or shallow-pitch roofs where the bracket base can sit fully in contact. If you are working on a listed building or in a conservation area, check with the local planning authority before making any external alteration.
Flat roofs: bitumen, EPDM and PVC membranes
Flat roofs are the most common surface on motorhomes and many vans. Bitumen, EPDM and PVC membranes each react differently to adhesives, so the surface type should guide the adhesive you choose. Clean the area thoroughly and let it dry before bonding. Skipping this step is a frequent cause of brackets lifting after a few weeks of use.
On flat roofs, the two main approaches are bonding and ballast. Bonding suits a clean, sound membrane and a bracket with a wide base. Ballast uses weight to hold the mounting frame down and avoids penetrating the membrane, but it adds significant load and is only suitable where the roof structure can carry it. For a leisure vehicle, ballast is rarely practical because of weight limits, so bonding with a membrane-compatible adhesive is the usual route. Always confirm the adhesive is approved for the specific membrane, and never bond to a damp or contaminated surface.
Metal roofs
Metal roofs, including aluminium and coated steel, are common on campervans and some motorhomes. The surface is smooth and non-porous, which can suit a bonded bracket, but the coating matters. A powder-coated or painted finish may need to be abraded lightly to give the adhesive a key, and any bare metal should be primed according to the adhesive manufacturer's instructions. Metal roofs also expand and contract more than other coverings, so choose an adhesive with enough flexibility to accommodate movement. If the roof is corrugated, a flat bracket base will not sit evenly, and a purpose-made mounting channel or rail is the better option.
A quick decision guide
Use this to narrow the choice before you buy:
- Tile or slate pitched roof: mechanical fixing with flashing, or a bonded bracket only if the surface is flat and sound.
- Flat membrane roof (bitumen, EPDM, PVC): bonded bracket with a membrane-compatible adhesive; ballast only if the structure allows.
- Metal roof: bonded bracket on a prepared, primed surface, or a mounting rail on corrugated profiles.
- Any roof you are unsure about: confirm the covering and the adhesive compatibility with the supplier before fitting.
Solar Panel Mounting Kit Compatibility: Panel Size, Frame and Rails
Before you order, confirm that your panels have rigid frames. Skyenergi's corner brackets are designed for rigid-framed solar panels. Measure the frame width and depth as well, because the bracket needs to grip the frame securely at the corners.
Panel orientation also matters. Mounting in portrait or landscape changes how many brackets you need and where they sit. Plan the layout on paper first, then confirm the bracket count against the kit contents. The Z Bracket Set is a separate option that uses 2mm aluminium brackets with stainless steel fixings.
What the Skyenergi 7 Piece Kit Includes and Where It Is Limited
The Skyenergi 7 Piece ABS Solar Panel Mounting Kit includes four corner sections, two centre sections and an entry gland. The ABS construction is UV stable, so it resists fading and discolouration over time. The kit is priced at £18.99.
The limitations are just as important. The kit is designed for bonding without drilling, which means its hold depends on the adhesive and the roof surface. Owners of larger arrays may wish to consider whether a bolted option such as the Z Bracket Set is more suitable.
The kit does not cover the electrical side of the installation.
Verified kit contents and compatibility
A common gap in product listings is a clear statement of what the kit actually fits. Based on the manufacturer's description, the 7 Piece ABS kit is intended for rigid-framed panels with a frame depth that allows the corner and centre sections to grip securely. The bracket profile is designed for standard frame widths, but you should measure your panel frame before ordering. The kit does not include adhesive, so you will need to source an adhesive approved for your roof covering.
Where the kit works best
The kit suits a single rigid-framed panel or a small array on a flat, sound roof where bonding is appropriate. It is not designed for flexible panels, which have no rigid frame for the brackets to grip. It is also not intended for roofs with a pronounced curve or corrugation, because the bracket base needs full contact with the surface. If your roof is curved, a rail-based system or a bracket with a adjustable base is the better choice.
Limitations to plan around
- Adhesive-dependent hold: the kit's security depends on surface preparation and adhesive choice. There is no mechanical backup.
- No drilling means no fallback: if a bonded bracket lifts, there is no fixing to take the load. Regular inspection is essential.
- Panel size limit: the kit is sized for standard rigid panels. Larger or heavier panels may need more brackets or a bolted system.
- Electrical parts not included: the entry gland is supplied, but fuses, cable and connectors are separate.
Step-by-Step: Fitting a Roof Mount Safely
Work through these steps in order. Skipping the preparation stage is where most problems start.
- Clean the roof area. Remove dirt, grease and old sealant from every bonding point. Let the surface dry fully.
- Dry-fit the brackets. Place the corner and centre sections on the roof without adhesive to confirm the layout and spacing against your panel frame.
- Mark the positions. Use a pencil or tape to mark each bracket location so you can reposition accurately after applying adhesive.
- Apply the adhesive. Follow the adhesive manufacturer's instructions for your roof covering, and apply it evenly to the bracket base.
- Press and hold. Seat each bracket firmly and hold it in place for the time the adhesive manufacturer specifies.
- Allow full cure. Do not load the brackets with panels until the adhesive has cured completely.
- Fit the panels. Attach the panel frames to the brackets and check that each one is secure before moving on.
Watch out: Never fit panels to brackets that have not fully cured. Loading a bonded bracket early is the fastest way to lift it off the roof.
Connecting the Array to an SRNE MPPT Solar Charge Controller
Once the array is mounted, the panels need to connect to a charge controller. SRNE MPPT solar charge controllers manage the output from the panels and regulate charging to the battery. Match the controller's voltage and current rating to your array before connecting, and check the controller's manual for the correct wiring sequence.
Keep the solar input, battery connection and load outputs clearly labelled, and fit the fuse block between the battery and the controller as a protective measure.
Planning Your Next Step: Choosing Your Mounting Kit and Controller
Start with the roof. Identify the covering, measure the panel frames and confirm whether the array is small enough for a bonded kit. If the roof is flat and the panels are rigid, the Skyenergi 7 Piece ABS kit is a practical place to start. If you need a bolted fixing or larger array, look at the Z Bracket Set instead.
Then choose a charge controller to match the array and battery. Taking these decisions in order, roof first, then mounting, then controller, keeps the project coherent and avoids buying parts that do not fit together.
Frequently Asked Questions
What components are needed to mount solar panels on a roof?
A typical roof mount needs corner or Z-shaped brackets, fixings suited to the roof covering, adhesive or screws matched to the surface, and a waterproof entry point for the cable. The Skyenergi 7 piece ABS kit covers four corner sections, two centre sections and an entry gland, and is designed for rigid-framed panels on flat surfaces. The Z Bracket Set adds 2mm aluminium tabbed brackets with stainless steel screws, washers, nuts and bolts. Check that whichever kit you choose suits your panel frame and the surface you are bonding to before you buy.
Are solar panel mounting kits compatible with different panel sizes?
Compatibility depends on the panel frame design and the spacing of the brackets. The Skyenergi kit is designed for use with rigid-framed solar panels, so panels with a different frame profile may not sit securely on the corner and centre sections. Measure your panel frame and compare it with the product listing before ordering.
Can an SRNE MPPT solar charge controller be used with roof-mounted panels?
Yes. An SRNE MPPT solar charge controller sits between the roof-mounted array and your battery bank, regulating the charge to the batteries. The panel array's voltage and current must fall within the controller's input limits, so check the maximum PV input figures against your panel specification before wiring. Keep the cable run from the roof entry gland to the controller as short as practical to reduce voltage drop.
Can a roof-mounted solar system work with an off-grid battery setup?
A roof-mounted array can feed an off-grid battery system through an MPPT charge controller, which is the usual arrangement in campervans and motorhomes. Size the battery bank to your daily energy use and the array to recharge it in typical UK daylight, which is considerably lower in winter.

Prev post

How to Install a Caravan Consumer Box with RCBO Protection?
Updated on 15 November 2026
Next post

SRNE Solar Panel Kits for UK Rooftops: What to Choose
Updated on 13 November 2026


